

DIY Salt Dough Ornaments
/One day, I’ll get better at taking pictures of my work as I go. Maybe I’ll start wearing a gopro on my head or something. I did ok this time, but i’ll go ahead and tell you right now, I coulda done better.
Anyway, enough about me, on to the project.
First, a little more about me (ha!): I’m a sucker for Christmas ornaments. My collection consists of:
Ornaments I’ve had since I was a kid (the nostalgia section)
Ornaments I’ve purchased on our travels
Ornaments that are handmade
The latter category are my favorites, probably for obvious reasons, seeing as how I have a craft blog and all. I’ve made some of the pre-packaged dough ornaments before where you flatten it out, have a kid smash their hand into it, and let it dry. They’re ok, but more expensive then they should be, and it feels a little like cheating. It’s kinda DIY, but not from scratch. Like buying a cake mix. Not that there’s anything wrong with that, but I like the satisfaction of making ALL of something.
Our godson James is visiting this weekend, and since it’ll probably be the last time we have him for quite a while (I’m pregnant, and we have to convert “his room” (the guest room) into the new baby’s room), I wanted to take my chance to get him to make me an ornament or two (or 10).
The Dough
So to Pinterest I went, looking for ideas. I found a salt dough recipe that I had all the ingredients for (some of these recipes get a little crazy). I halved it:
1 cup flour
1/2 cup salt
1/4 cup white paint
1/4 cup water
Following the instructions, I mixed dry ingredients and wet ingredients separately, then mixed them together. I had to add a little water to get it to mix, added too much, kneaded in some flour, etc. A lot like making biscuits. I was going for a dough that wouldn’t stick to my hands when I handled it, but wouldn’t fall apart either. Once I got there, I wrapped it in parchment paper and put it in the fridge until I was ready for it.


The Design
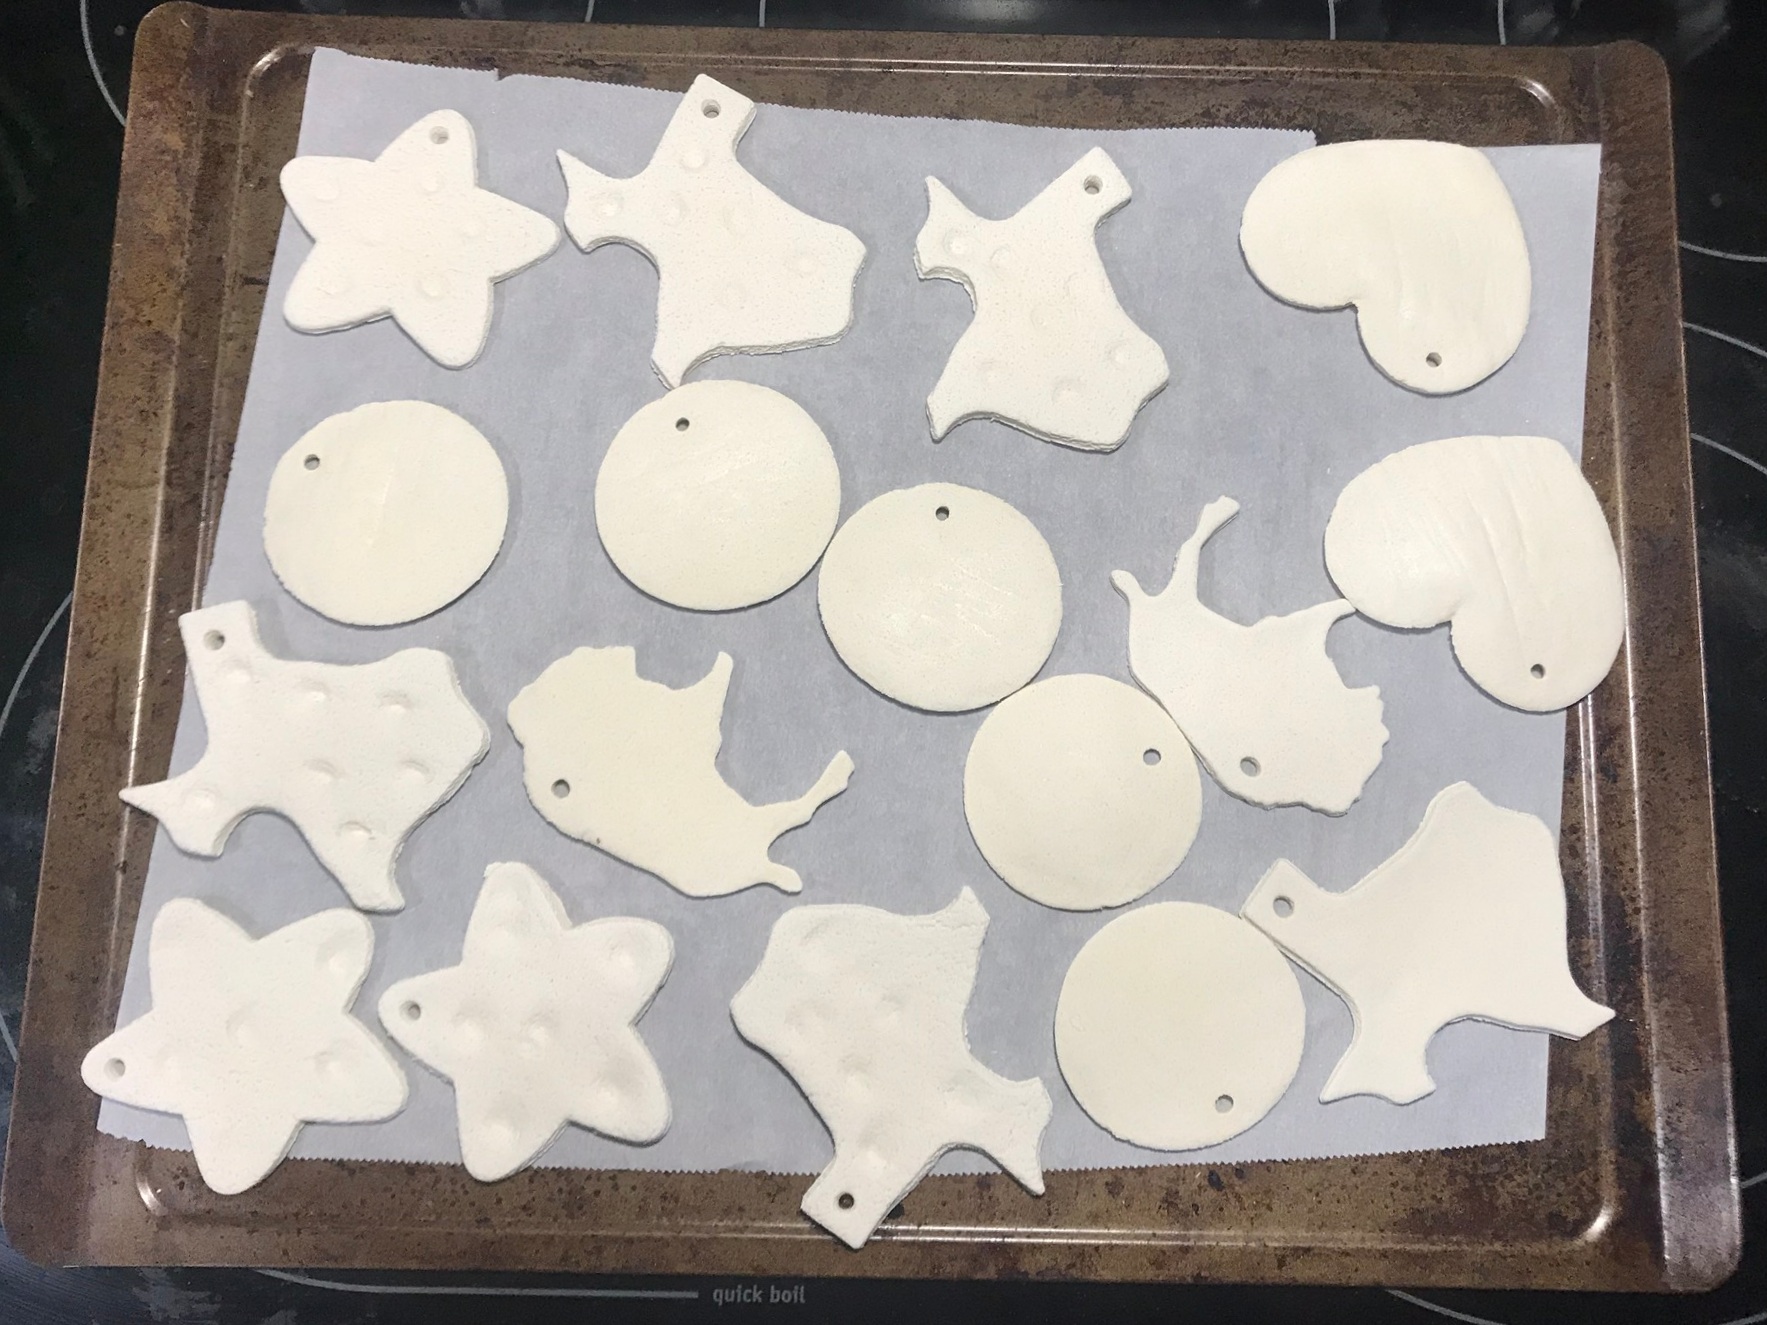
For the design of the ornaments themselves, I found Christmas tree ideas that I liked, but I don’t have a Christmas tree cookie cutter (I know, I’ll fix that), so I dug out what I do have: Texas, Heart, Star, Circle, Buffalo. Yes, that’s right, a buffalo. I liked the fingerprint “Christmas light” concept though, so I kept that, and went with the shapes I did have. I like Christmas Texas ornaments better than trees anyway!
Once the kids woke up from their naps, and after they ate dinner, I rolled out the now chilled dough 1/4” thick on some lightly floured parchment paper and cut out some shapes. A couple tips here:
I’m glad I chilled the dough, it made it a lot easier to work with. In total, it was probably in the fridge for 2 hours.
I don’t have a rolling pin, but I used a pint glass and it worked just fine.
I left the excess dough around the shapes to help them hold their shape while the kids pressed their fingers into the ornaments.
I used a plastic drinking straw to cut holes in each ornament for where I’ll tie some twine for hanging. Don’t @ me for using plastic straws.
Once I had the dough rolled out and the shapes/holes cut, I started with James. I told him to press his index finger in to random places on the shape. I let him make 4 (2 Texas’, 2 stars) before moving to Mary and making 3 more. I did it for her by taking her finger and pressing it into the shape - I would’ve made more, but she was over it after 3.
After I released the kids to go play, I gathered up the extra, rolled it back out, and cut more shapes/holes so James would have more to paint. I did this until I was out of dough.

Drying
This dough will air dry in 24-48 hours, but James is leaving tomorrow and since I want to let him paint a few of these, I put all the shapes on parchment paper on a large baking sheet and put them in the oven at 200 degrees for 2 hours, flipping them over halfway through. I let them air dry overnight, but in the morning I put them back in the oven for another hour for good measure.
Painting
After breakfast, I got my workstation ready outside on the deck. I use renovation cardboard for activities like these, and use painters tape to hold it down. I used acrylic paint, and let James paint most of the blank ones, while I painted Mary’s and a couple other ones (a Texas and a buffalo, of course). After James got some of his painting excitement over with, I guided him through painting the fingerprint ones. Teaching a four year old how to paint small circles with a small amount of paint is extra fun. Once I let him go, I painted his name and year on the back of the ornaments, then glittered some spots on them using glossy modpodge and glitter.
Once they had dried, I used a sharpie to draw the “light cord”, and then used glossy modpodge on all of the surfaces to seal them and make them shiny. For the glitter spots, I dab the modpodge on instead of painting it, because otherwise glitter will get all over the ornament. Once I dabbed a glitter color, I rinsed the brush and moved to another glitter color with more modpodge.
Once the fronts had dried, I flipped them and modpodged the back.

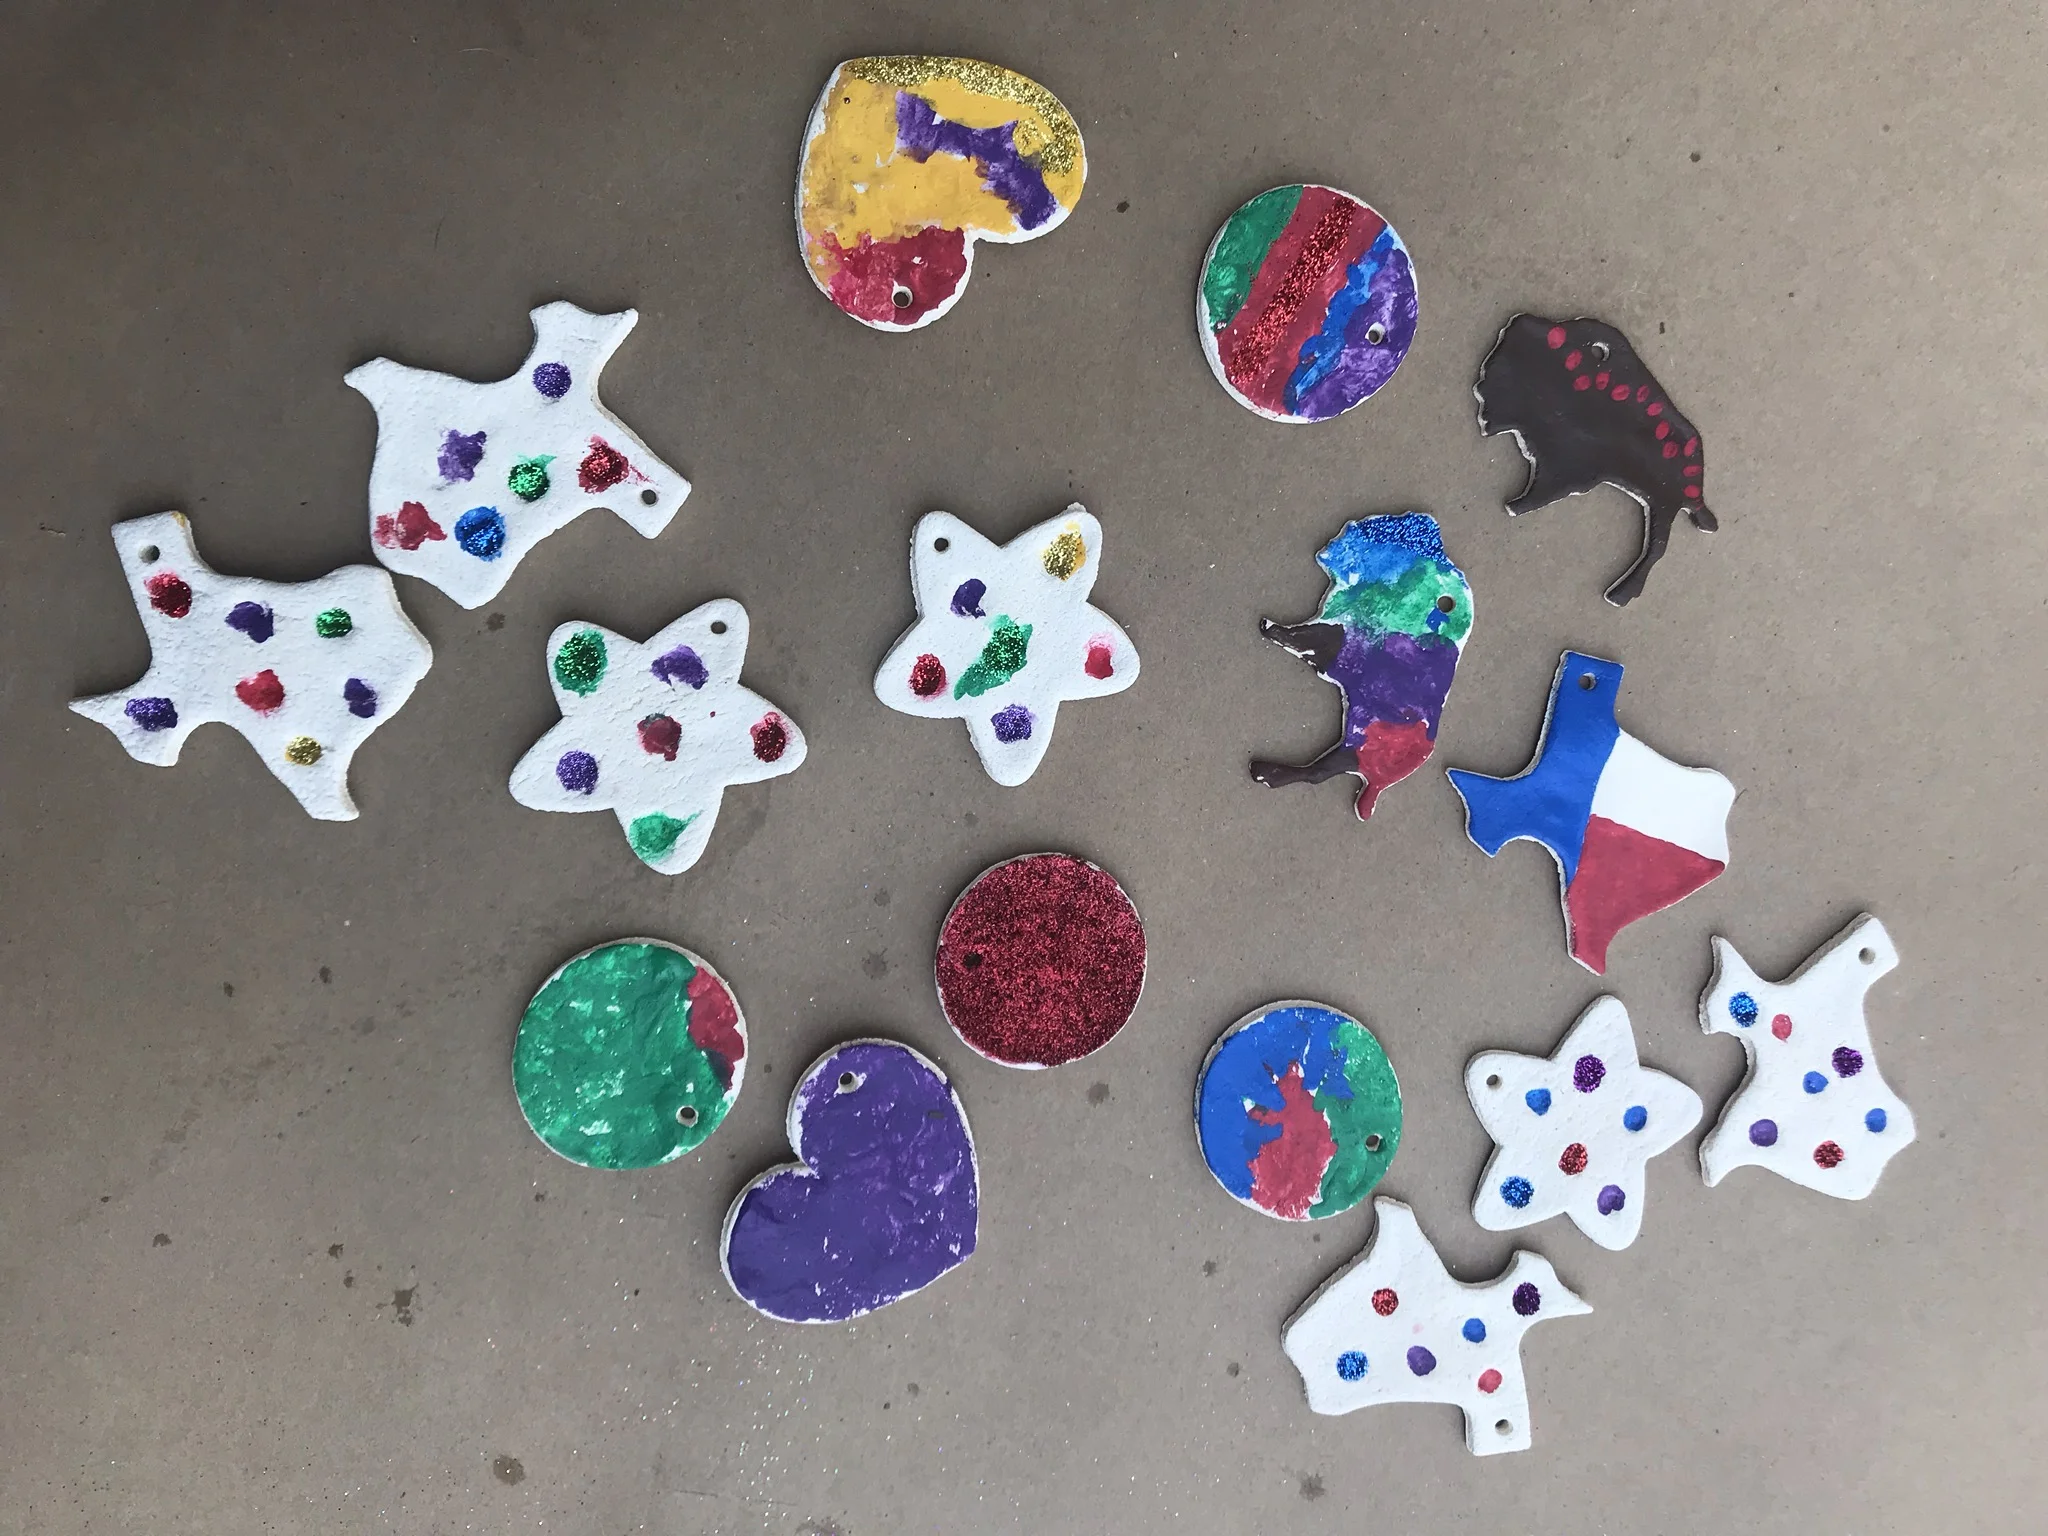


All done! I kept 3 of James’, and sent the rest home with him.