DIY Lost Boys Rules Sign
/
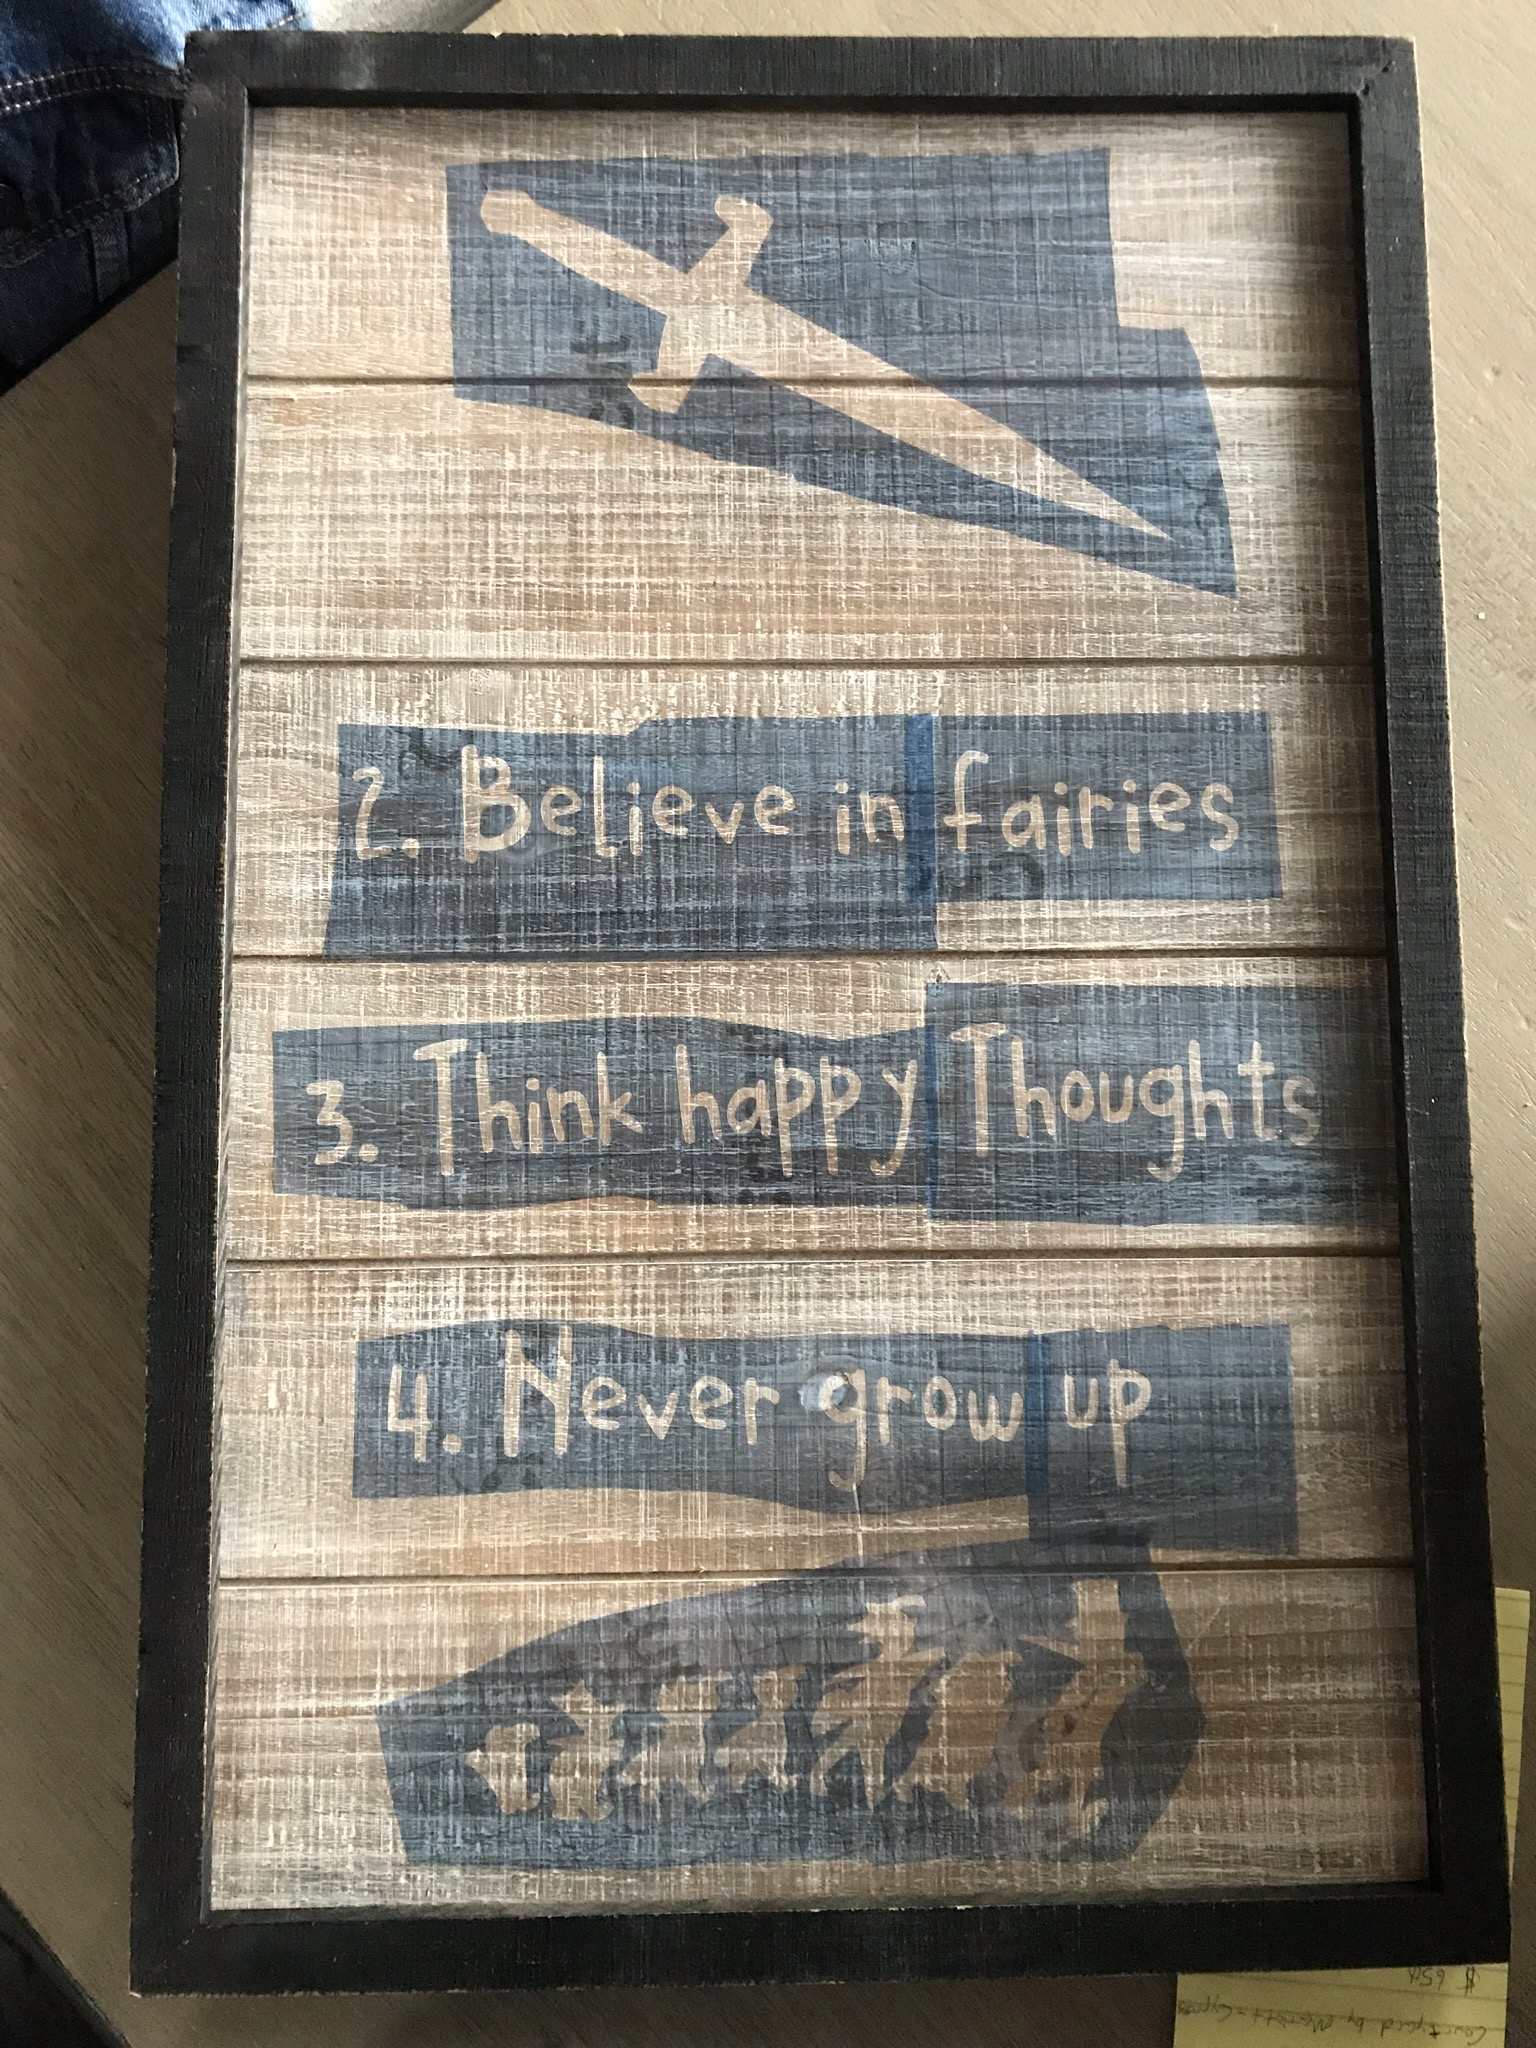
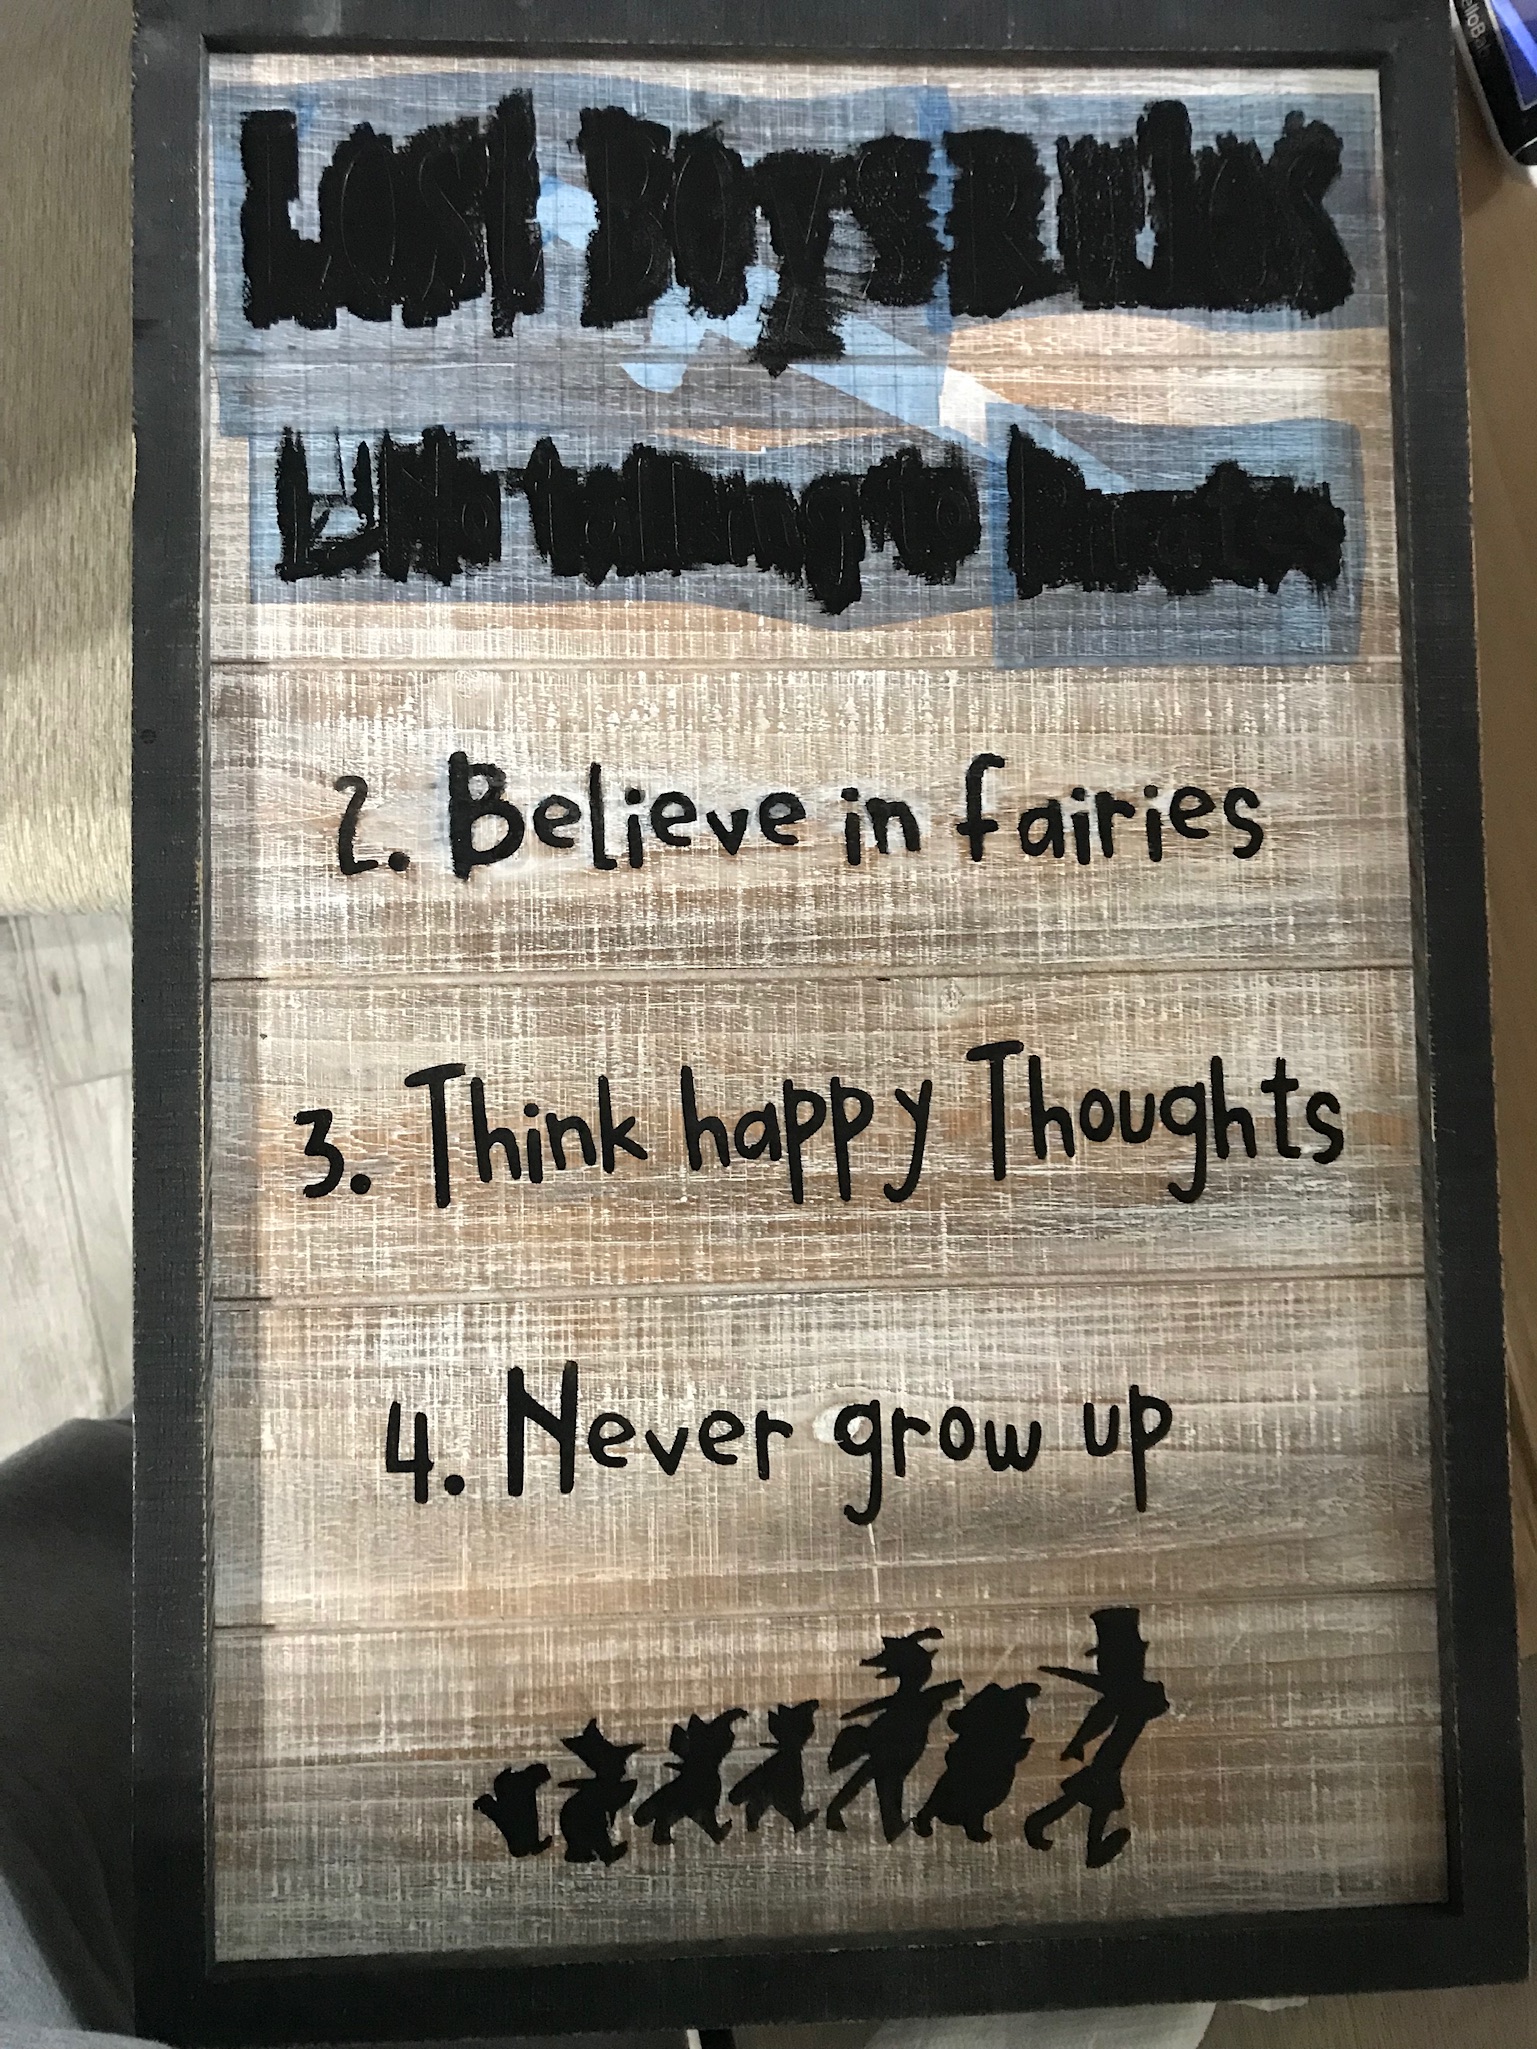
This wall decoration is for the same friend that I made the Peter Pan mobiles for. She is decorating her nursery with a Neverland theme, and so obviously needs to have the Lost Boys Rules posted.
The nice thing about this particular project is that there are no “rules” (ha!) for what it needs to look like. The Lost Boys Rules are just spoken in the movie, not an actual artifact to have to mimic.
There are a lot of different versions out there on Pinterest - this was my friend’s inspiration. Just like I did with the mobiles, I went wayyyy off the tracks. Hopefully she likes my spin on it! I’ll let you know, cause I can’t post this until after I give it to her anyway! (Update: she loved it!!)
Materials
Premade wooden sign. I found mine at Hobby Lobby for $21, and then got 40% off with a coupon. Yeah, I could have made it myself, but this looks great.
Stencil vinyl. Again, 40% off at Hobby Lobby.
Cricut machine
Acrylic paint. I used black and white.
Sponge brush
Making the Sign:
I measured the space I had to work with, and modified my design to fit how I wanted it to. Then I cut it out on stencil vinyl using my Cricut. I probably should have used transfer paper past this point, buuuut I didn’t.
I very carefully peeled the stencil off the backing, trying to magically keep the vinyl from sticking to itself. Many curse words later, I had placed the stencils for the sword, rules 2 - 4, and the lost boys, making sure I got all the little pieces in the middle of letters like B and P. I REALLY should have used transfer paper.
I painted the sword white, and the rules and lost boys black. The key to painting over a stencil is to dab the paint on. Paint strokes will make the paint bleed under the stencil. It can be more time consuming, but it’s important, and ensures the lines are crisp when the stencil is removed.
I pulled up all of the stencils slowly (this can be done while the paint is wet), leaving the little mid-letter pieces (remember our friends B and P from earlier) for later.
After the white sword dried, I placed the stencils for the title and rule number 1, and painted them black.
I removed those stencils, then removed all the tiny mid-letter pieces.
Using a tiny paintbrush, I touched up the areas that needed it.
Let it dry!