DIY Restored Antique Door
/
Before I hit publish on this one - I started writing this in January 2021. It’s now June 2022. I’ve finally finished it and am posting it - my first DIY post in over a year. It feels good to do it again.
Also, after writing the rest of the steps below, and then looking at my pictures, it’s apparent that I didn’t do the steps in the order I wrote them in. Take the steps below as my “lessons learned” version.
That is all.
——-
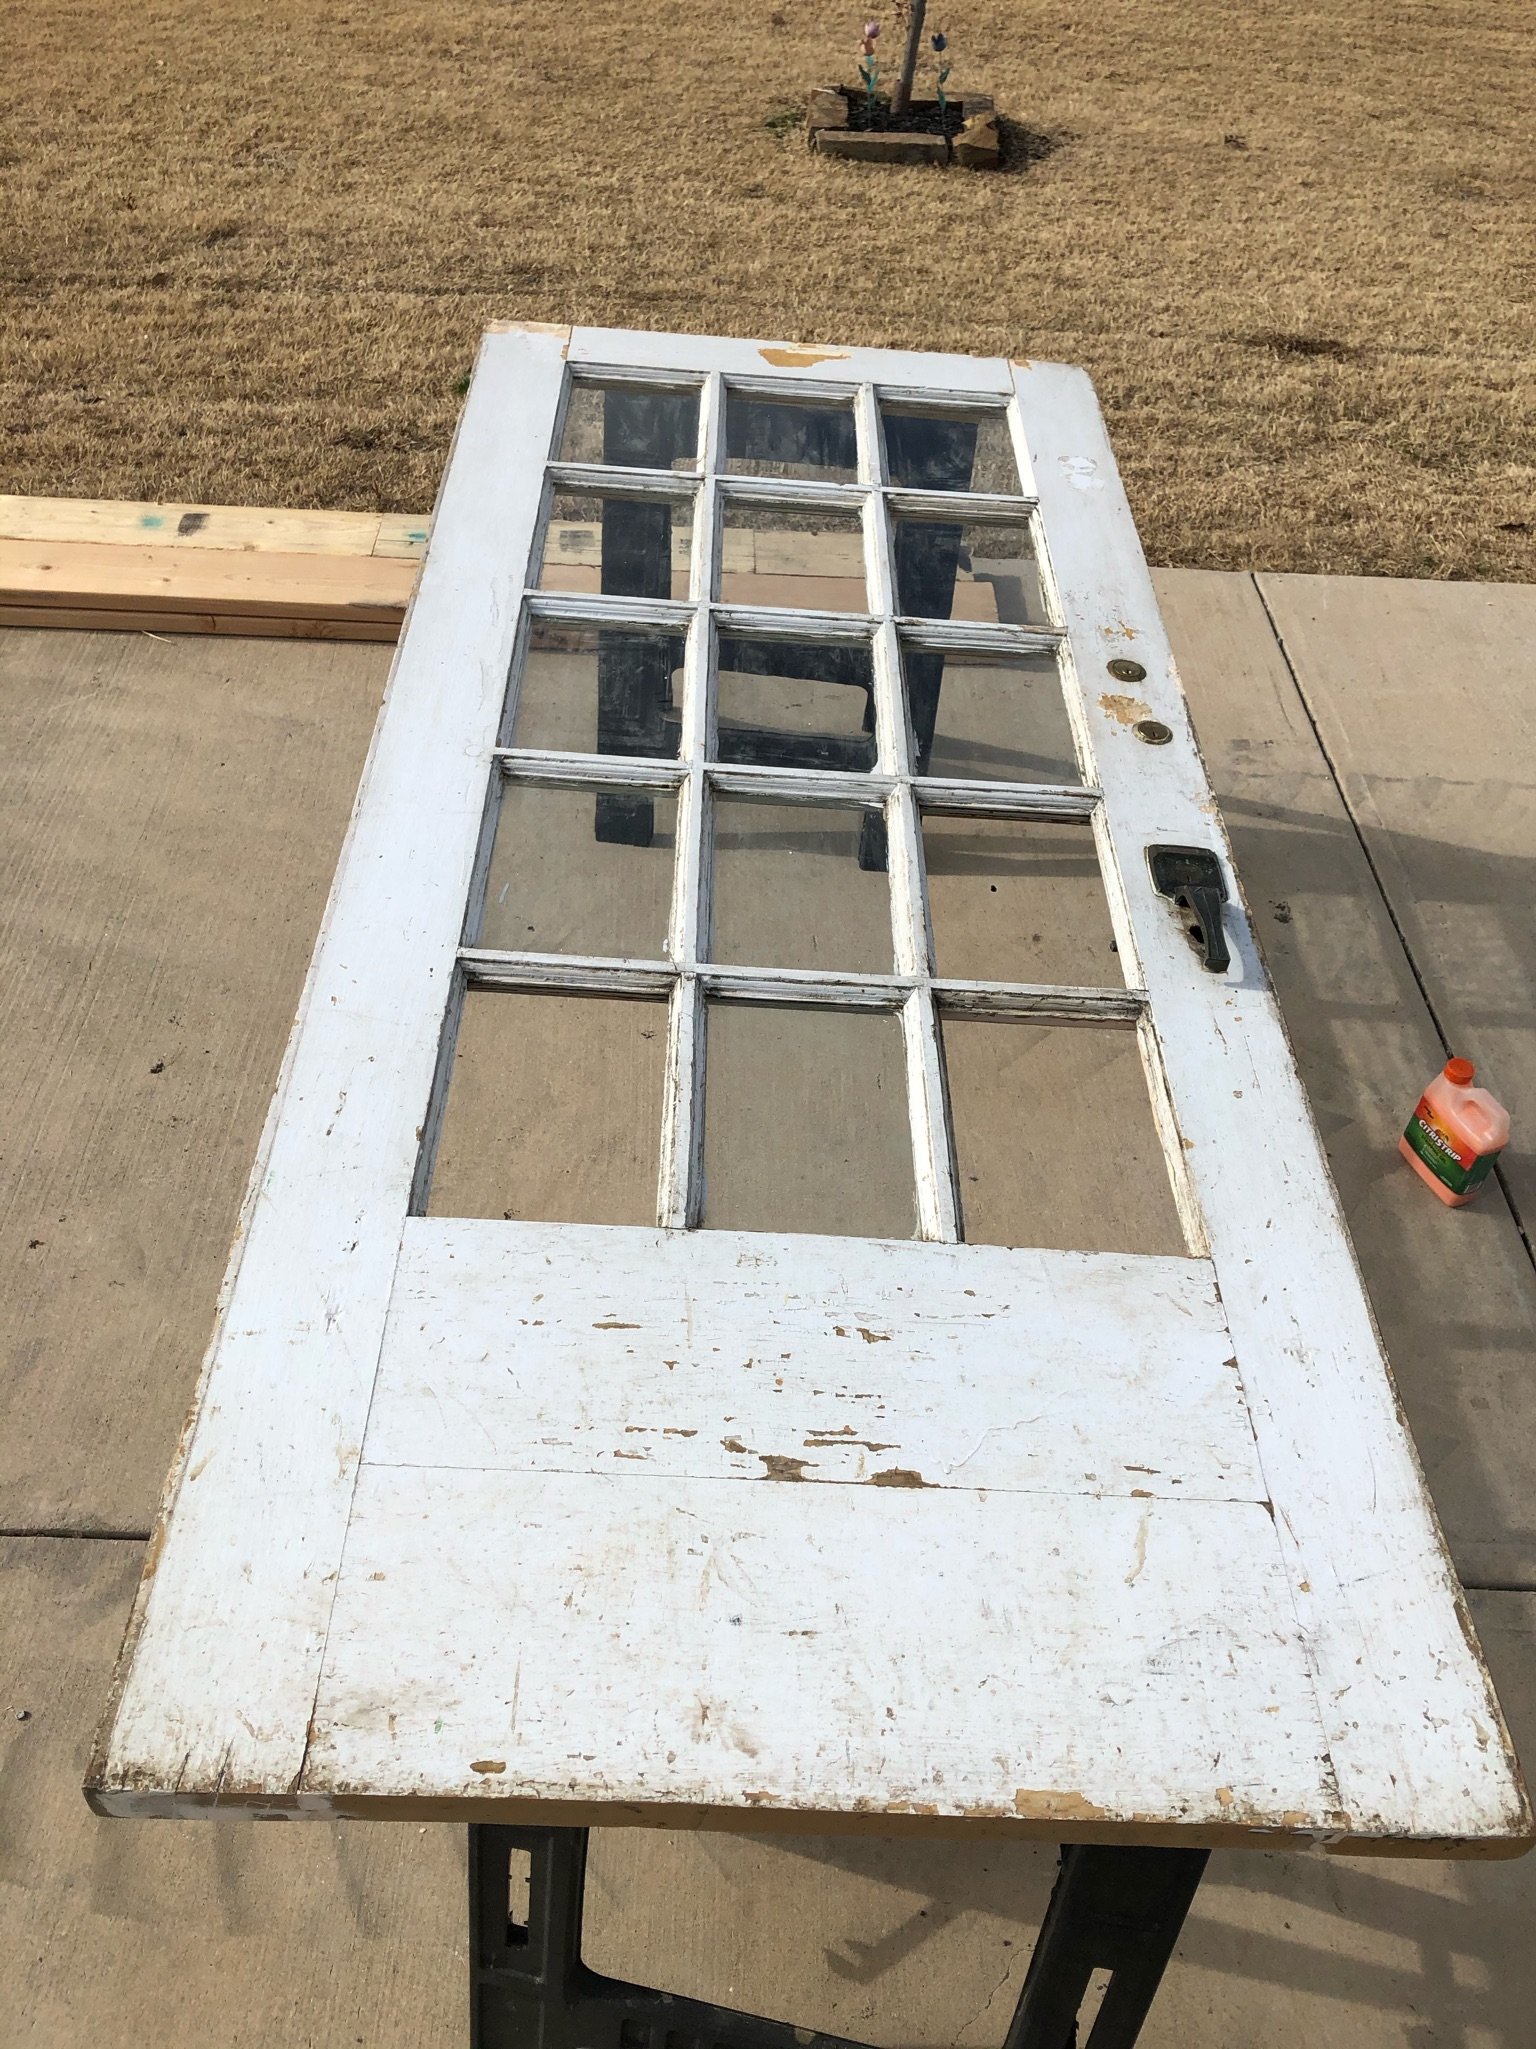
I have found the purpose for one of my 7 antique doors. The first one was a barn door in our old bathroom, and now this one will be the door on our detached garage. I love working with these doors. The history is just so cool, and I love giving a door a new life.
Initially I was going to strip this door like I did with the other one, but once I cleaned it up and really saw the extent of the damage, I realized I was going to have to rebuild several areas with putty, which isn’t so pretty. Fortunately for me, that meant the job would be easier. Stripping paint is hard work.
We opted to leave the door hardware on the door vs taking it off, primarily for fear that if we took it off, we’d never be able to get the back on as securely. Overall, the door came out fine, but it did require some detailed sanding/painting.
Materials
A door. Mine happens to be an extremely dirty front door from 1909 with three broken window panes and brittle paint.
A solution of 1 part vinegar, 2 parts water in a spray bottle for cleaning
Rag, paper towels, etc for cleaning
Sandpaper (80, 100, 120) - for the orbital sander, and for hand sanding
I also used some sanding “sponges” in the same grits - they’re like kinda squishy sandpaper blocks that are great for sanding detailed areas
Hand sander - I used my orbital sander on this, and then good old fashioned hand sanding
Wood filler/putty - mine was the exterior variety since it’ll be a door
Putty knives - I used one thin stiff one, and a wider more flexible one
Replacement glass for the broken windows - this was an adventure, more on that later
A glass company to install aforementioned glass - after watching the pros do it, I’m SO GLAD I didn’t try to do this on my own
Painter’s tape
Paint, small paint roller, paintbrush
Method
CLEAN. This door was DIRTY. Not just because it’s old, but because when my friends remodeled their house, this door sat outside for a bit collecting dirt. No worries, vinegar to the rescue! I love cleaning with vinegar. Such a simple solution, but so cheap and effective. It’s pretty much all I use to clean with. For the door, I sprayed it down with my spray bottle, and then started scrubbing and wiping. Vinegar is an acid, so the longer it sits (wet) the better it works.
Sanding. The goal is to prepare the door for painting. Smooth and clean.
First I used my orbital sander to knock off flakes of paint and expose some of the wood. I didn’t have to remove all of the paint since I was painting it again, just get all the dirt off and smooth out the edges and dings. 80, 100, then 120 grit.
Then good old fashioned elbow grease and sandpaper/blocks to get the detailed areas (windows and door hardware).
I also used the stiff putty knife to free paint that was pretty crumbly.
I’m pretty dramatically oversimplifying this step in the spirit of progress - sanding is tedious, time consuming work. All in all, I probably sanded this door for 4 - 5 hours total.
Putty Repair #1. This door had some mega dog damage on the interior side (which will be our exterior). Poor little fella/gal had scratched the door to hell in a couple of the windows. Wood putty to the rescue. Wood putty is great, but you have to build it up with a couple layers if the damage is really bad - or in this case, 3 times since this situation was pretty catastrophic.
Using the wide putty knife, I started the rebuild process around the windows that needed repair. The goal of the first layer is to give the second layer a smooth surface to start with, so it didn’t need to be super goopy or thick.
I let it dry overnight.
More sanding. I sanded down the first layer of putty to make the surfaces smooth, and then applied the 2nd layer.
Did this again a third time, and then sanded until I liked the shape.
Once the door was satisfactorily cleaned, sanded, and repaired, I set about figuring out how to repair the glass windows. This door is antique, with legit antique wavy glass. I couldn’t just replace it with regular old modern glass. I called my local glass company. He said he didn’t have any wavy glass, but that he could cut it to size and install it if I could find it…as long as I was planning to use the door for decoration, and not an actual door. Apparently, antique glass isn’t up to code. I assured him that I would be using it as decoration *ahem*. Then, I emailed Little Wooden Penguin - their owners are pickers, and have a warehouse full of awesome stuff! They told me to meet them over there, they thought they might have something - when I got there, sure enough they were pulling a window out, and it had more than enough wavy glass to fix my three panes. I told them what I wanted it for, and they let me have it!! Just gave it to me! Heart eyes. I took the window down the street to the glass company (I love this small town). He took the glass out of the frame, and said he’d be over the next day. The next day, he shows up at the house, cut the panes to size, and installed them in 30 minutes. He did break one (wavy glass is fragile - back to the, uh, code thing), but it was ok, he just cut another one. A little silicone and careful wood tacks, and he was done.
More putty repairs - all the little notches and all the little dings, dents, cracks, scuffs, and imperfections got puttied with the wood putty using a putty knife. Finished one side, let it dry overnight, then did the other side. Some spots were way worse than others, so needed the multi-layer approach.
More sanding. I used the hand sanders, sandpaper, sand sponges, all of it. 100 grit then 120. In retrospect, I should have also done 180, would’ve made painting easier. Sanding around all that hardware was not fun though, so I was about done. Did both sides and then used the air blower (outside) to get as much dust off as possible.
Cleaned again. Vinegar and water solution for the windows, dust cloths for the door.
Taped up EVERYTHING I didn’t want to paint with painter’s tape. All 15 window panes, and door hardware, both sides. No one ever wished they didn’t tape before they painted.
Side note, If you think you’re some kind of master painter that doesn’t need to tape because you’re a skilled artisan, you’re wrong. Tape.
Paint! I used an outdoor latex paint, and I did several coats. Not sure how many, I would just say “as many as it takes”. I used the little mini rollers for the big parts, and smaller brushes for the detailed part. I let each coat dry for a day in between, and then 2 days when I was done with a side. Then I flipped it over and repeated.
After all that paint, I sanded again with very fine grit. Not much, not to sand the paint off, just to sand off the rough-ness. Once I was happy with it, I removed all the painter’s tape.
The last step was to install the kick plates. I made sure to screw the screws just enough to hold the kick plate in place, but not warp the metal. We found the kick plates online, and I measured so carefully to make sure they were right in the middle of the large area at the bottom of the door.
Well all that careful measuring didn’t matter, because when the carpenter came to install the door on the trailer barn, he had to cut 2” off the bottom of my beautiful door. I sanded/repainted/sanded after he cut it, and then he actually installed it the next day.
All installed, it looks amazing. We absolutely love it.