

DIY Acrylic Calendar
/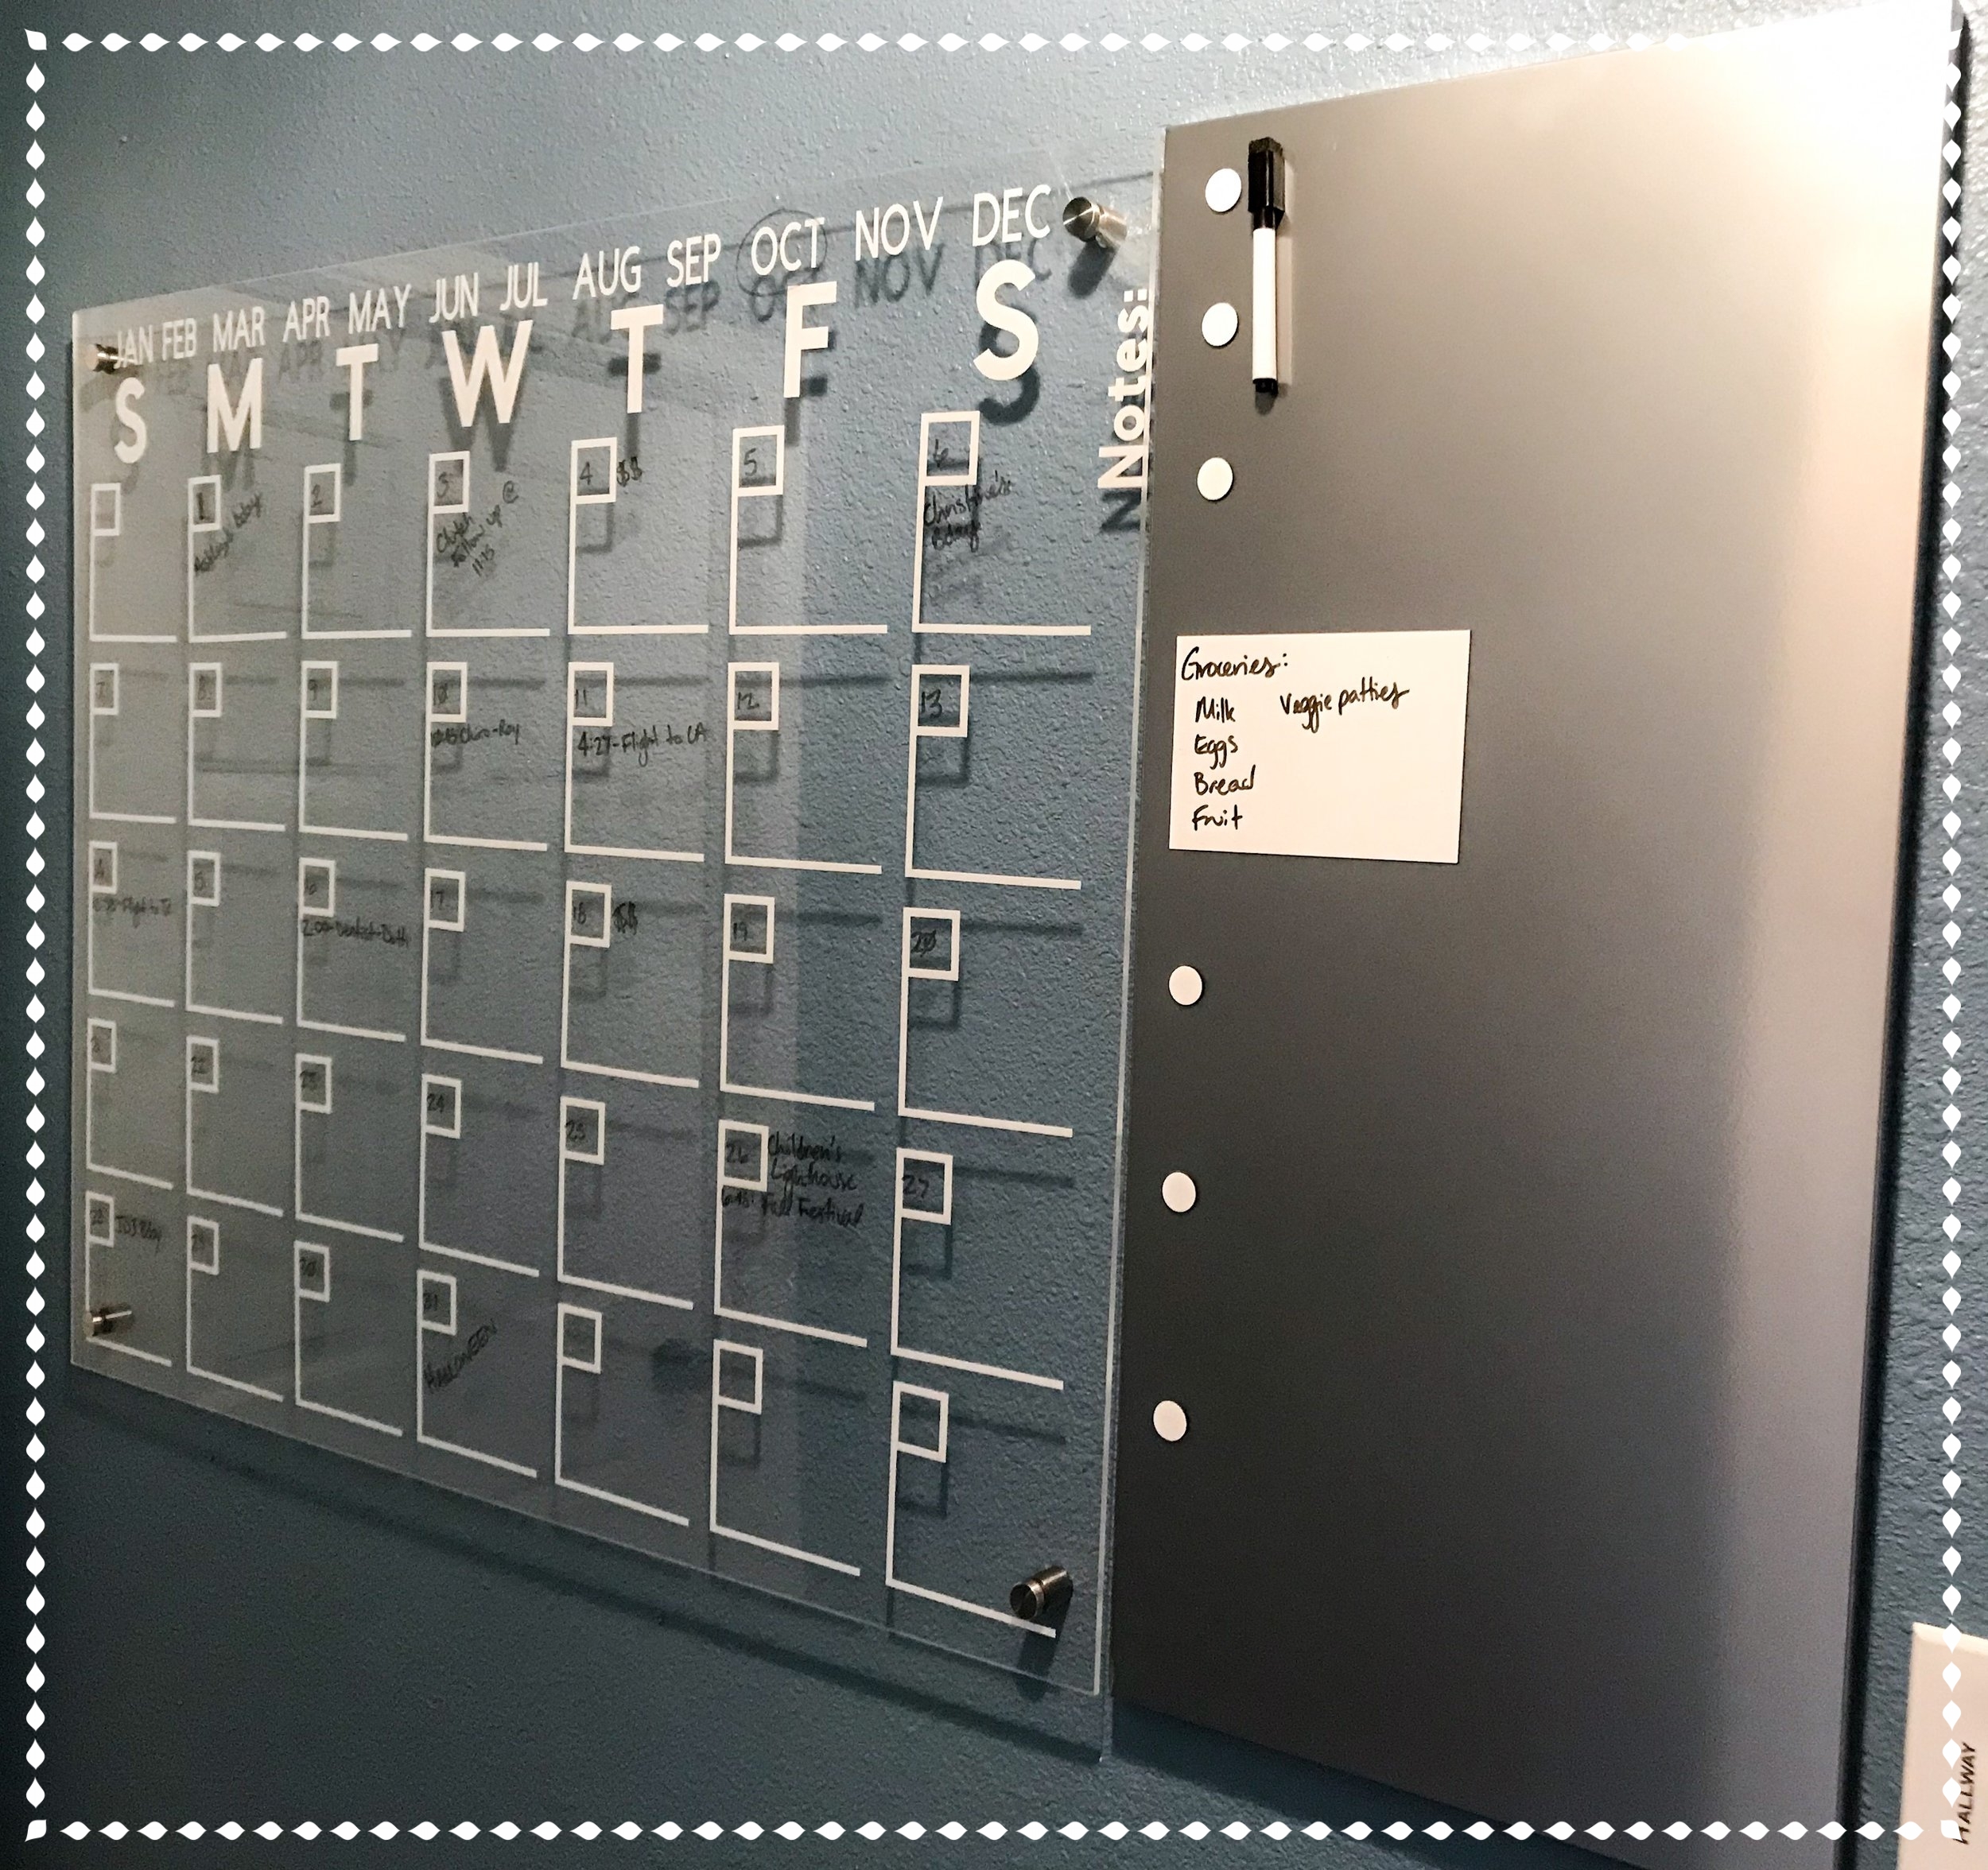
This calendar and I have been through quite a few ups and downs together. In the end, I think it turned out pretty great, considering. My biggest lesson learned is to use a good drill with the right drillbit for the standoff mounting hardware holes. You’ll see.
This was supposed to be my first DIY post, but a series of unfortunate delays has pushed the delivery date back a couple weeks. …ugh, that sounds like something I would say in a work email. I’m gonna move on.
We plan to use this calendar as part of our home Command Center. Appointments, birthdays, reminders, etc. When I was looking for ideas, I came across this idea on Pinterest and loved it. Tweaked it a little bit, added a magnetic board, and here we are.
Here’s what I used:
Standoffs for signs. There are different sizes - I got 3/4” x 3/4”.
Electric drill with a 10mm drillbit (+ safety glasses)
Painter’s tape or masking tape
Ruler - I used a cabinet door pull template
Marker, to mark the drill holes and draw the guide lines
Stable surface to drill on (clamps optional but recommended)
Cricut or Silhouette machine to cut the vinyl
I made a calendar design file for my Cricut
Vinyl - any solid color would work, I used white
Vinyl weeding/burnishing tools

My supplies list grew by a couple things (topo+choco+baby)
The Vinyl
Cricut Settings:
Wheel: VInyl+ (pic 3)
Mirror Mode: On (pic 1) (muy importante)
Walkthrough:
I used my calendar design to plan out the calendar. I decided to hang the acrylic sheet horizontally on the wall, and since I had a magnetic board for the side, I designed the vinyl to take up the whole 30”x36” space.
Mirror mode was necessary because, like the Pinterest how-to I followed, I put the vinyl on the back of the acrylic sheet so that I have a nice clean surface to write on. Pic 1.
Once I got to the screen to plan the cut for the day boxes, I rearranged the design to make better use of the vinyl. I only redesigned one “day box” mat, and then just cut out that same mat 9 times. Pic 2.
I taped the corners of my vinyl so I didn’t have to worry about my mat being sticky. FYI. In case you were wondering. Pic 4.
After the designs were cut out, I weeded away the unwanted vinyl. I usually move in small sections - remove some vinyl, cut it away, keep going, etc. Pic 5, 7.
I added transfer paper to all of the designs, and made sure to really press it on with the burnishing tool. I’ve fought with vinyl before when I didn’t get that transfer paper on right, and it sucks. Pic 6, 8, 9.
To get everything ready to be put on the acrylic, I cut each calendar box out separately, cut the months out individually, and the day letters individually. Pic 10, 11.


Acrylic + Vinyl
I left the plastic protective covering on the acrylic sheet so that I could use it to draw my guidelines on. The magnetic board made a great straightedge. I measured out where everything needed to go, and drew lines where the bottom-right edge of the vinyl pieces would go. In hindsight, I probably should have measured for where the bottom-left corner would be, but eh. It worked. Pic 1 - 5.
After drawing the guidelines, I flipped over the acrylic and started removing the protective sheet on that side to add the vinyl. Pic 6.
I went suuuuuuuuuuper slow, and tried my damndest to make everything perfect and straight, but it’s pretty much impossible. I think it turned out fine though. Also, since I was putting the vinyl on the back of the calendar, everything was backwards - that took some getting used to. Pic 8, 9, 10.
For the day boxes, I took off half of the paper backing and put the bottom side down first, and then took the rest of the backing off and laid the top down. That helped keep things straight. Pic 7.
After I got all the vinyl on, I used my burnishing tool to press it all down. This took awhile, cause I’m a bit of a perfectionist. Then I took off all the transfer paper. Then I pressed it all down again with the burnishing tool. coughoverkillcough. Pic 11 - 15.


The Drill Holes
I put masking tape on the corners to put the drill marks on, and to protect the acrylic while drilling. I had originally wanted to do the drill holes first, but didn’t have the right drillbit, so I did the vinyl first, which is why there’s no vinyl in the first 3 pics, and vinyl after that. Long story. Pic 1.
Using my cabinet door template, I measured and marked where I wanted the drill holes. I chose to put the holes at 1.5 inches from the edges to preserve the integrity of the acrylic sheet. Fat lotta good that did at the end, but I digress. Pic 2, 3.
My cheapo sawhorses had no problem being a stable surface for the calendar. Pic 4, 5.
My crappy drill did a crappy job of drilling the holes for the standoffs. The first three went ok I guess, but the drill definitely struggled. TIme to get a new one. By the last hole, the battery was dying, and my arm was getting tired. I got sloppy, and I broke the corner. Devastated. I gorilla-glued it back on, and it’s ok (because it has to be). I had to get my dremel and finish out the hole so the standoff post would fit. You don’t really notice it, but i’m still pretty salty about it. Pic 6 - 9.
After I got over the heartbreak from the corner, I took off the masking tape. Pic 10, 11.


The Standoffs
The standoffs are interesting - I’ve never seen wall hardware like this. I measured the distance between the holes in the acrylic to know where the standoffs should go on the wall, and I marked everything with chalk.
Using regular drywall screws, I screwed the back of the standoffs into the wall.
With my husband’s help, I mounted the calendar to the wall and screwed in the posts. Miraculously, everything worked the first time.
Ta-daaaaaaaa!!