DIY Seed Bombs
/
These cute seed bombs are easy to make, and I’m always a fan of anything that adds a splash of color where it’s needed most.
We’re making and “planting” these in the Fall, so the plants have a chance grow before Winter. This ensures they come back in the Spring! Once they’re made, they need to be planted/chucked/stuffed within the week.
You can plant these at your house, throw them out the car window, or even tuck them into a forgotten planter somewhere - really, anywhere you think there should be more wildflowers is a good place for a seed bomb.
We have kits for sale in our Etsy shop (CraftedTogetherTX)
The Kit Includes:
Enough air-dry natural terra cotta clay for 10 seed bombs
Enough sifted planting soil for 10 seed bombs (sifting removes large sticks and other debris).
An assortment of native (to the North Texas/Oklahoma region) wildflower seeds, including, most importantly, bluebonnets.
A compostable platter to make the bombs on, and to take them home on to finish drying.
Not included in the kit, but we did have them for the class -
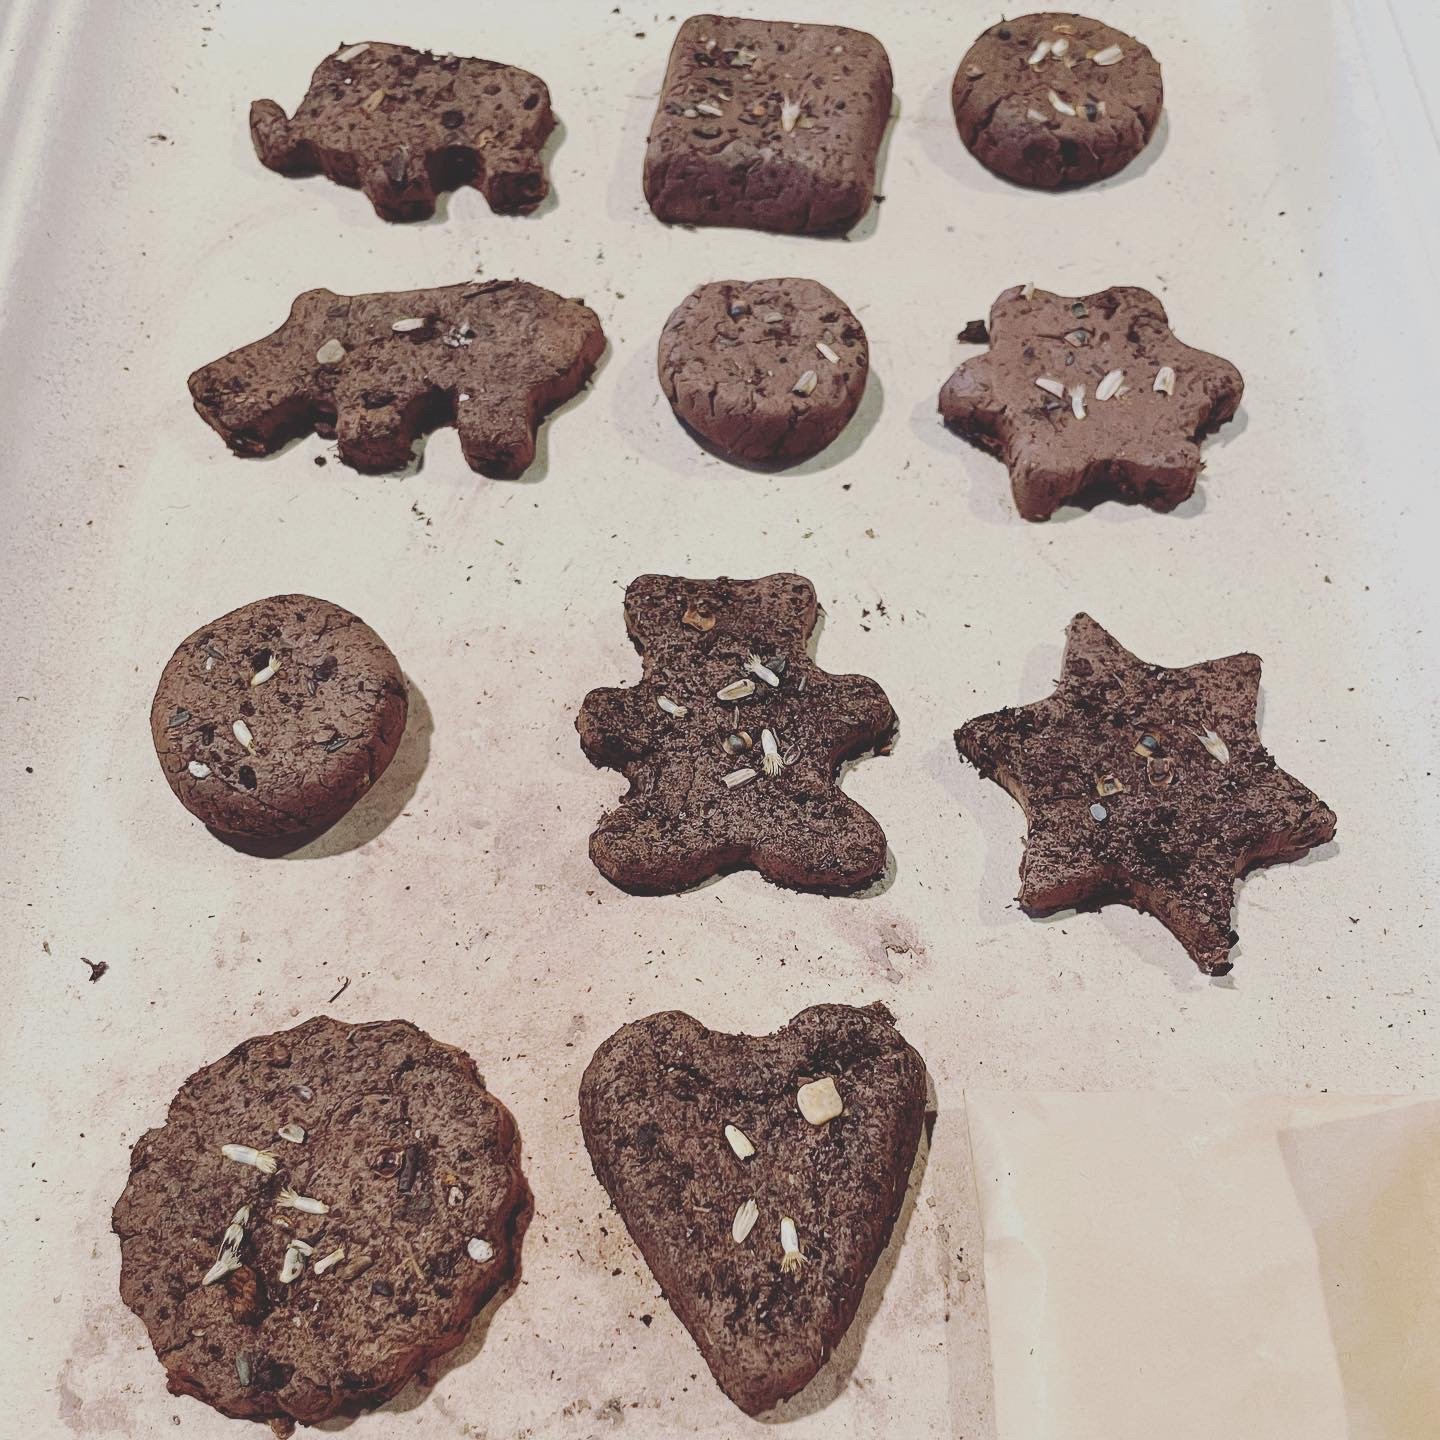
An assortment of mini cookie cutters to cut the bombs into shapes
How-To:
Break the clay up into 10 roughly equal pieces.
Put 9 of them to the side, leaving 1 in front of you.
Work it into a ball, and then flatten it out into a thin disc, about 1/8” thick.
Take a pinch or two of dirt, and put it in the middle of the disk like a clay & dirt pizza.
Top that pizza with about 5 or 6 seeds. You don’t want too many plants trying to grow in one place, so you really don’t need a lot of seeds! We’ll use more later too.
Fold the disk in half and make a clay & dirt calzone (or empanada) by pinching the edges together.
Start mashing the clay together, fold it over, etc; mix in the dirt really well.
Roll the clay and dirt mixture into a ball, then lightly dust it with some dirt, like flouring dough, and then flatten it out into a disk about 1/2” thick on your tray.
Press two or three more seeds into the top.
From here, assess the size, and decide what shape you want to end up with. Hearts, flowers, and circles are easy shapes to make with your hands, If you have small cookie cutters, use those. You can also make the disc thinner as needed for a cookie cutter or shape. You could even make little sculptures!
Execute your plan, and set it to the side to dry. That one is done - start over with the next chunk of clay, and repeat until you have 10ish!
If you have some extra scraps from the last seed bomb, mash the extra into the next piece of clay.