DIY No-Sew Quiet Book
/These. Are. So. Fun.


I can’t wait to get more felt and make more pages! I might even have to learn how to sew for these. Hot glue gets it done too though - just have to make sure to keep a super close eye on Mary while she’s playing with it in case something comes off.
I came across these aptly-called Quiet Books on Pinterest, and knew immediately that I was going to have to make one. So naturally, I made a Pinterest board.
https://www.pinterest.com/craftedtogether/quiet-books/
Supplies
I did a lot of reading about different pages & techniques, and about what supplies to use, trying to decide what to buy at the craft store. I made a mental list, and went for it.. After I had walked out of there, this is what I bought:
Metal rings for the book binding. I got 2” rings so I can eventually have a lot of pages.
Fabric glue - turns out this doesn’t work on felt to hold pieces of it together (duh), but it does work to stiffen/fortify it, so it wasn’t a total loss.
10x10 felt pages. Lots of them, in lots of colors (and a couple with glitter). Two sheets make one page, so I got 12 to serve as my starter pack.
I read a lot about different types of felts and various durabilities, and ended up just getting regular ol’ felt. Works fine.
I also got some sticky-back felt sheets, for embellishments on the pages.
Sequins
Acrylic Jewels
Cotton string
Woodland Friends felt stickers
Ocean Friends felt stickers
Acrylic pony beads
Basically, all of my favorite types of fun supplies that I rarely get to use. [Side note, I’m really liking this having-a-kid thing, I get to play with all of my favorite stuff again!]
In addition to the above, I needed the following tools:
A page template - I used one of Mary’s board books, which ended up being 8” x 8”
Hot glue gun & lots of glue sticks
X-acto knife (for the details)
Scissors
A printer & paper for printing templates
Chalk for outlining cuts
[More of my favorite things - I basically feel like I’m in The Sound of Music]
The Process
I am still terrible at taking pictures of my projects as I make them. I’ll get better, I swear.
Some overall strategy notes and lessons learned:
I glued two pieces of felt together to make a page. That gave me some freedom to fortify my pages on the back (with extra glue, etc).
Where I cut a hole at the edge for the binding rings, I used fabric glue to strengthen the felt.
Speaking of those holes, I should have waited to cut them until after the page was glued together, and I should have made them smaller. And I should have only cut two. See next note.
I used three binding rings, but I should have only used two.
I didn’t hot glue my felt stickers, and I should have. Because Mary has already pulled the fishes off.
Fabric glue does not work to hold pieces of felt together. Again, duh.
I should not have used velcro dots; felt sticks to itself well enough anyway, and the hook side of velcro damages any felt it touches.
Overall Process:
Knowing I was going to end up gluing two pieces of felt together to make a page, I picked the order I wanted the page colors to go in. I wanted to use my glittery felt for the front and back covers, so I worked in from there to put the pages in order.
At this point, I still didn’t have a solid plan for what I was going to actually put on the pages…but I was thinking about it!
I also hadn’t yet come to terms with the fact that I needed hot glue. I had bought that fabric glue, and was trying to make it work on test pieces. I glued two pieces together and let them sit overnight, and when I picked them up in the morning they fell apart [wahhhhh] (idiot). Soooo ok hot glue it is. Had to find my hot glue gun. In my craft pile. It’s formidable, y’all.
Using Mary’s 8x8 board book as a stencil, I traced the book onto the felt pieces with chalk, and then cut out all the 8'“x8” pages.
Still forming plan for pages….
[After I cut out all the pages, I cut the holes in the edge for the binding rings, but I shouldn’t have - I should have waited until after the page was complete and glued together, so for the rest of this writeup, I’m going to pretend like I did that.]
Yadda yadda yadda, I made the pages (see next section for details).
Once the pages were complete, I glued the fronts and backs of them together. I had to be mindful of the order, especially for my Mr. Potato Head pages, since they need to display a specific way. I glued them edge by edge, but before I glued the last edge I did a line of glue down the middle on the inside of the “pouch”.
I then cut small (5mm) holes in the edge of the book, evenly spaced, to serve as the book binding together with the binding rings. I used 2” rings, which is way too big for right now, but I figure we can grow into it.
[see, this is when I’m cutting these holes!]
I put it all together, and voila! Mary loves it so far!!
Specific Pages
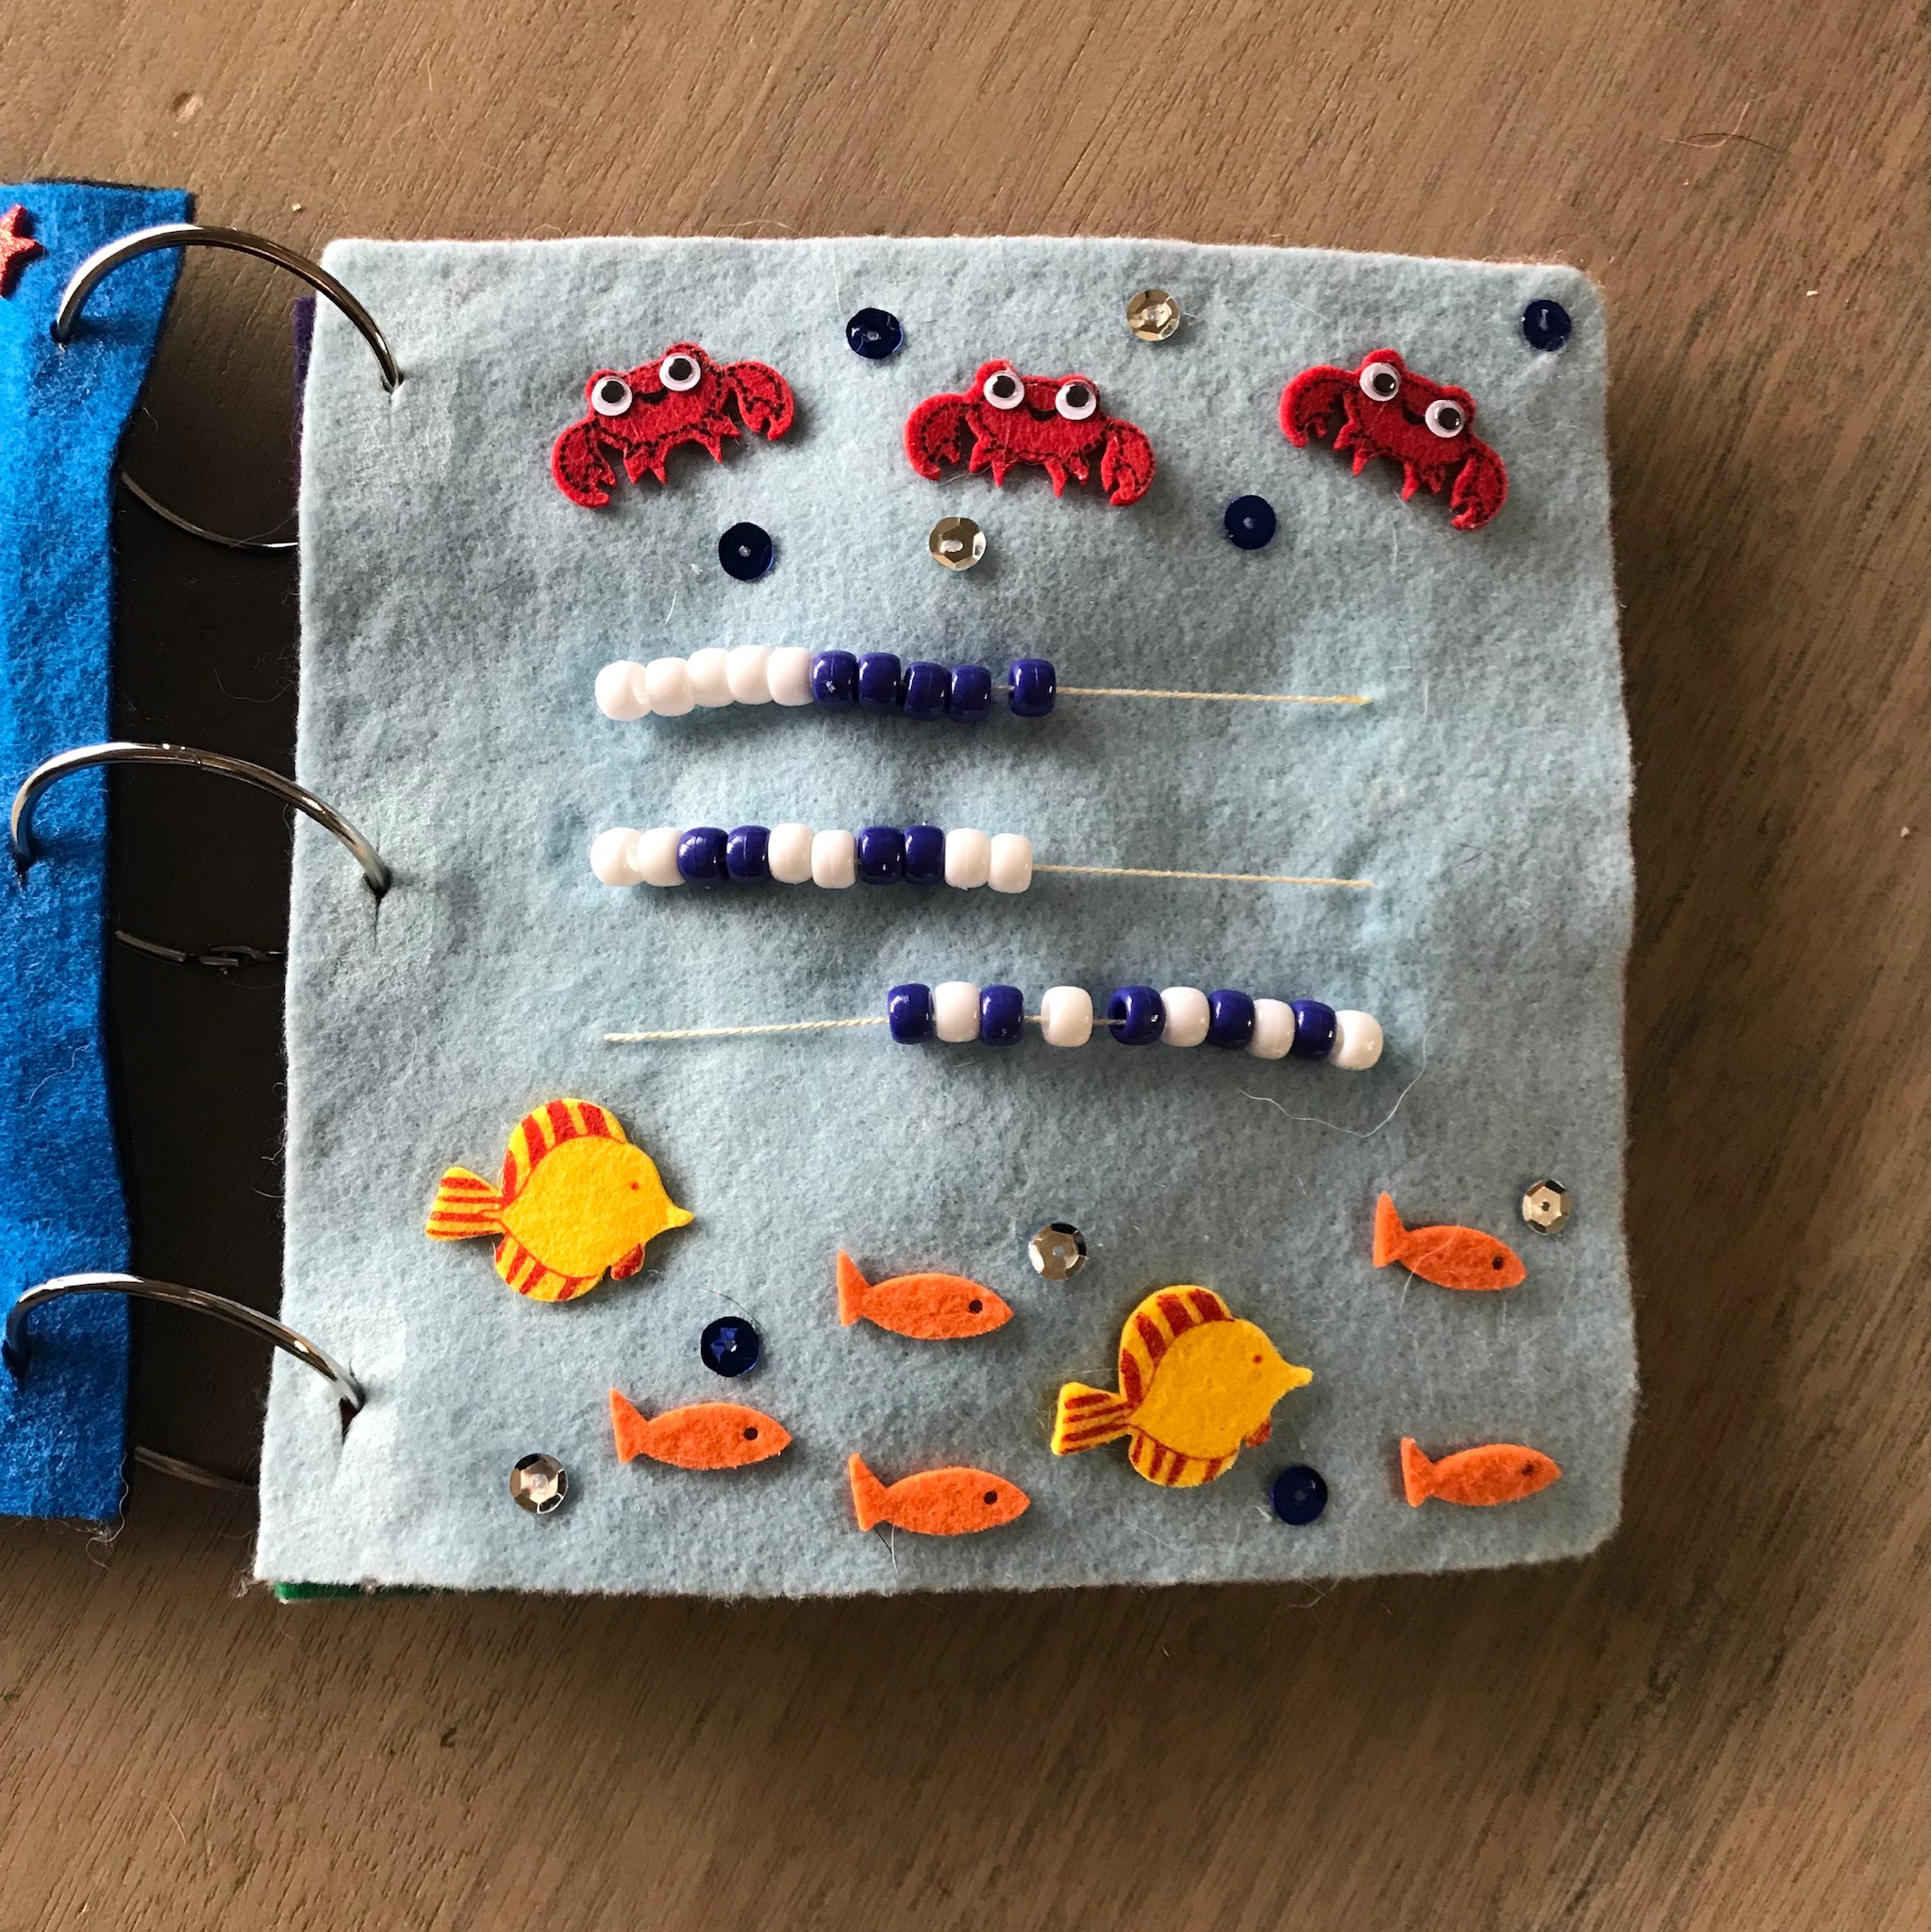
Under the Sea Abacus
Decorations: Felt stickers, sequins, hot glue.
Abacus: Cotton string, pony beads, tapestry needle, hot glue, felt.
To make the bead abacus, I used a tapestry needle to thread the cotton string through the felt. This way, I was able to use one piece of string for the whole page, and only have knots in two places on the back of the page.
I cut a length of string about 3’ long, tied 3-4 knots in the string at one end of the string, and threaded the other end through the tapestry needle.
I pulled the string all the way through the felt to the knot at the other end.
Next, I added 12 beads onto the thread, and then put the needle through the felt about 4” to the side to make the first row.
On the back of the felt, I went down about an inch and half, and put the needle up through again to start the second row. 12 more beads, down through the felt 4” over, you get it.
Step 4 again for the 3rd row.
To keep the string in place for sure, I cut 1cm x 1cm squares of felt, put a drop of hot glue on each small square, and then placed the squares on the back of the page, on top of where the string was coming through the felt. 6 small squares in all.
[After I made this page, I knew the decision to glue two pieces of felt together to make a page was the right call for more reasons than one. Originally it was to make the pages stronger, but now it was also to cover up the back (maintenance-side) of the pages, and give me more flexibility on what I could do for each page.]

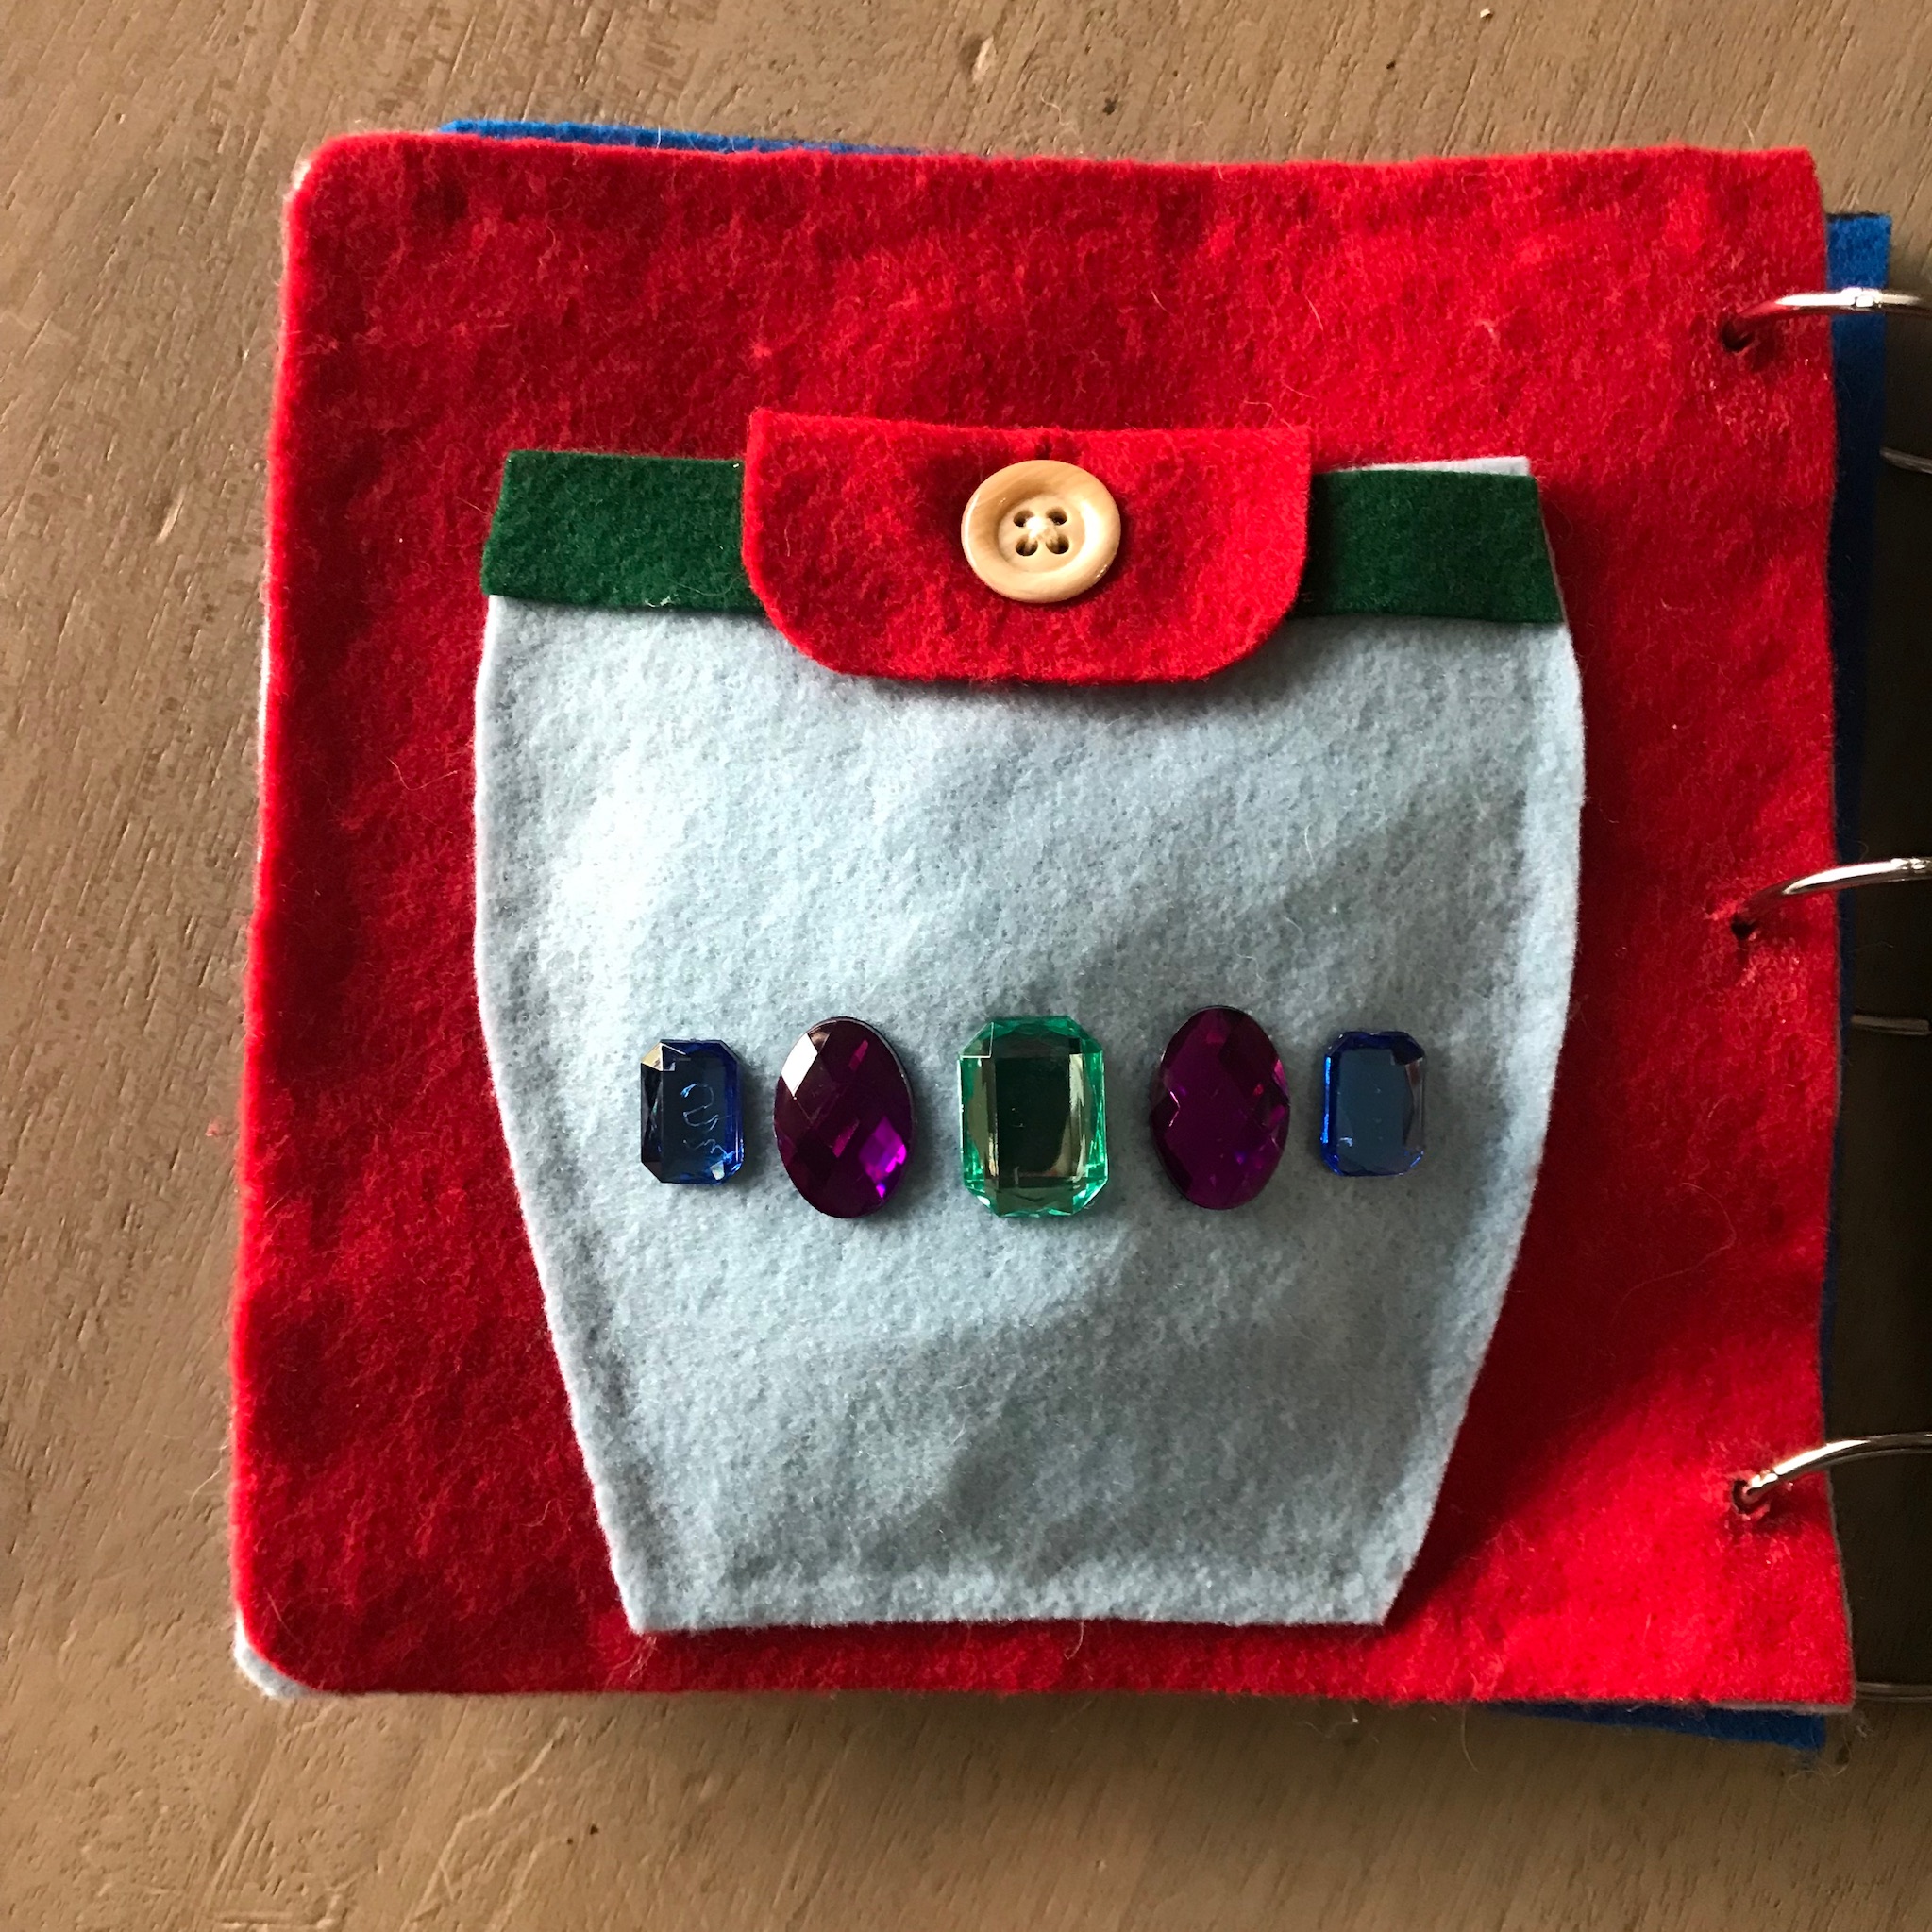
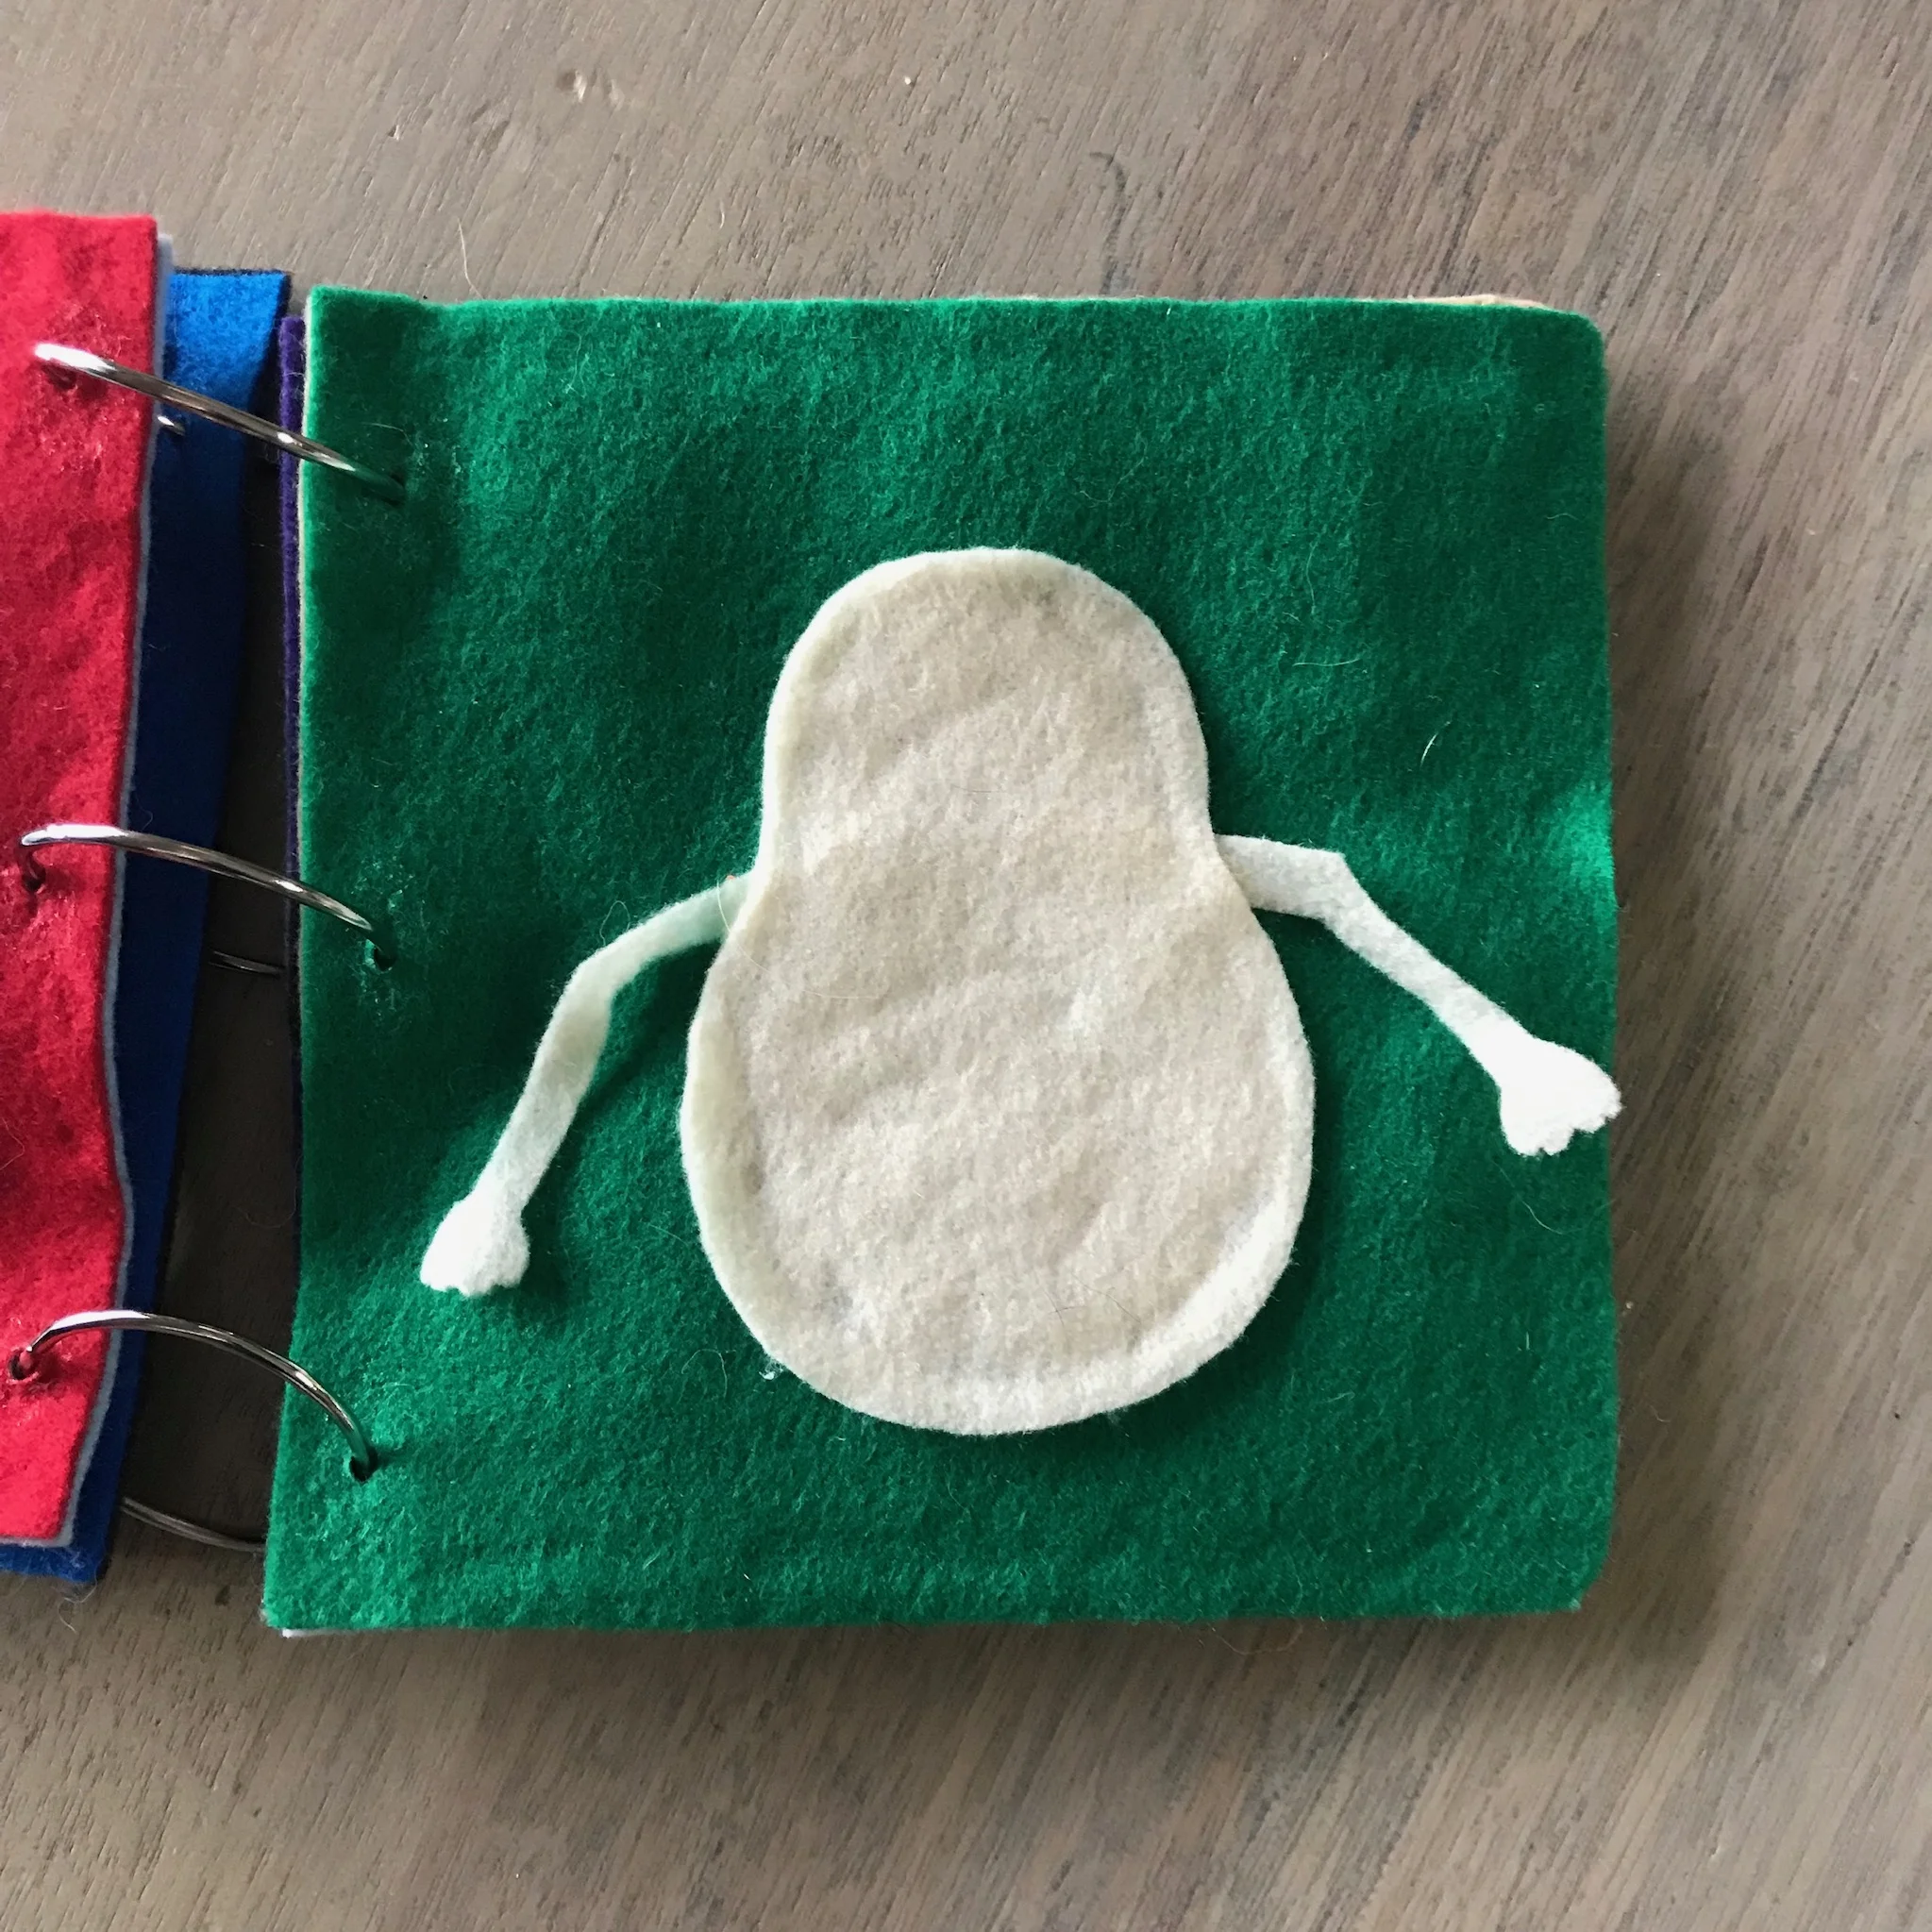
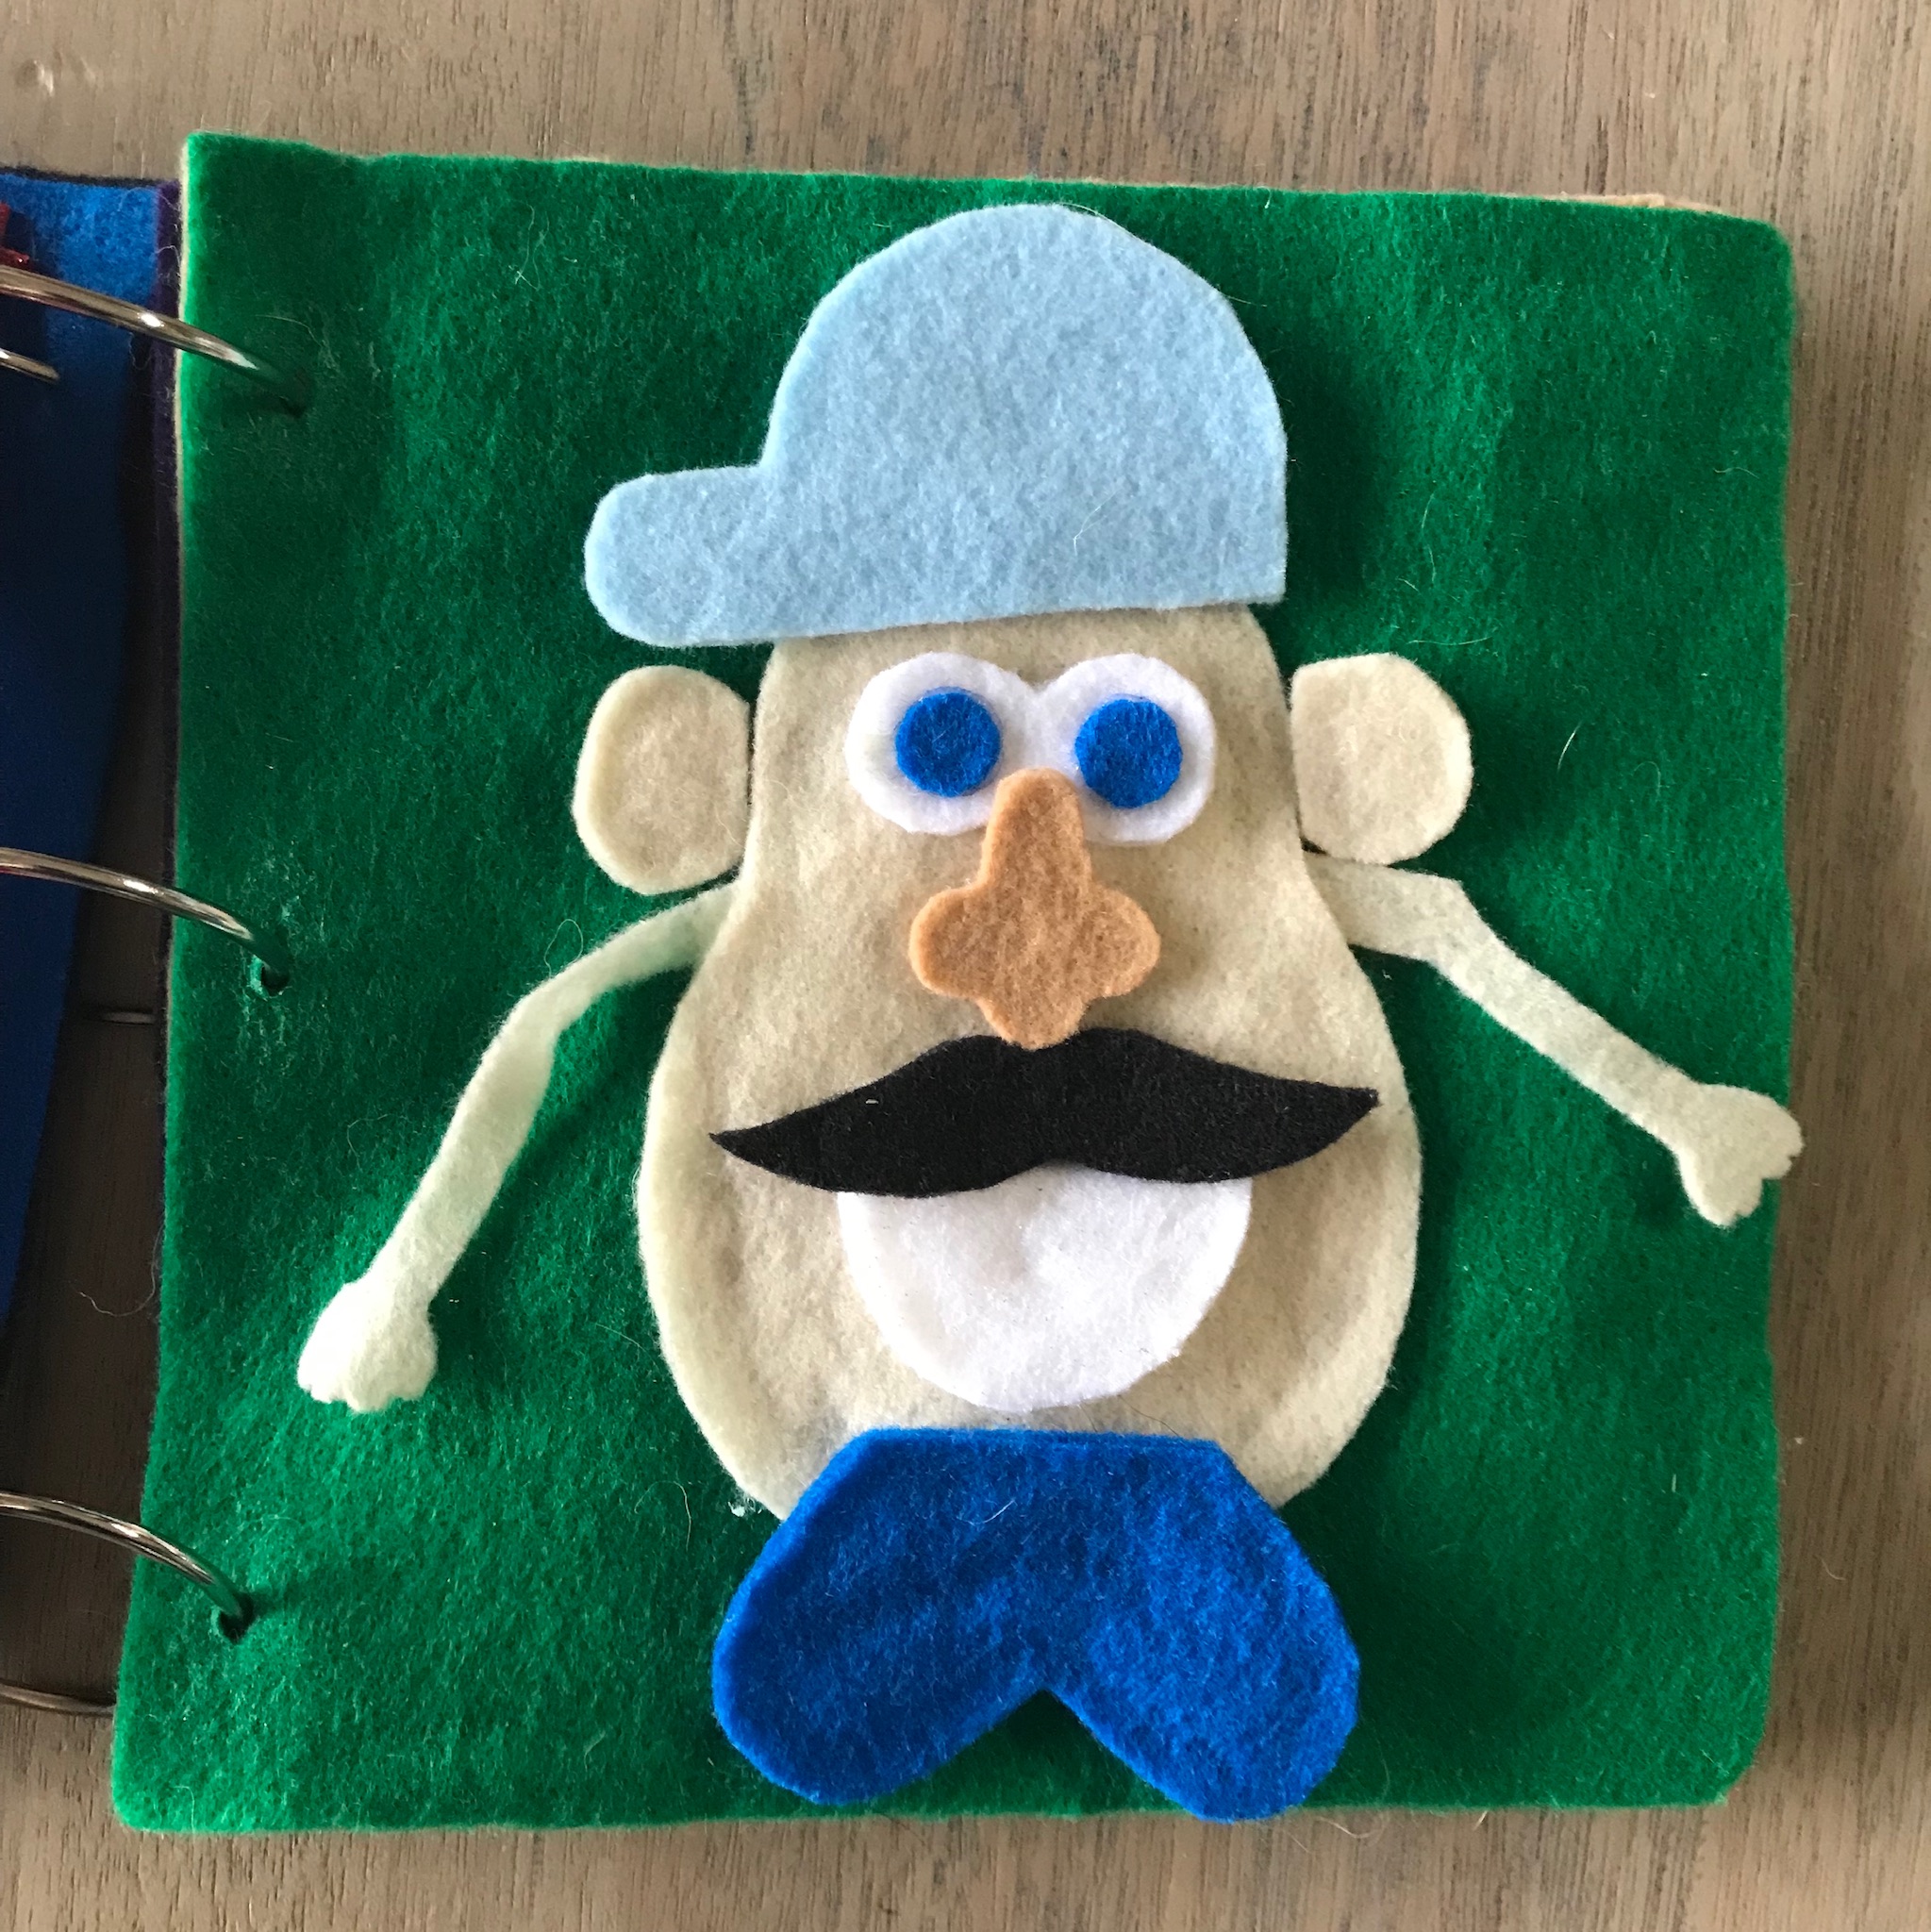
Mr. Potato Head
Decorations: Rhinestones, felt, button, hot glue.
Potato Head: Templates, chalk, felt, hot glue.
I wanted to make the Mr./Mrs. Potato Head pages after seeing the idea on Pinterest. The post I found had great template printouts - their quiet book page was bigger than mine though, so when I printed the template, I changed the print scale to 75% so the image would print smaller.
Once I printed out the templates, I cut out all the pieces I wanted to make. I didn’t use all of the shapes. Call it laziness, I call it practicality - who needs three sets of eyeballs?
Once the shapes were cut out, I used them as a stencil to cut two of every shape for the accessories for Mr./Mrs. Potato Head
2 hats, eyes, 2 ears, nose, teeth, lips, mustache, shoes, purse
I cut out one of everything else
Barrel, barrel band, potato shape, arms
I also cut out a square to use as the flap to cover the barrel and not let all the pieces fall out everywhere.
Glue on the Potato page (I used the page on the right)
I glued the accessory pieces together (this is why I cut out two of everything, to make these pieces stronger)
I placed the potato and arms how I wanted them on the page, then removed the potato and glued the potato’s arms to the page
I placed the potato back over the arms how it was, and glued it down too (over the arms)
Glue on the Barrel page (I used the page on the left)
I placed and then glued the parts barrel onto the page. I glued around the edges to make sure I ended up with a clean and secure pouch.
Then I glued the band on top of the barrel, as well as the rhinestones.
Lastly I glued the square I used as the flap to keep all the pieces in
I sewed a button onto the barrel to secure the flap in place.


Other Pages
The other pages were less intense than those two:
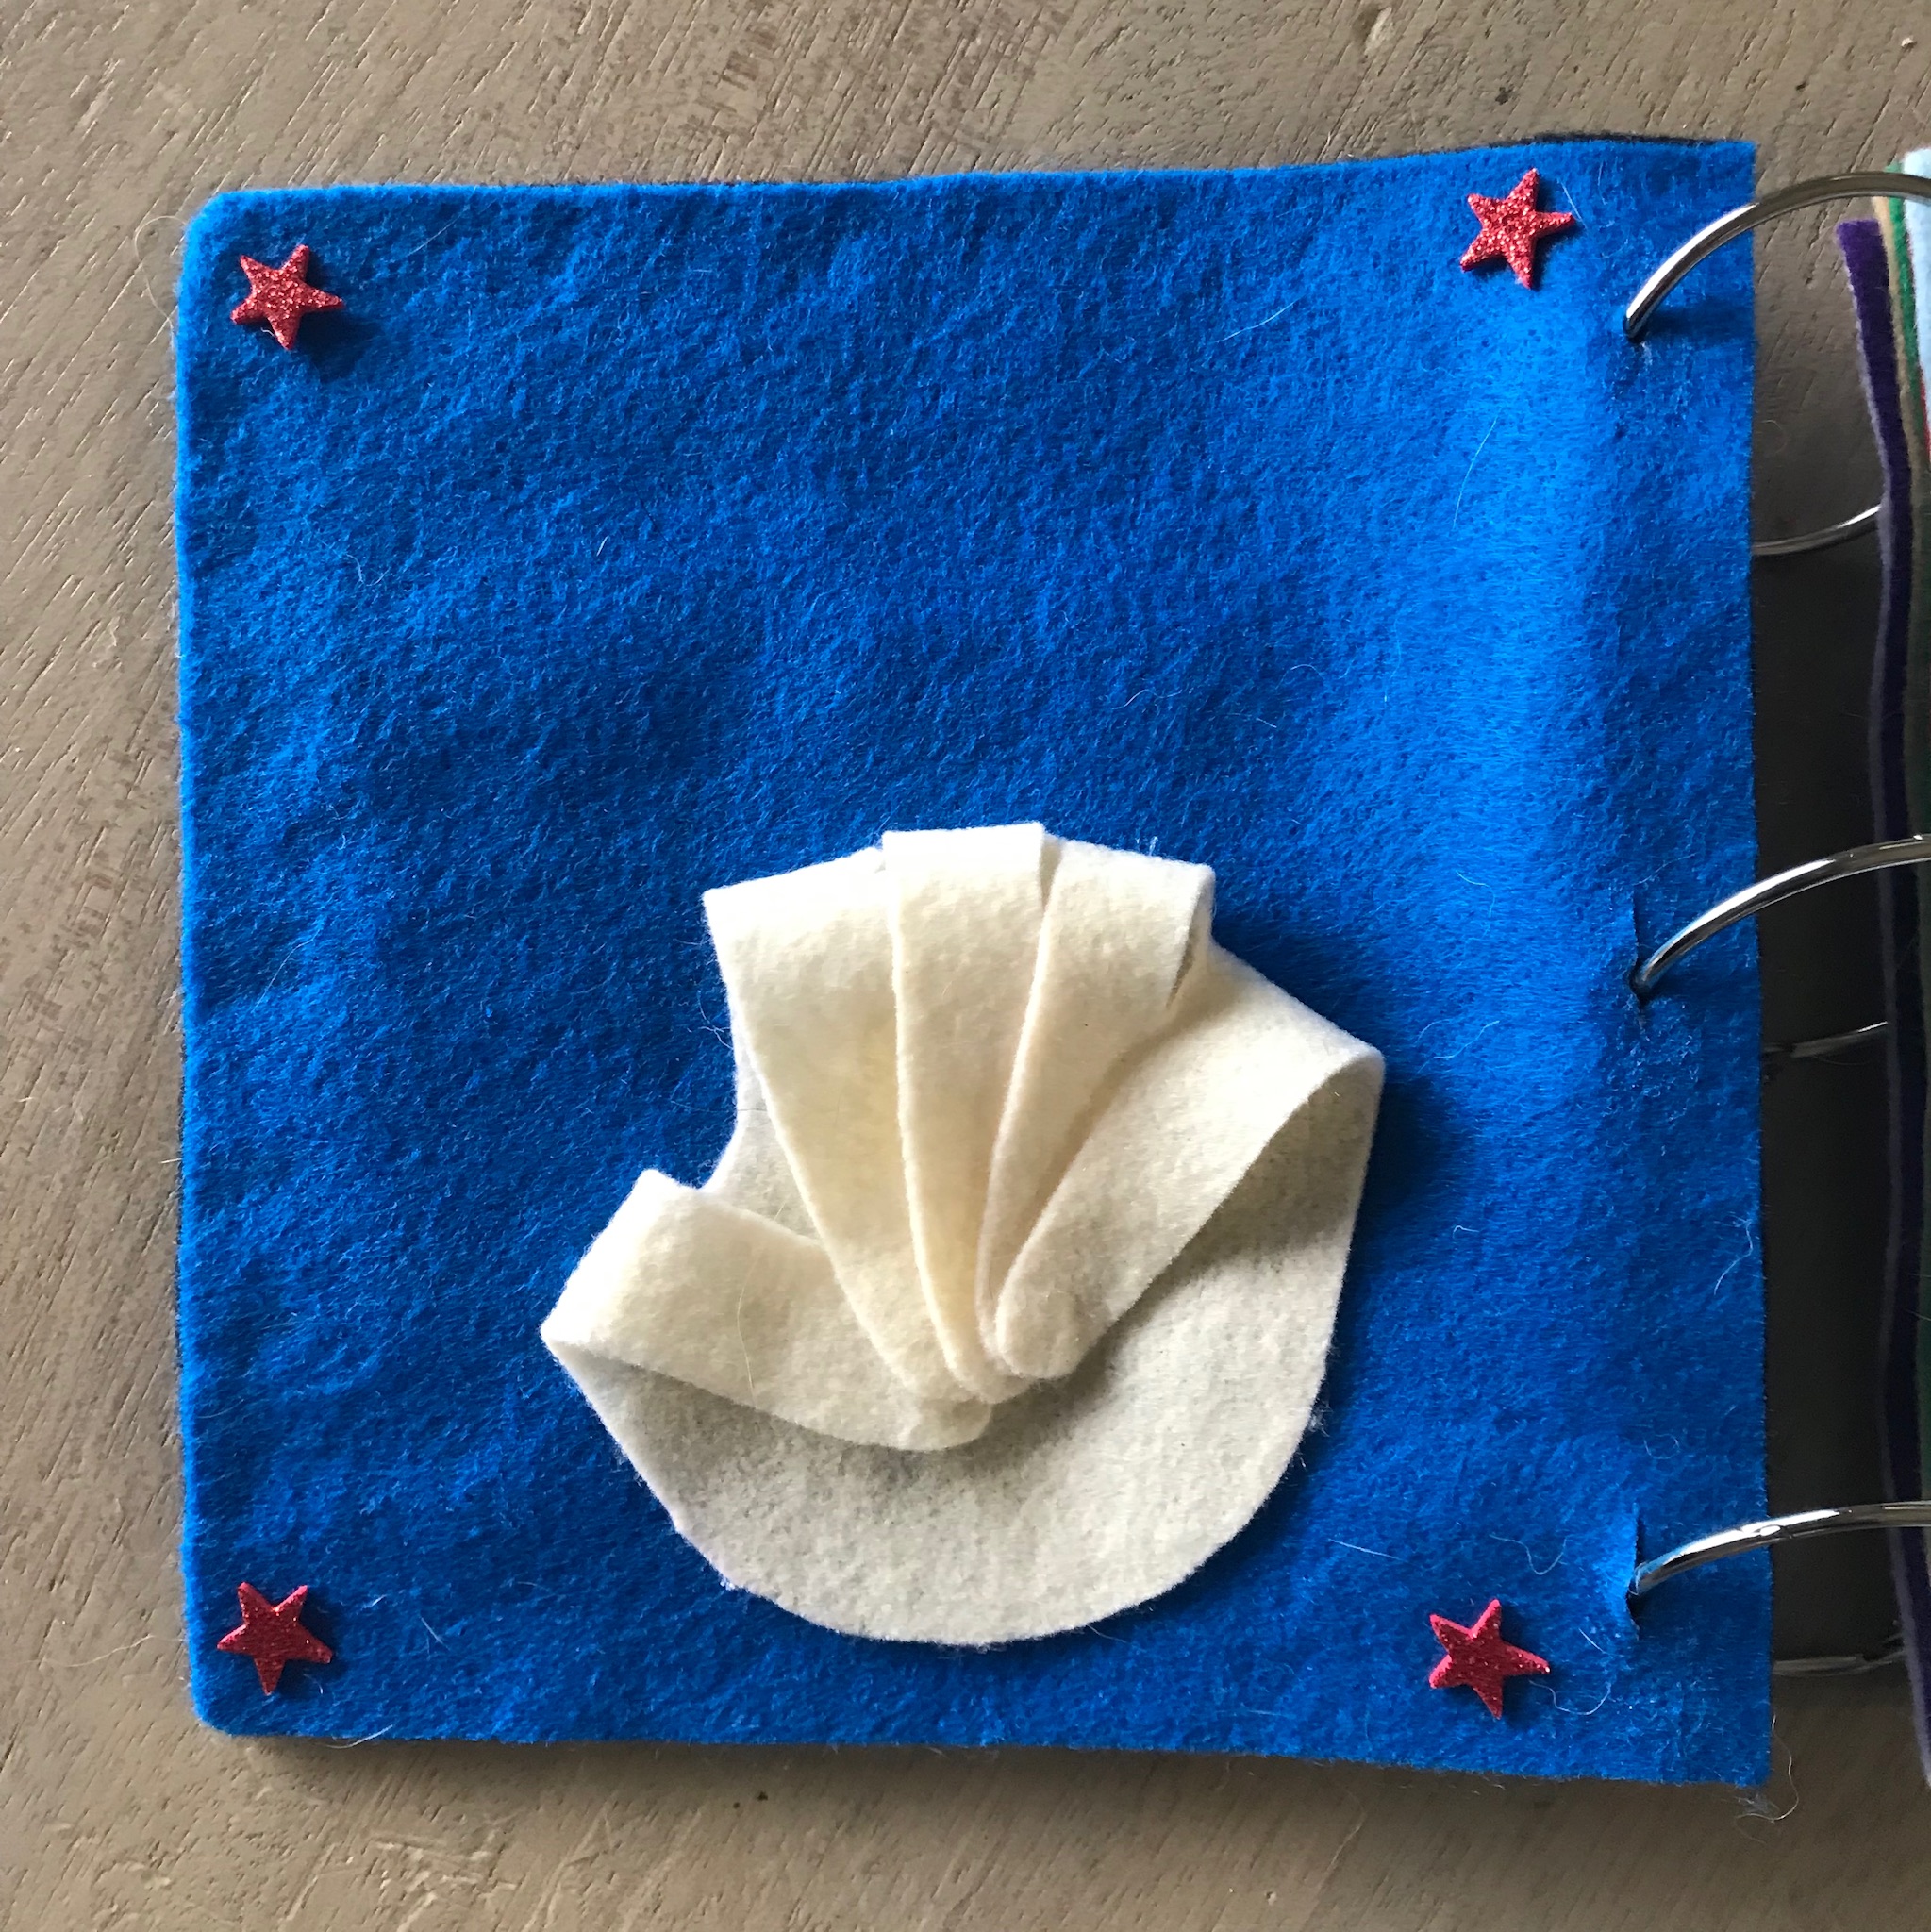
Hand Page: Felt, hot glue.
Forest Friends page: Felt stickers, sticky felt, hot glue, cotton string.
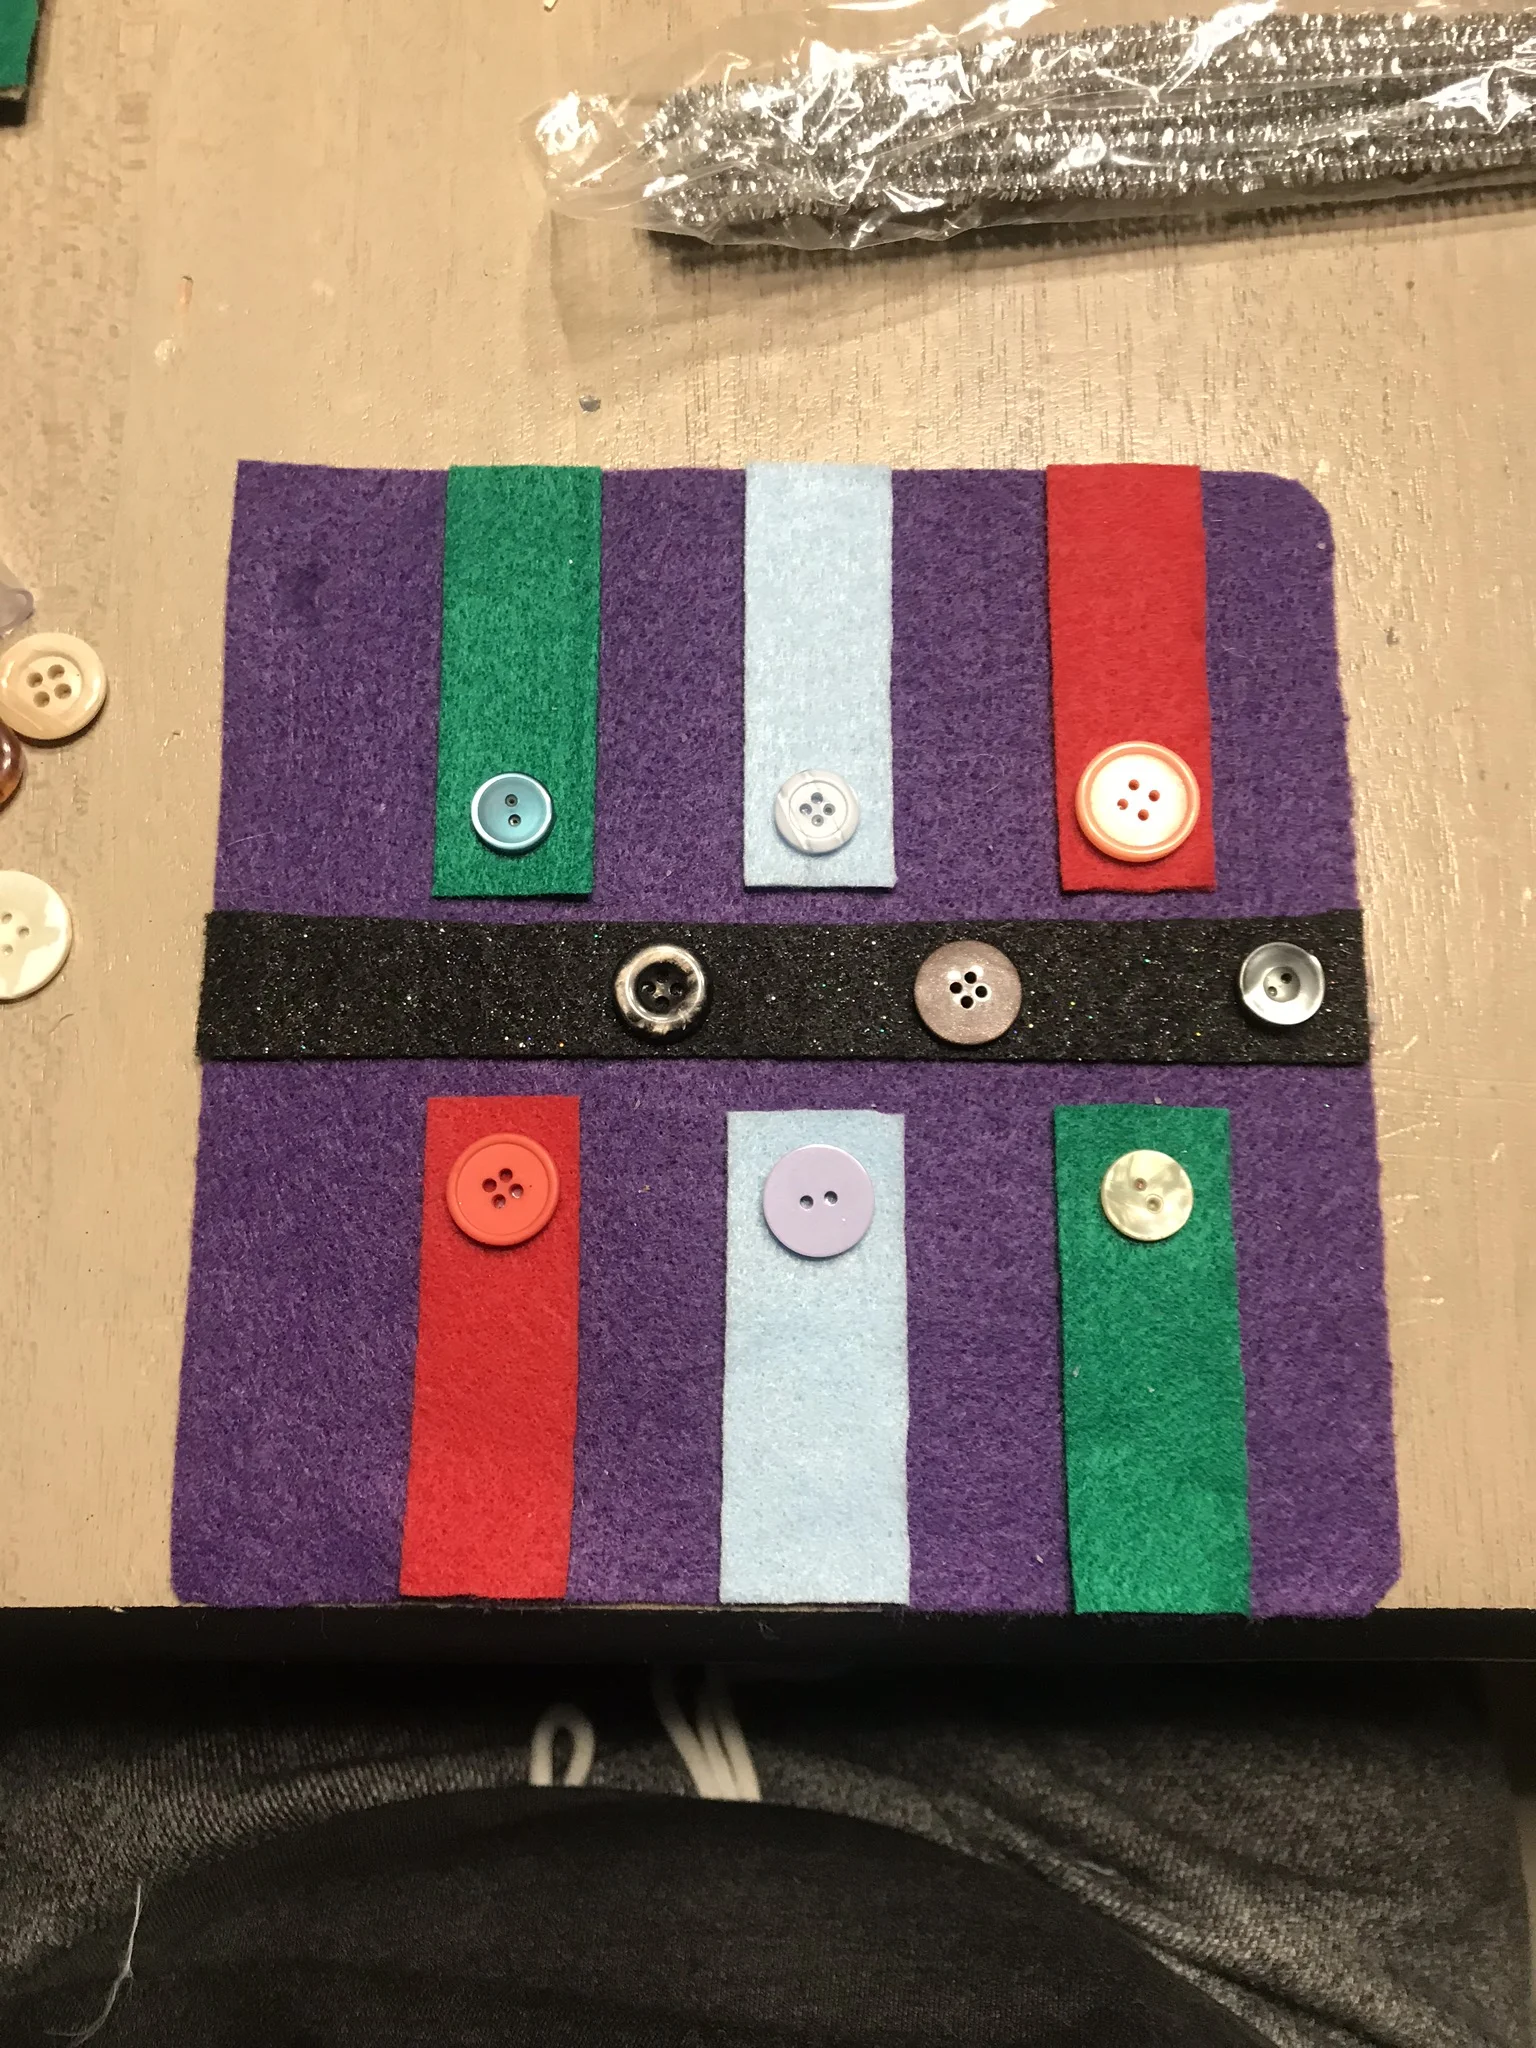
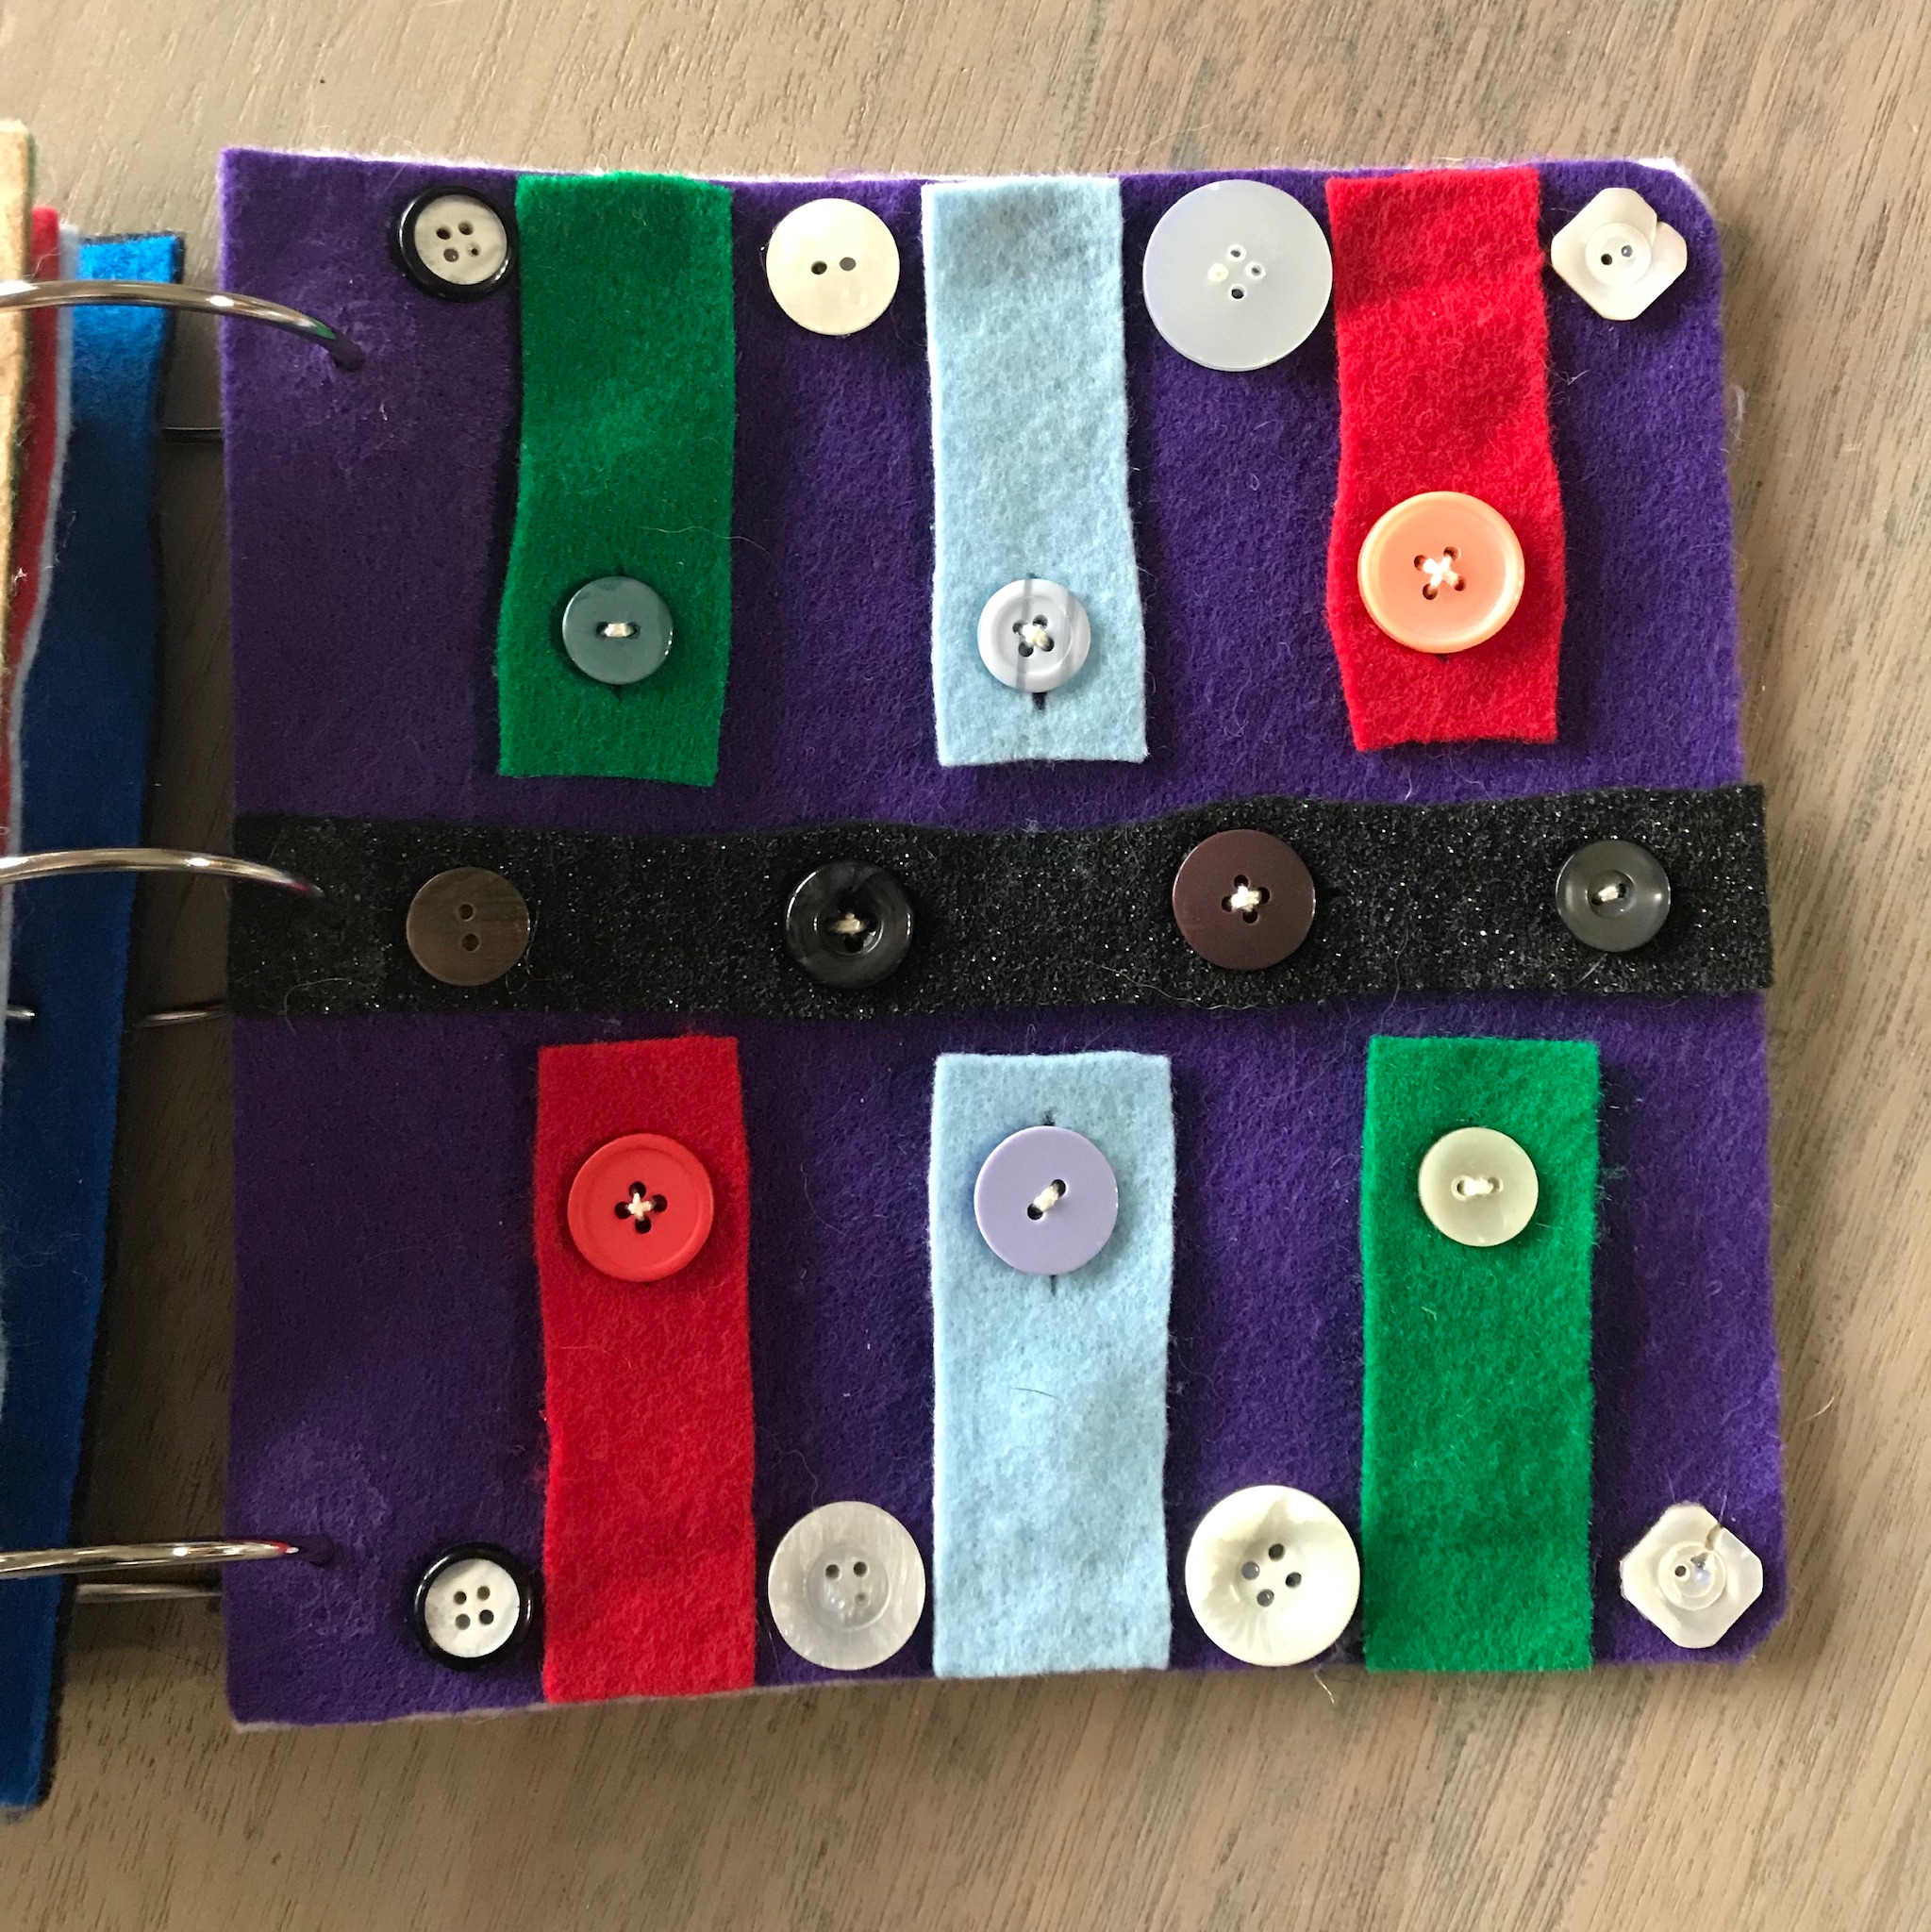
Buttons Page: Buttons, felt, cotton string, hot glue, embellishments.
Hand page: I traced my hand on felt, and cut it out. I glued the palm to the page so the fingers were free, and then added some sparkly stuff around the edges. I plan to write numbers under the fingers one of these days, to show her how to count.
Forest friends page:
I used sticky felt for the background, and leaf felt stickers for the leaves at the top and the forest friends themselves.
I placed/glued the leaves at the top, evenly spaced (3)
I placed the forest friends where I wanted them, made a mark on the page felt under the center of their heads, and then removed them. .
I then threaded my tapestry needle, and tied a couple knots in the end opposite the needle end.
I threaded the needle through at one of my marks, and made it long enough to reach the leaf at the top. Then I glued a 1cm x 1cm piece of felt to the back of the page where the string went through to make sure it stayed in place. Repeat x2 for the other two forest friends.
I placed the forest friends back on the page, and glued them under their heads where the string was coming out. I should have just glued the whole sticker, and probably still will.
I cut out 6 acorns, and over the loose end of each string, I glued two together (like an acorn/string sandwich).
Embellish!
Buttons page: I had some spare buttons. I sewed them onto the page, and then used felt scraps to make the button closures. I glued the felt down on one side of the felt so it was able to “flap”. Added lots of embellishments/design.