DIY Dream Catcher
/Our latest class was this super cute dream catcher, which is really an amazing use of popsicle sticks, string, and some pretty things.
This is another great craft to use up those random beads and things you have around the house!
Let’s have some fun.
The final product is so cute, and it’s fun & easy to make. Hang it in a window or on the wall, but whatever you do, hang it somewhere by your bed so it can catch all the bad dreams before they make it to you!
What’s in the kit:
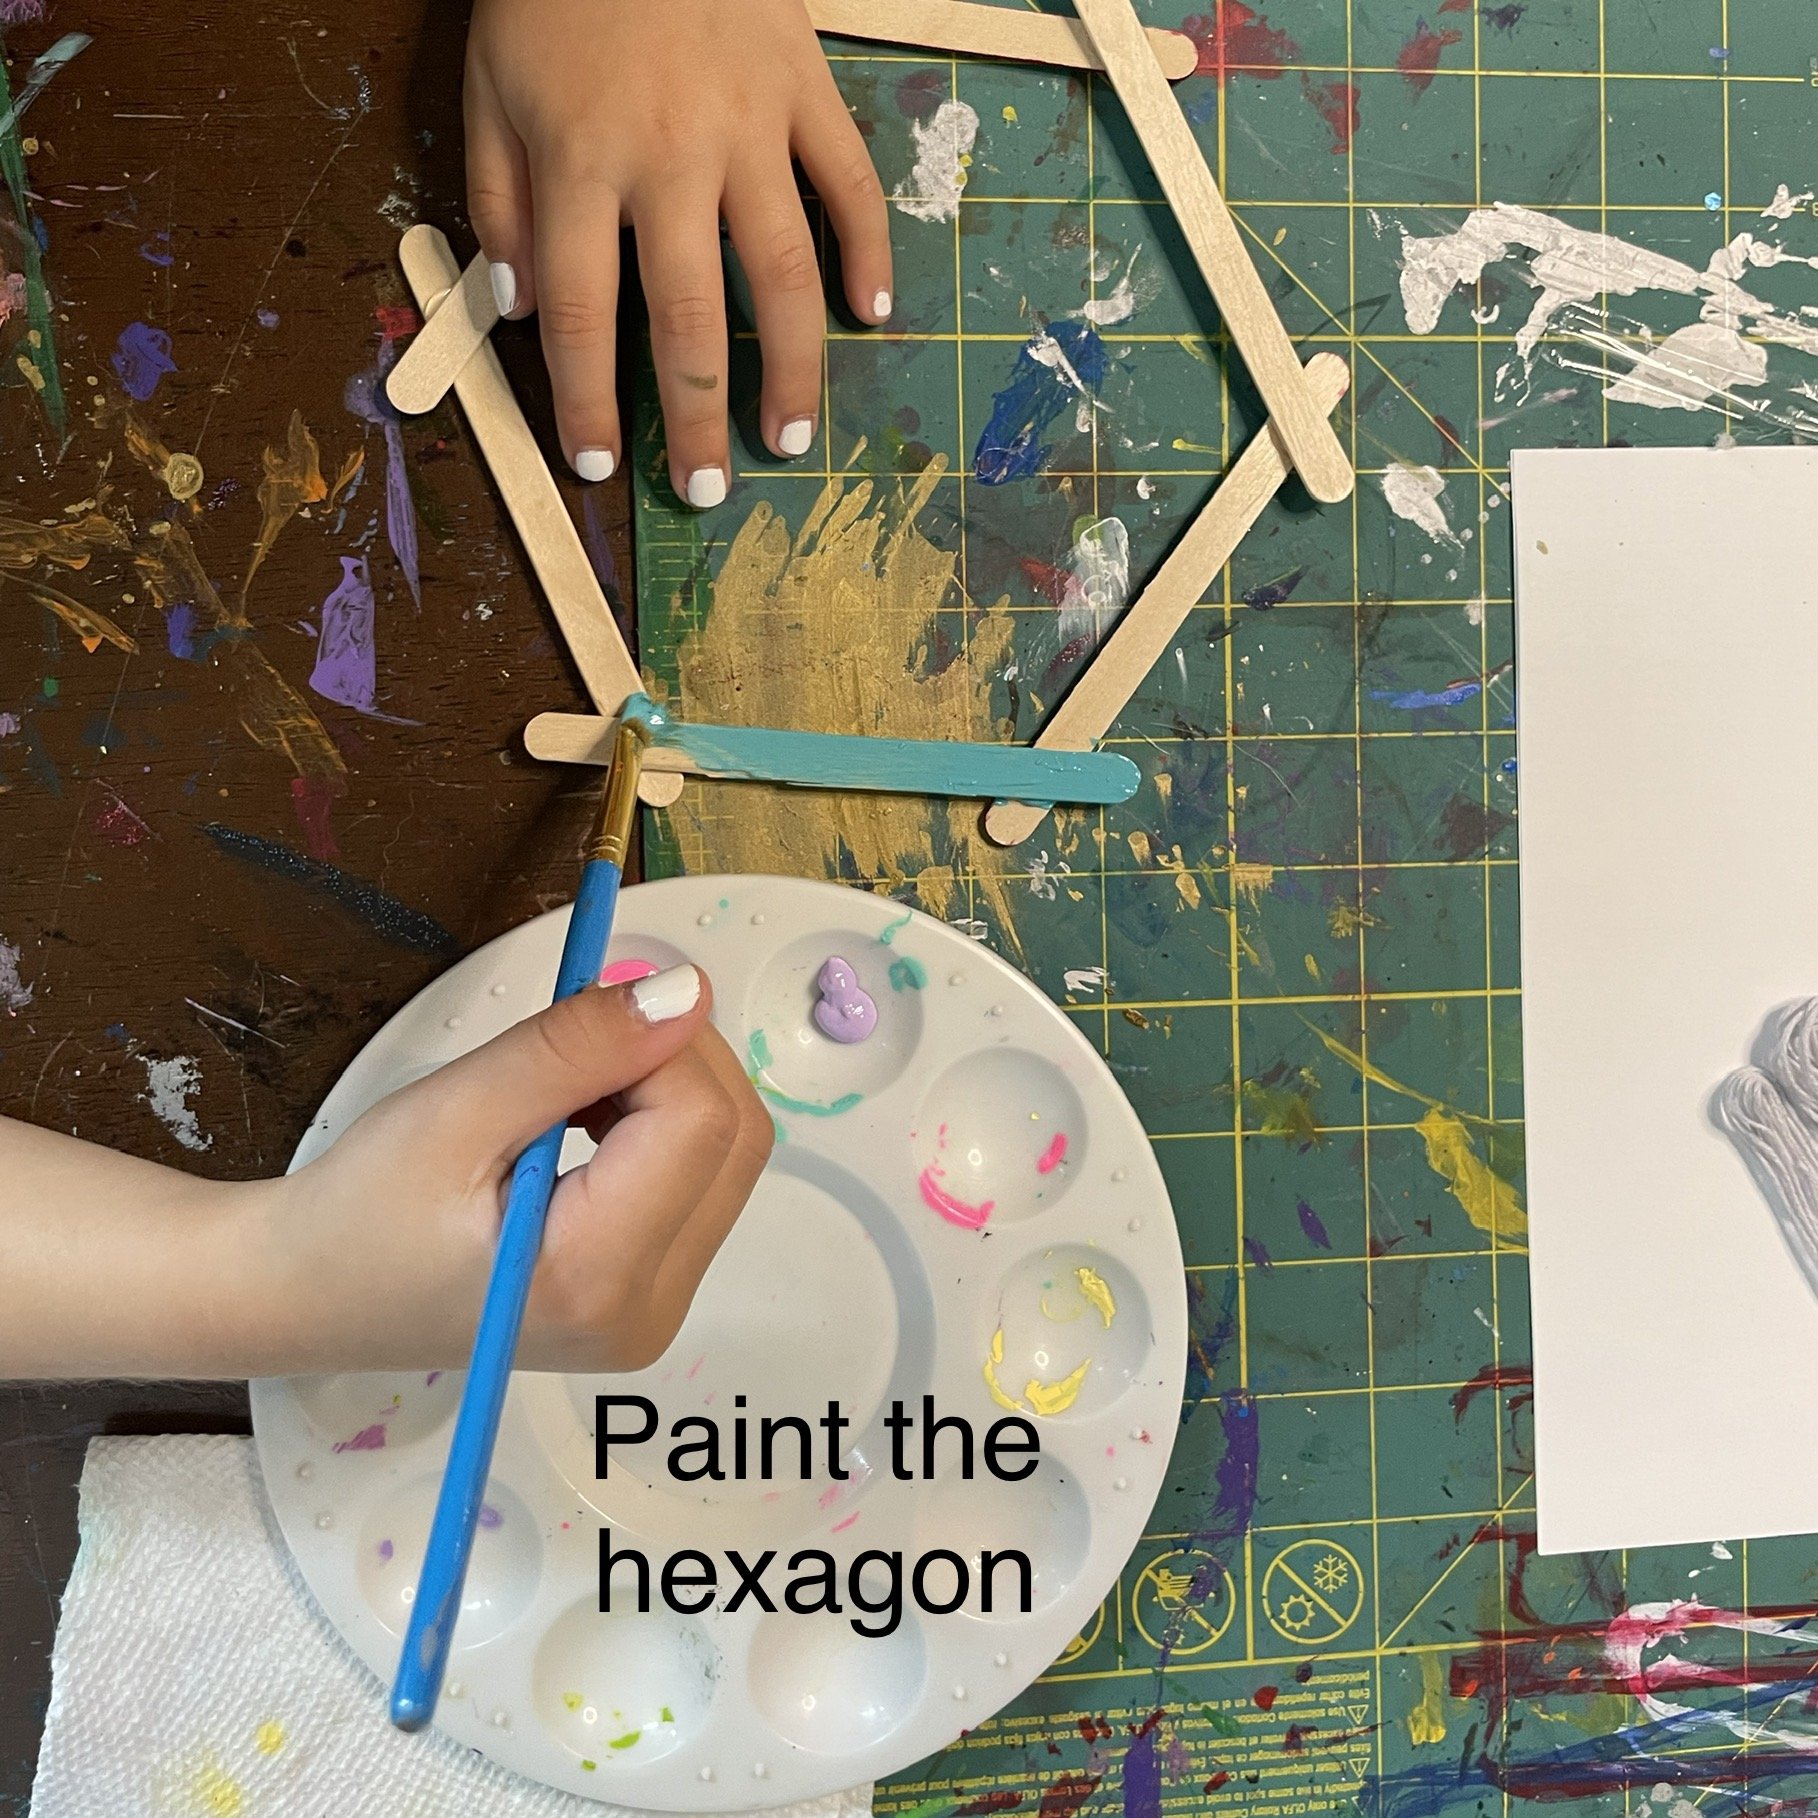
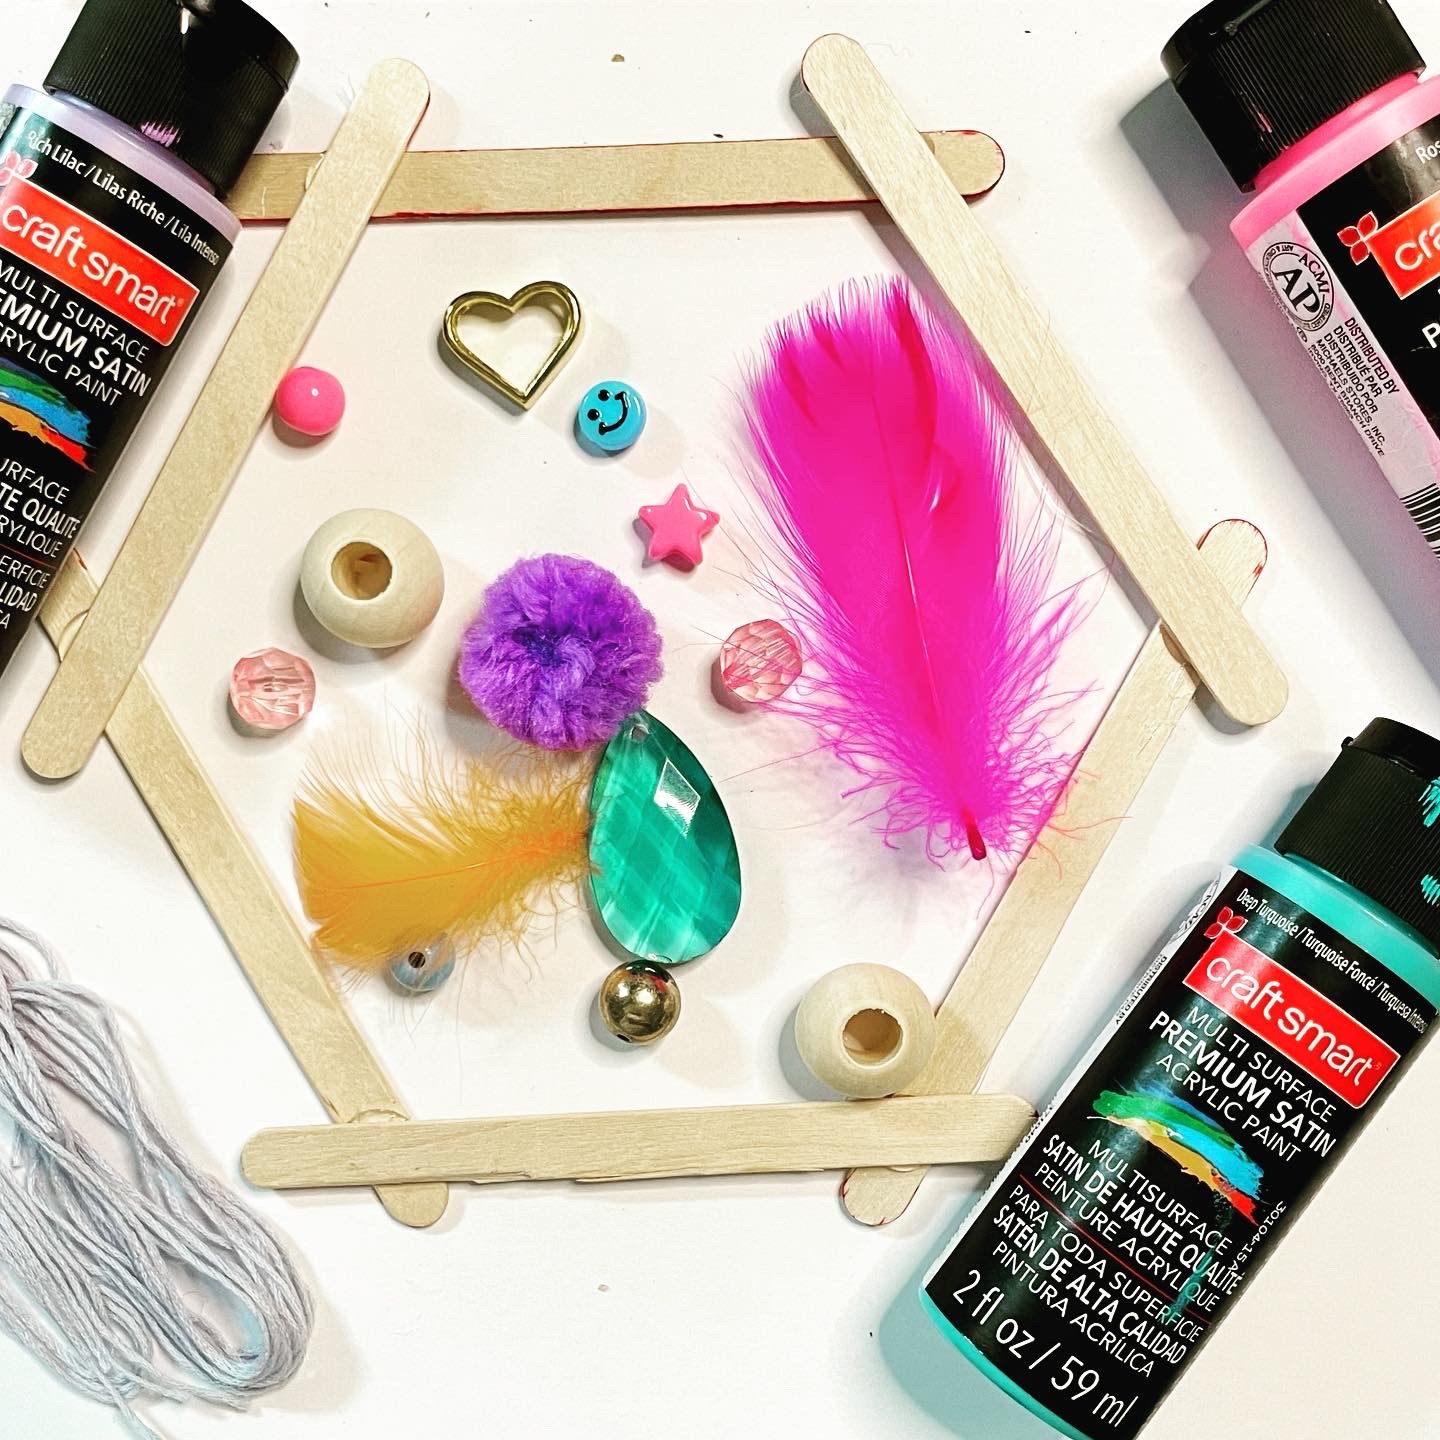
A popsicle stick hexagon
Embroidery floss, pre-cut to size
Paint & paintbrush
Assorted beads
2 feathers
1 pompom
1 tassel
2 brass charms
How To:
The Dream Catcher:
Paint the frame (the popsicle stick hexagon). You really only need to paint one side, but you could paint both if you want.
Paint the wooden beads (if you want).
Let them dry. For real, all the way dry.
Tie one end of the long string to an “elbow” of the frame, making sure the knot is on the bottom of the frame so it doesn’t show on the “pretty” side.
String a bead, and stretch the string from one side to the other across the hexagon. Hook it around an elbow, or go around the other side to change direction.
This is where instructions deviate from pictures - learn from my woulda-shoulda:
Keep the string on top of the wooden frame as much as possible by using the elbow joints to wrap around and go a different direction instead of going around the back of the hexagon. You’ll have to go behind a couple times depending on the look you’re going for, but keep it to a minimum, and definitely don’t do it every time.
Here’s why - every time you go in front, string a bead (or two), keeping the bead(s) inside the hexagon while you switch direction with the string. You want to keep all of the beads on the front, to create the dream catcher face. It doesn’t matter how the beads are arranged in the web yet, we’ll do that later. Just make sure you like your web.
You have more string and beads than you need. Stop when you like it!
Use hot glue to hold the end of the string in place somewhere on the back of the hexagon.
Use more hot glue on the back of the hexagon to keep the strings in place all the way around.
With the pretty side up, arrange your beads. Hold it up in front of you to let gravity do it’s thing, and turn it to each side to identify the top and bottom of the dream catcher (based on how you like it best). Set it down in front of you.
The Hanging Strings - Prep:
You have three shorter strings in the kit. Lay them out, and then pick one up.
Fold it in half.
These are your dream catcher “strings” - Place the looped side under the left side of the bottom stick (remember you picked the bottom stick earlier), and then pick up the two ends and put them through the loop over the hexagon. See the pics if this is confusing, because it’s actually very simple and I promise you’ve done this “knot” before today.
Slide that string as far left as possible and make sure the knot is tight. Put a dot of hot glue on the back to tack it in place.
Do the last two steps again, but on the right side.
Do the same two steps again, but in the middle.
The Hanging Strings - Deco:
This is really up to you. I’ll give you some pointers - read through them, then plan your layout.
The pompom - tie a knot in the spot where you want the pompom to be. Split the strings around a pompom and tie another knot.
The tassel -
The dangling crystal - I recommend both strings through a bead first, then one string through the crystal, then tie it in a knot to the other string.
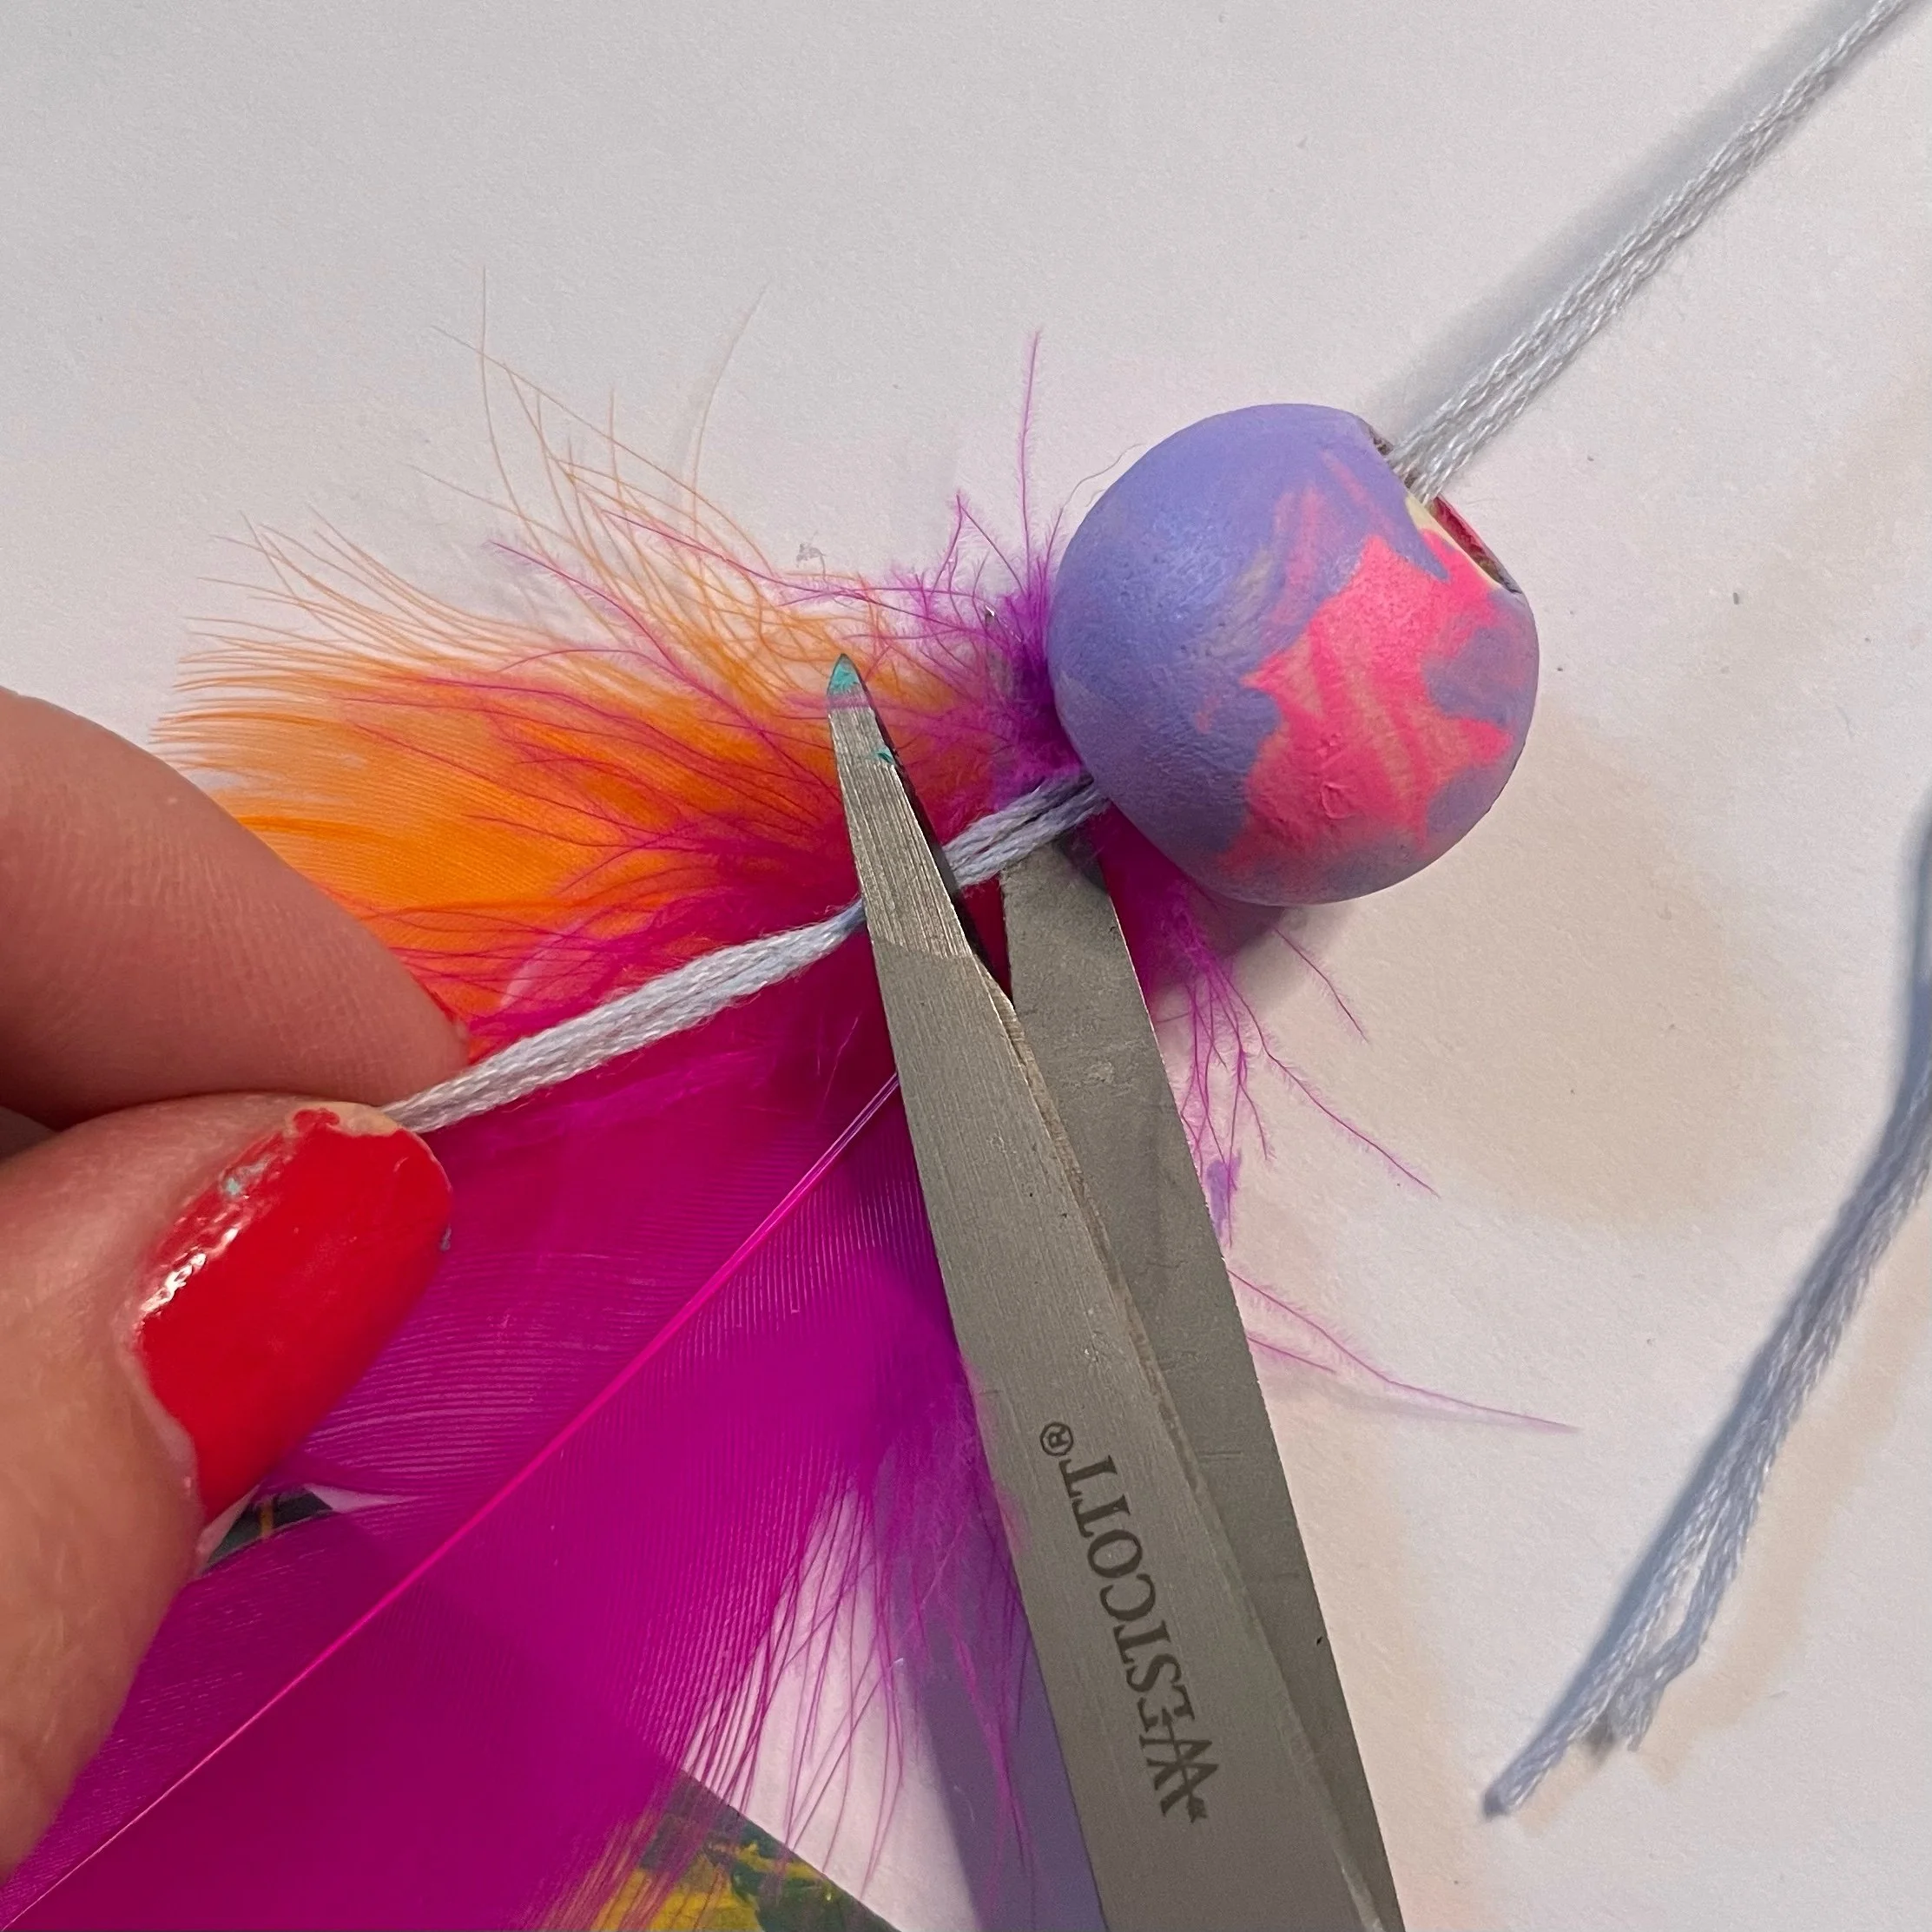
The feathers - use these with a wooden bead. I put both strings through the bead, then split them under and ran them back through the top. This helps hold the bead level instead of tilting to one side. Then I used hot glue to hold the bead and string together. Another squirt of hot glue in the bottom of the bead for the feathers to stick to, then finally the feathers (carefully placed).
The other beads - you should have more than you need. Use them however you like on any of the strings.
Pick it up, and enjoy it!!