DIY Mosaic Stepping Stones
/

My sister in law, and the girls’ godmother (so she gets the prestigious title of Nina), got the girls DIY mosaic stepping stone kits for Christmas. She went above and beyond though, because she also got extra glass and pretty charms - she knew the kit would be sparse, and she was right.
With that, my first tip, get extra glass!
I was a little intimidated by this craft. Anything that requires mixing something up that then immediately starts to dry, so therefore there’s a timer, adds pressure that I’m not a huge fan of. I’d never really worked with concrete like this, so I didn’t know how long my clock was (i.e. how much time I had to place the glass). Turns out it’s plenty long! If you’ve been thinking about trying mosaics, do it! I’d definitely do more, I like it a lot more than resin crafts, though there are similarities.
Mosaics remind me of puzzles, but with less rules. More freeform - chaotic almost. But then they’re not; we made shapes and pictures!
I have a stepping stone out front that my mom made before she passed, and now I get to put these out there with it once they’re fully cured <3
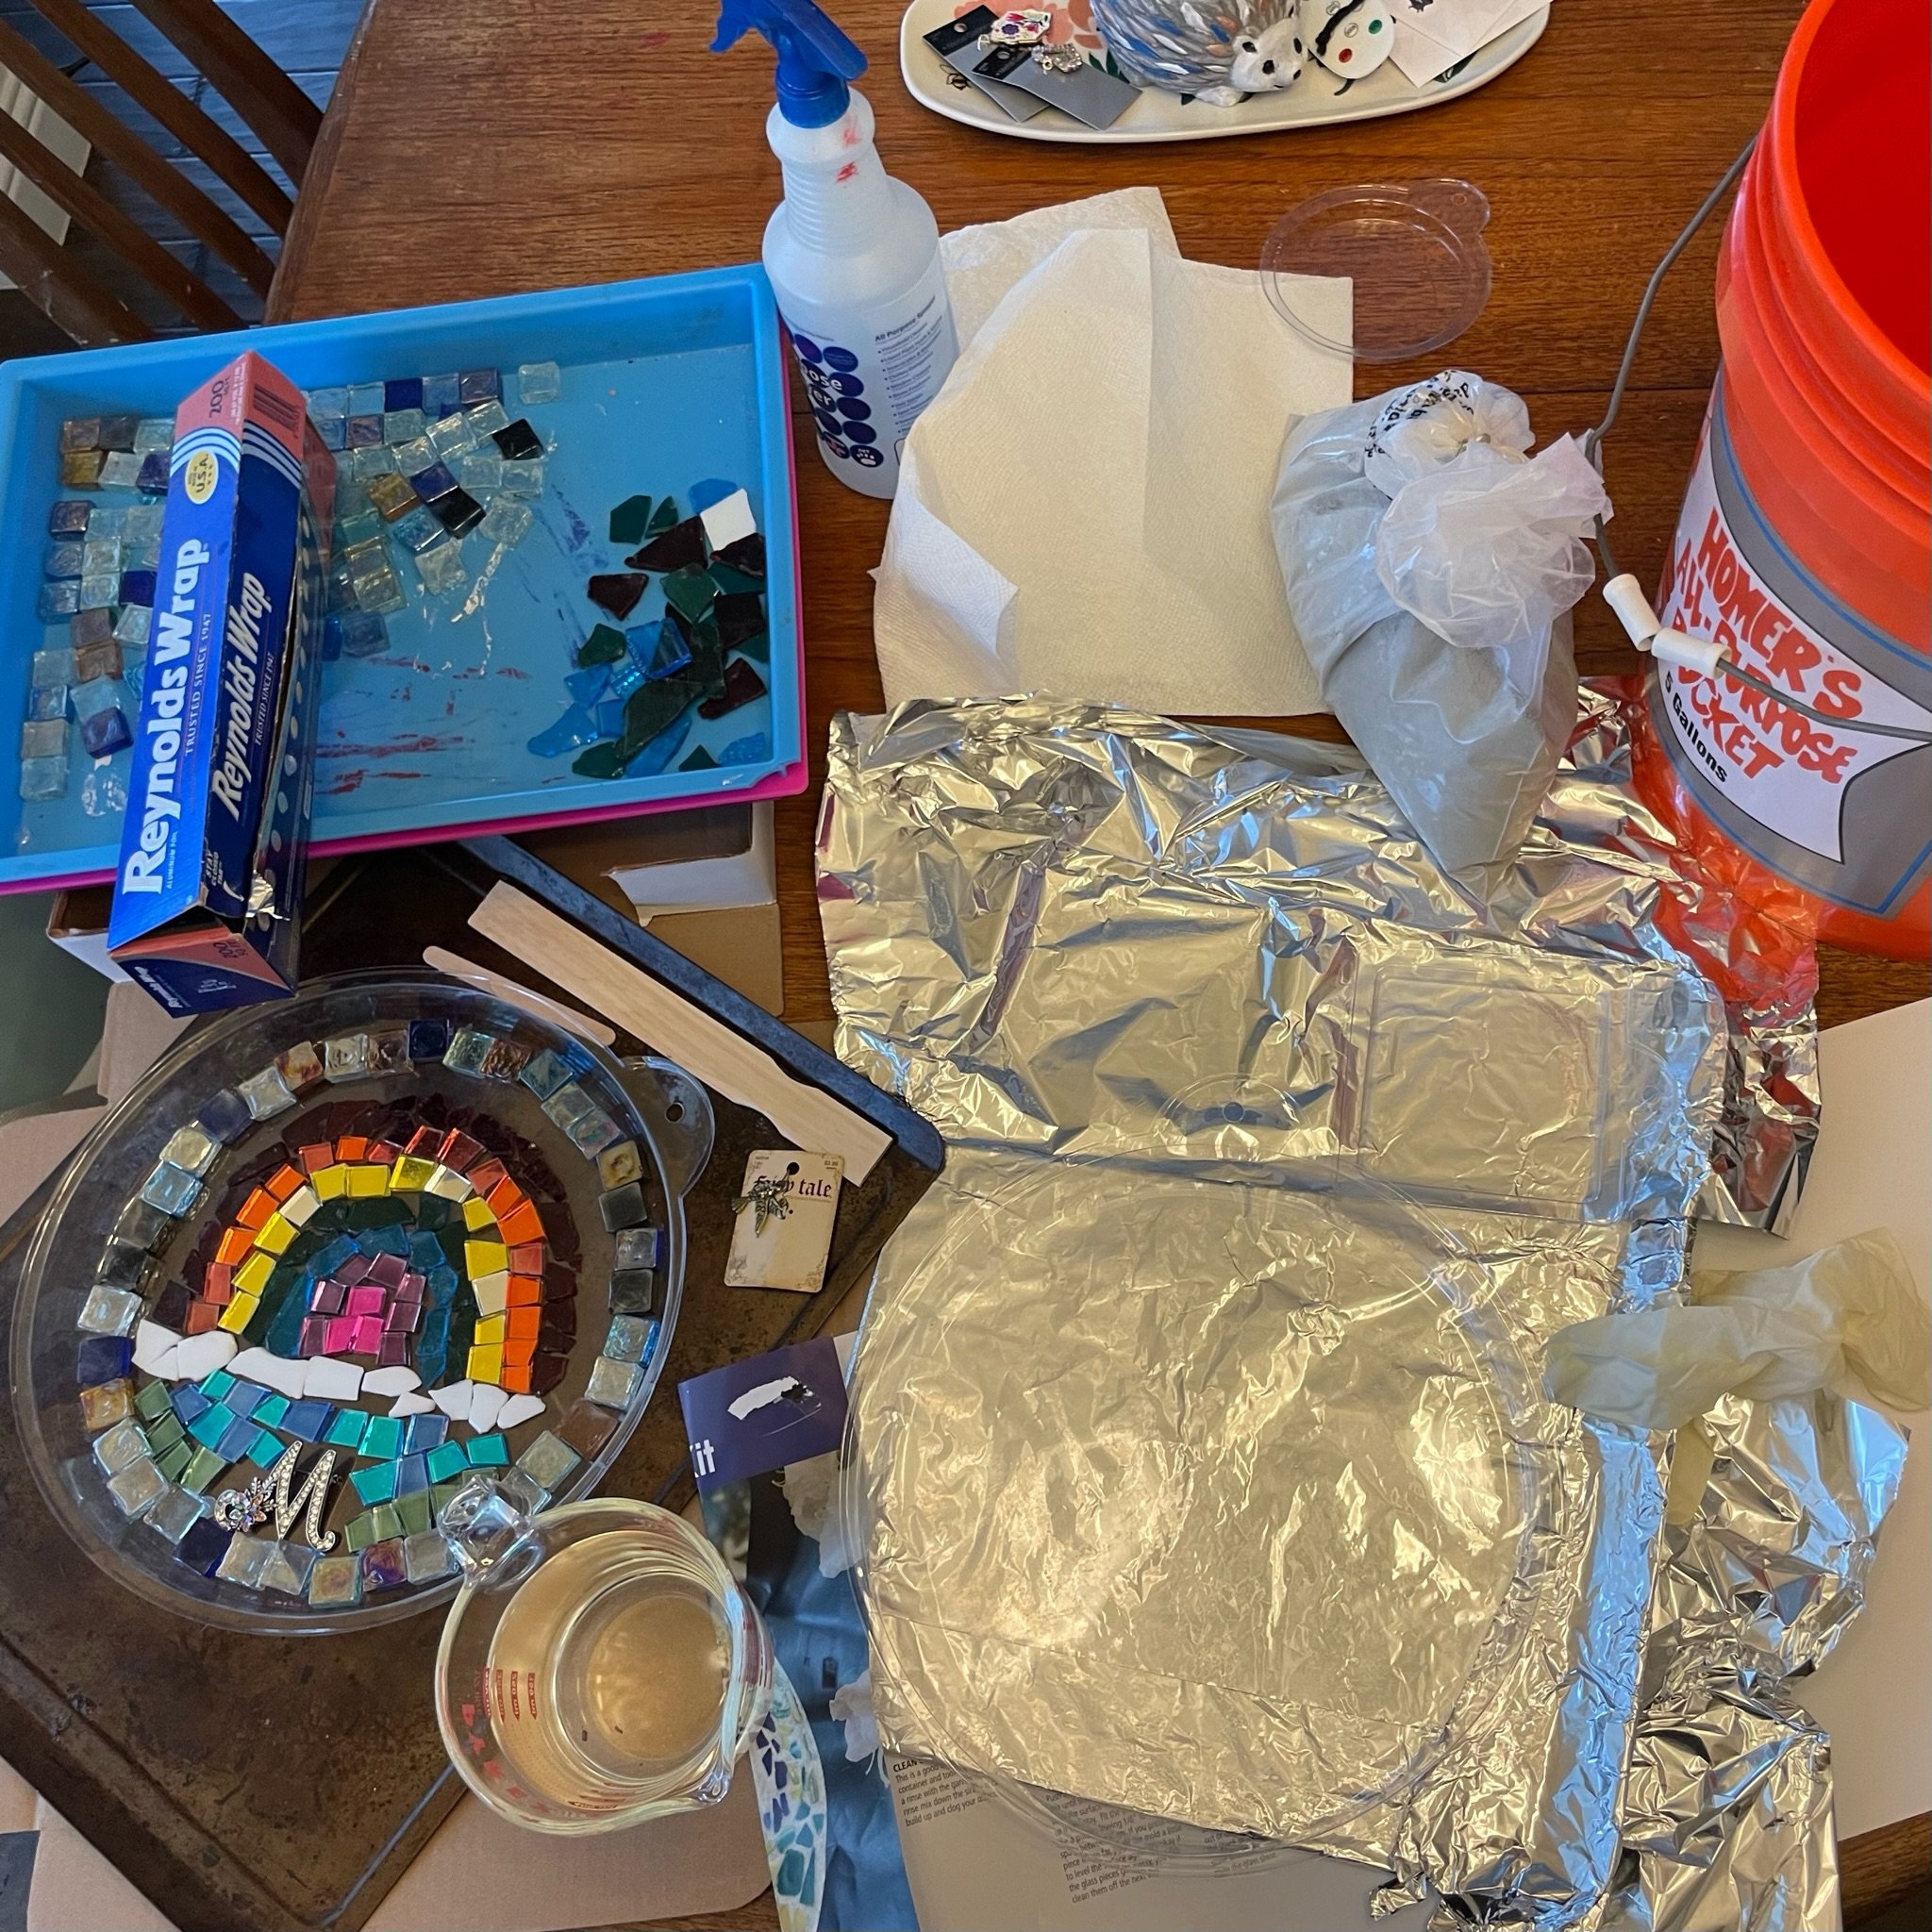
Materials:
Mosaic Stepping Stone kit - comes with powdered concrete, some glass, mixing sticks, a mold, letter/number stamps, and a pattern
Water - each stepping stone required about 2 1/3 cups
Extra glass & charms
A bucket to mix the concrete in
Foil & parchment paper for prep/cleanup
Something flat and rigid to put the finished stone on to transport/dry - I used a big cookie sheet
Latex gloves
Extra paper towels for cleanup
The Method
The method is the generally the same for both stones, but of course I learned some lessons with the first one. I’ll include those in the steps below, so you may notice a bit of a mix of steps from stone 1 and stone 2.
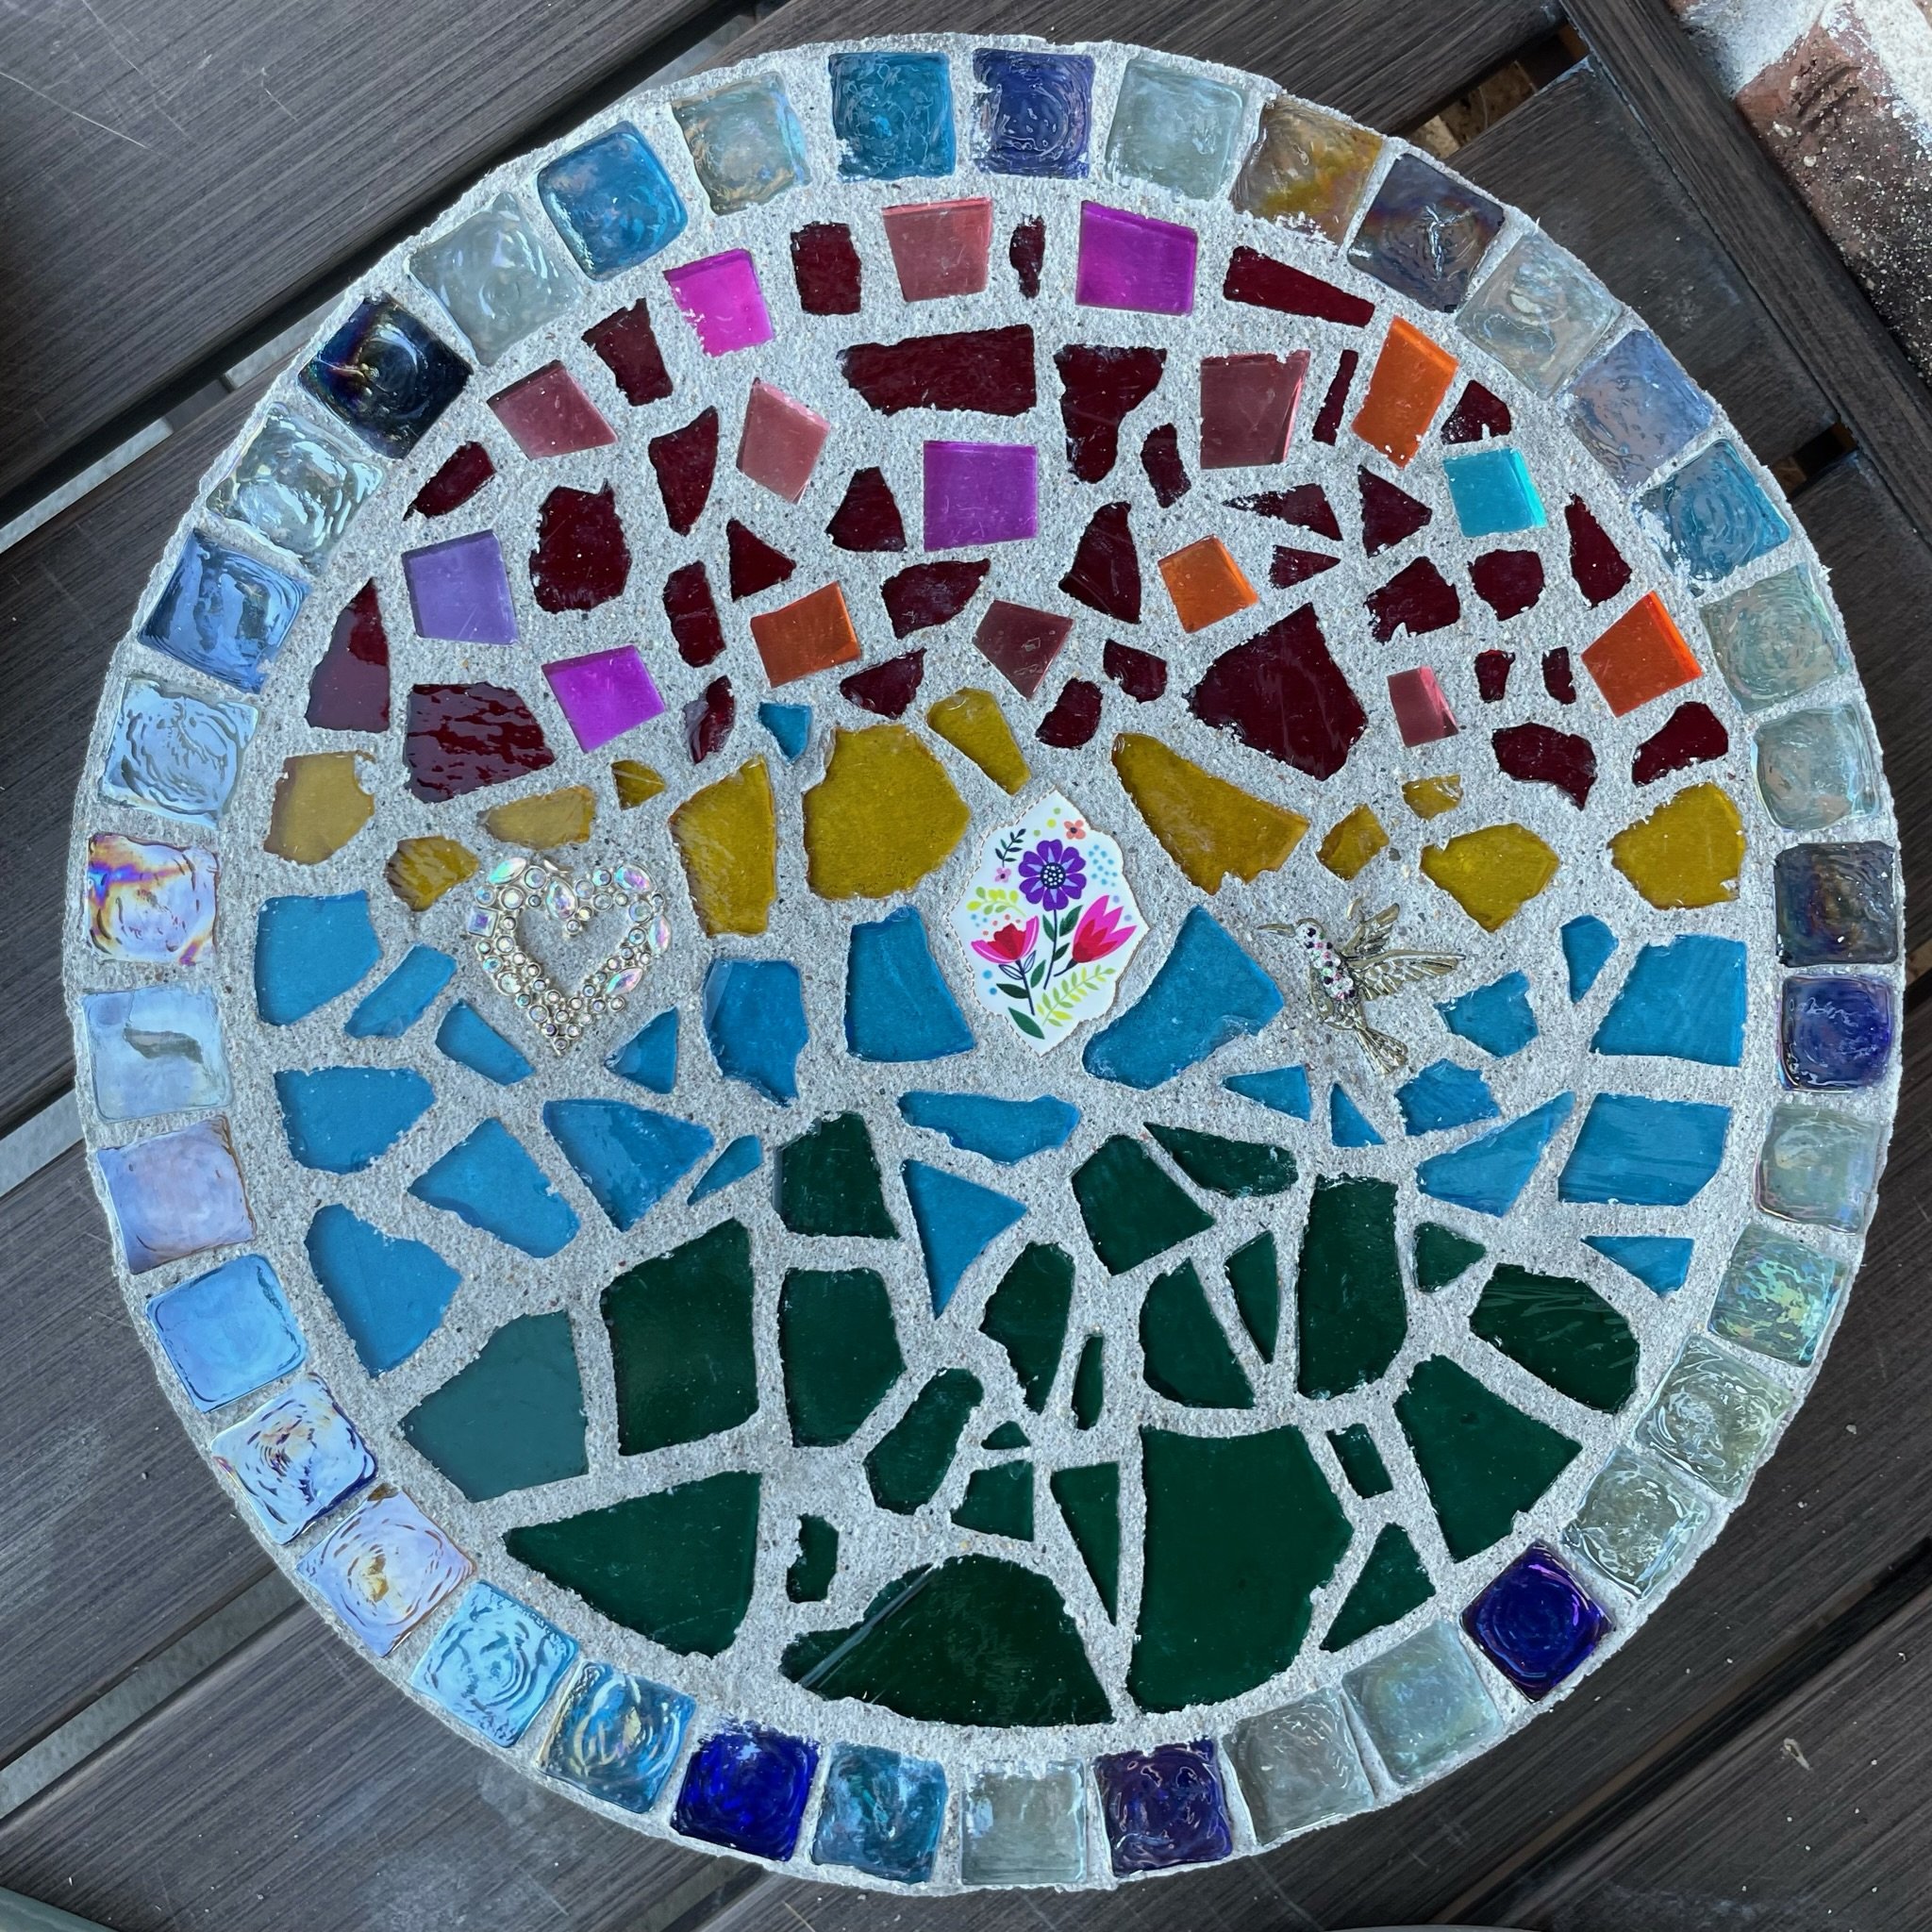
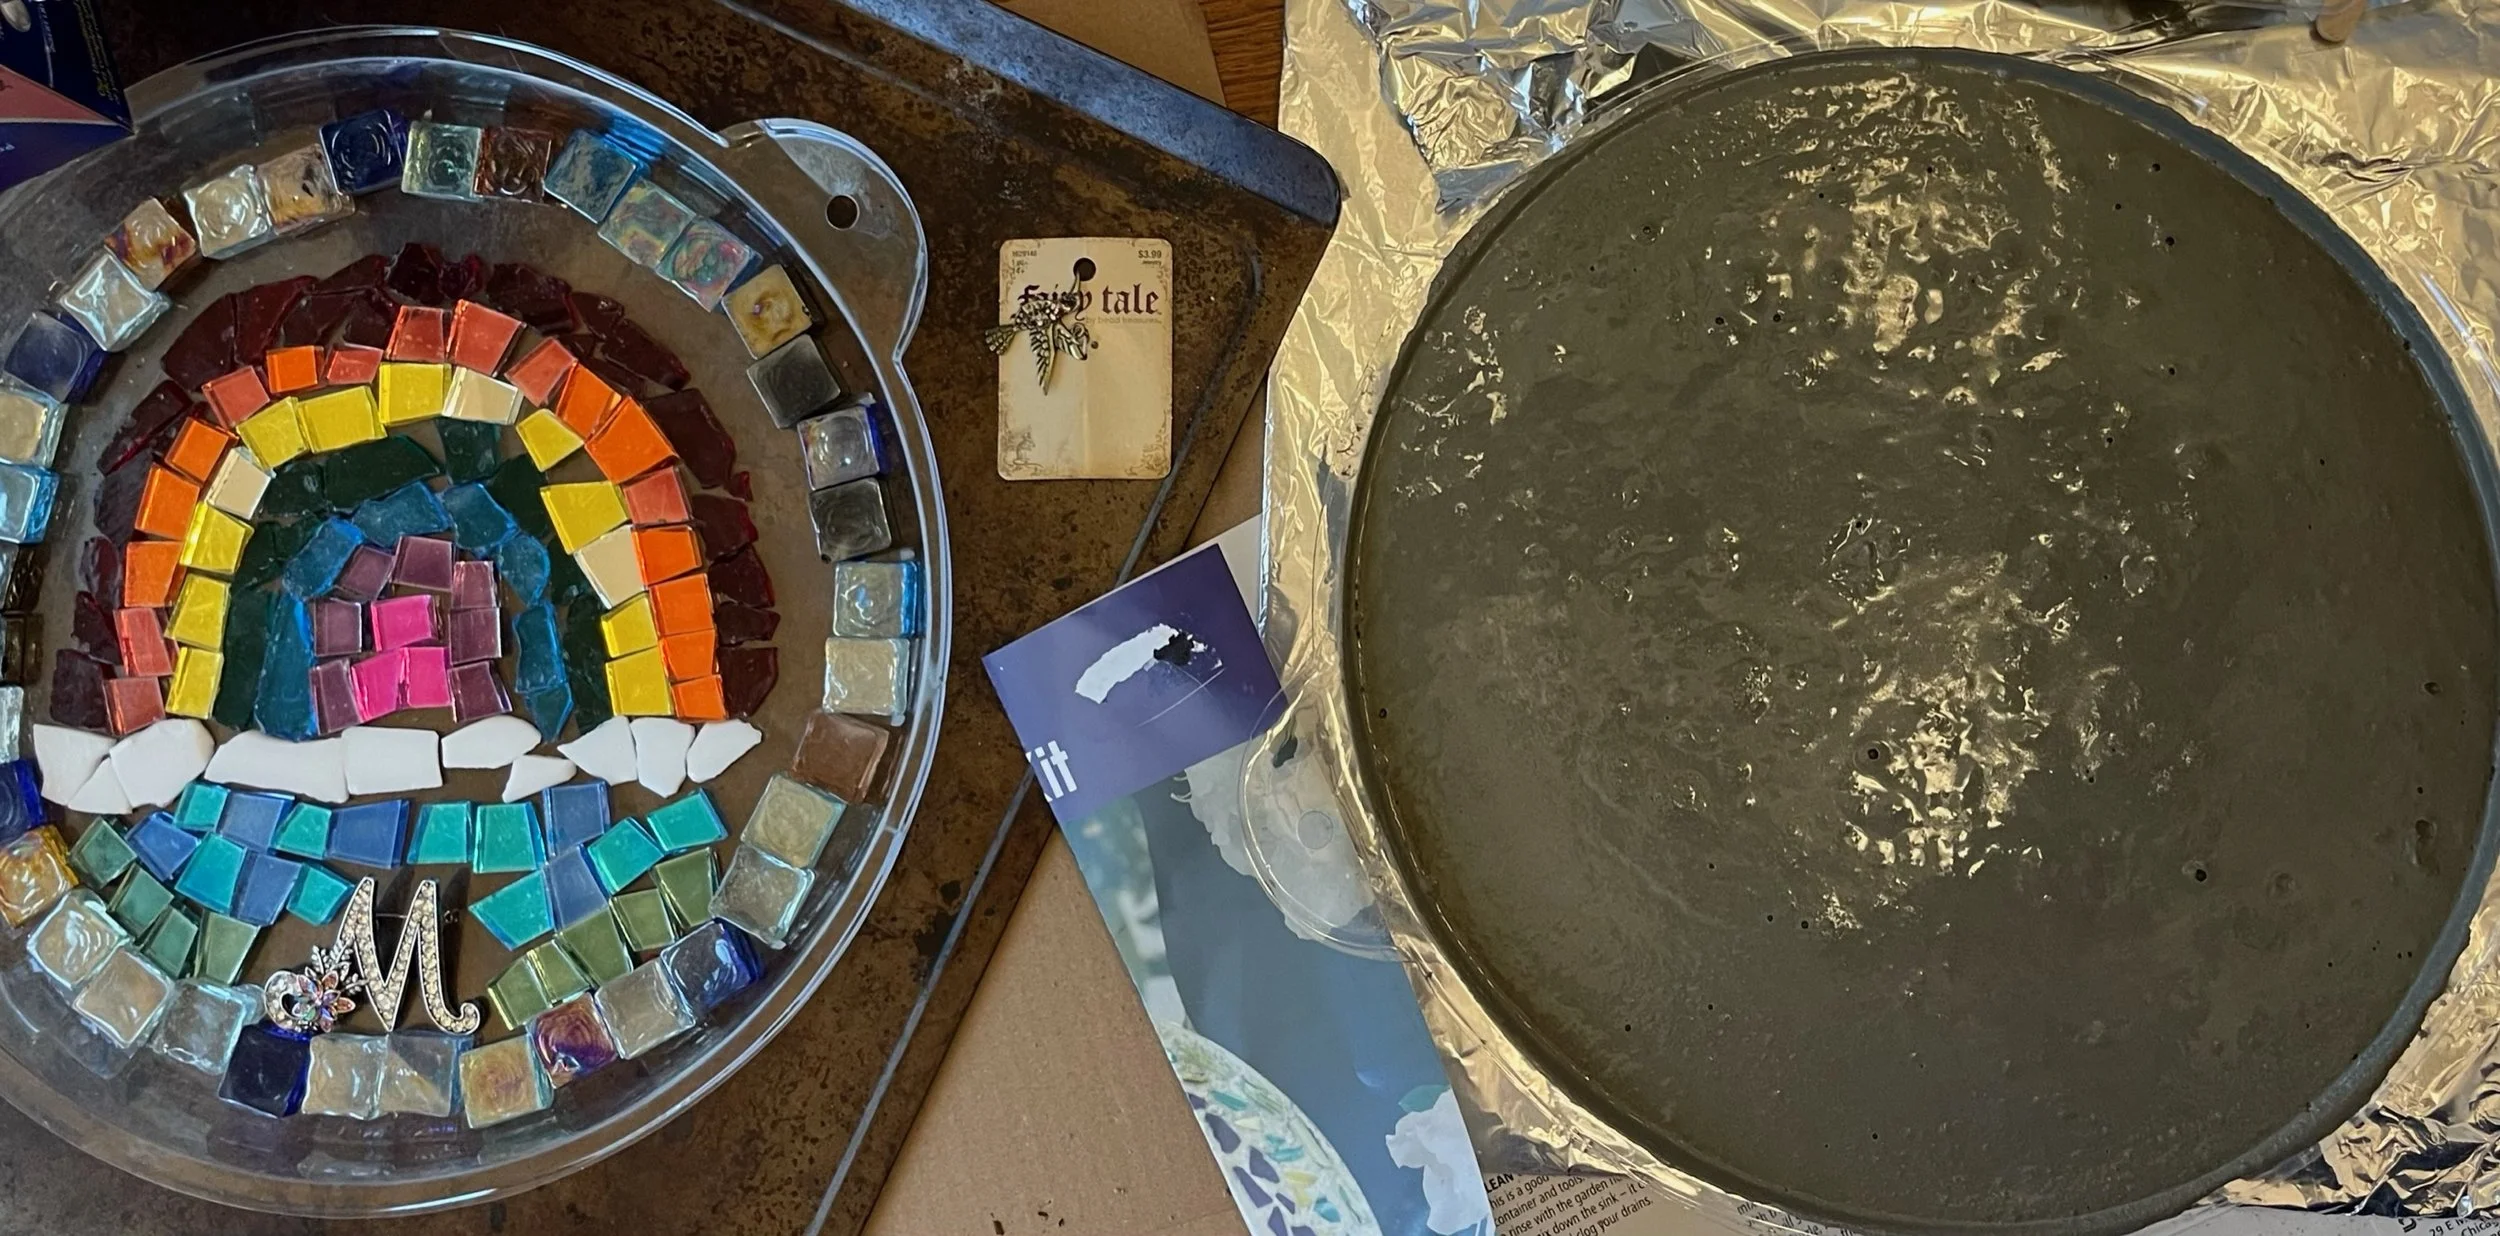
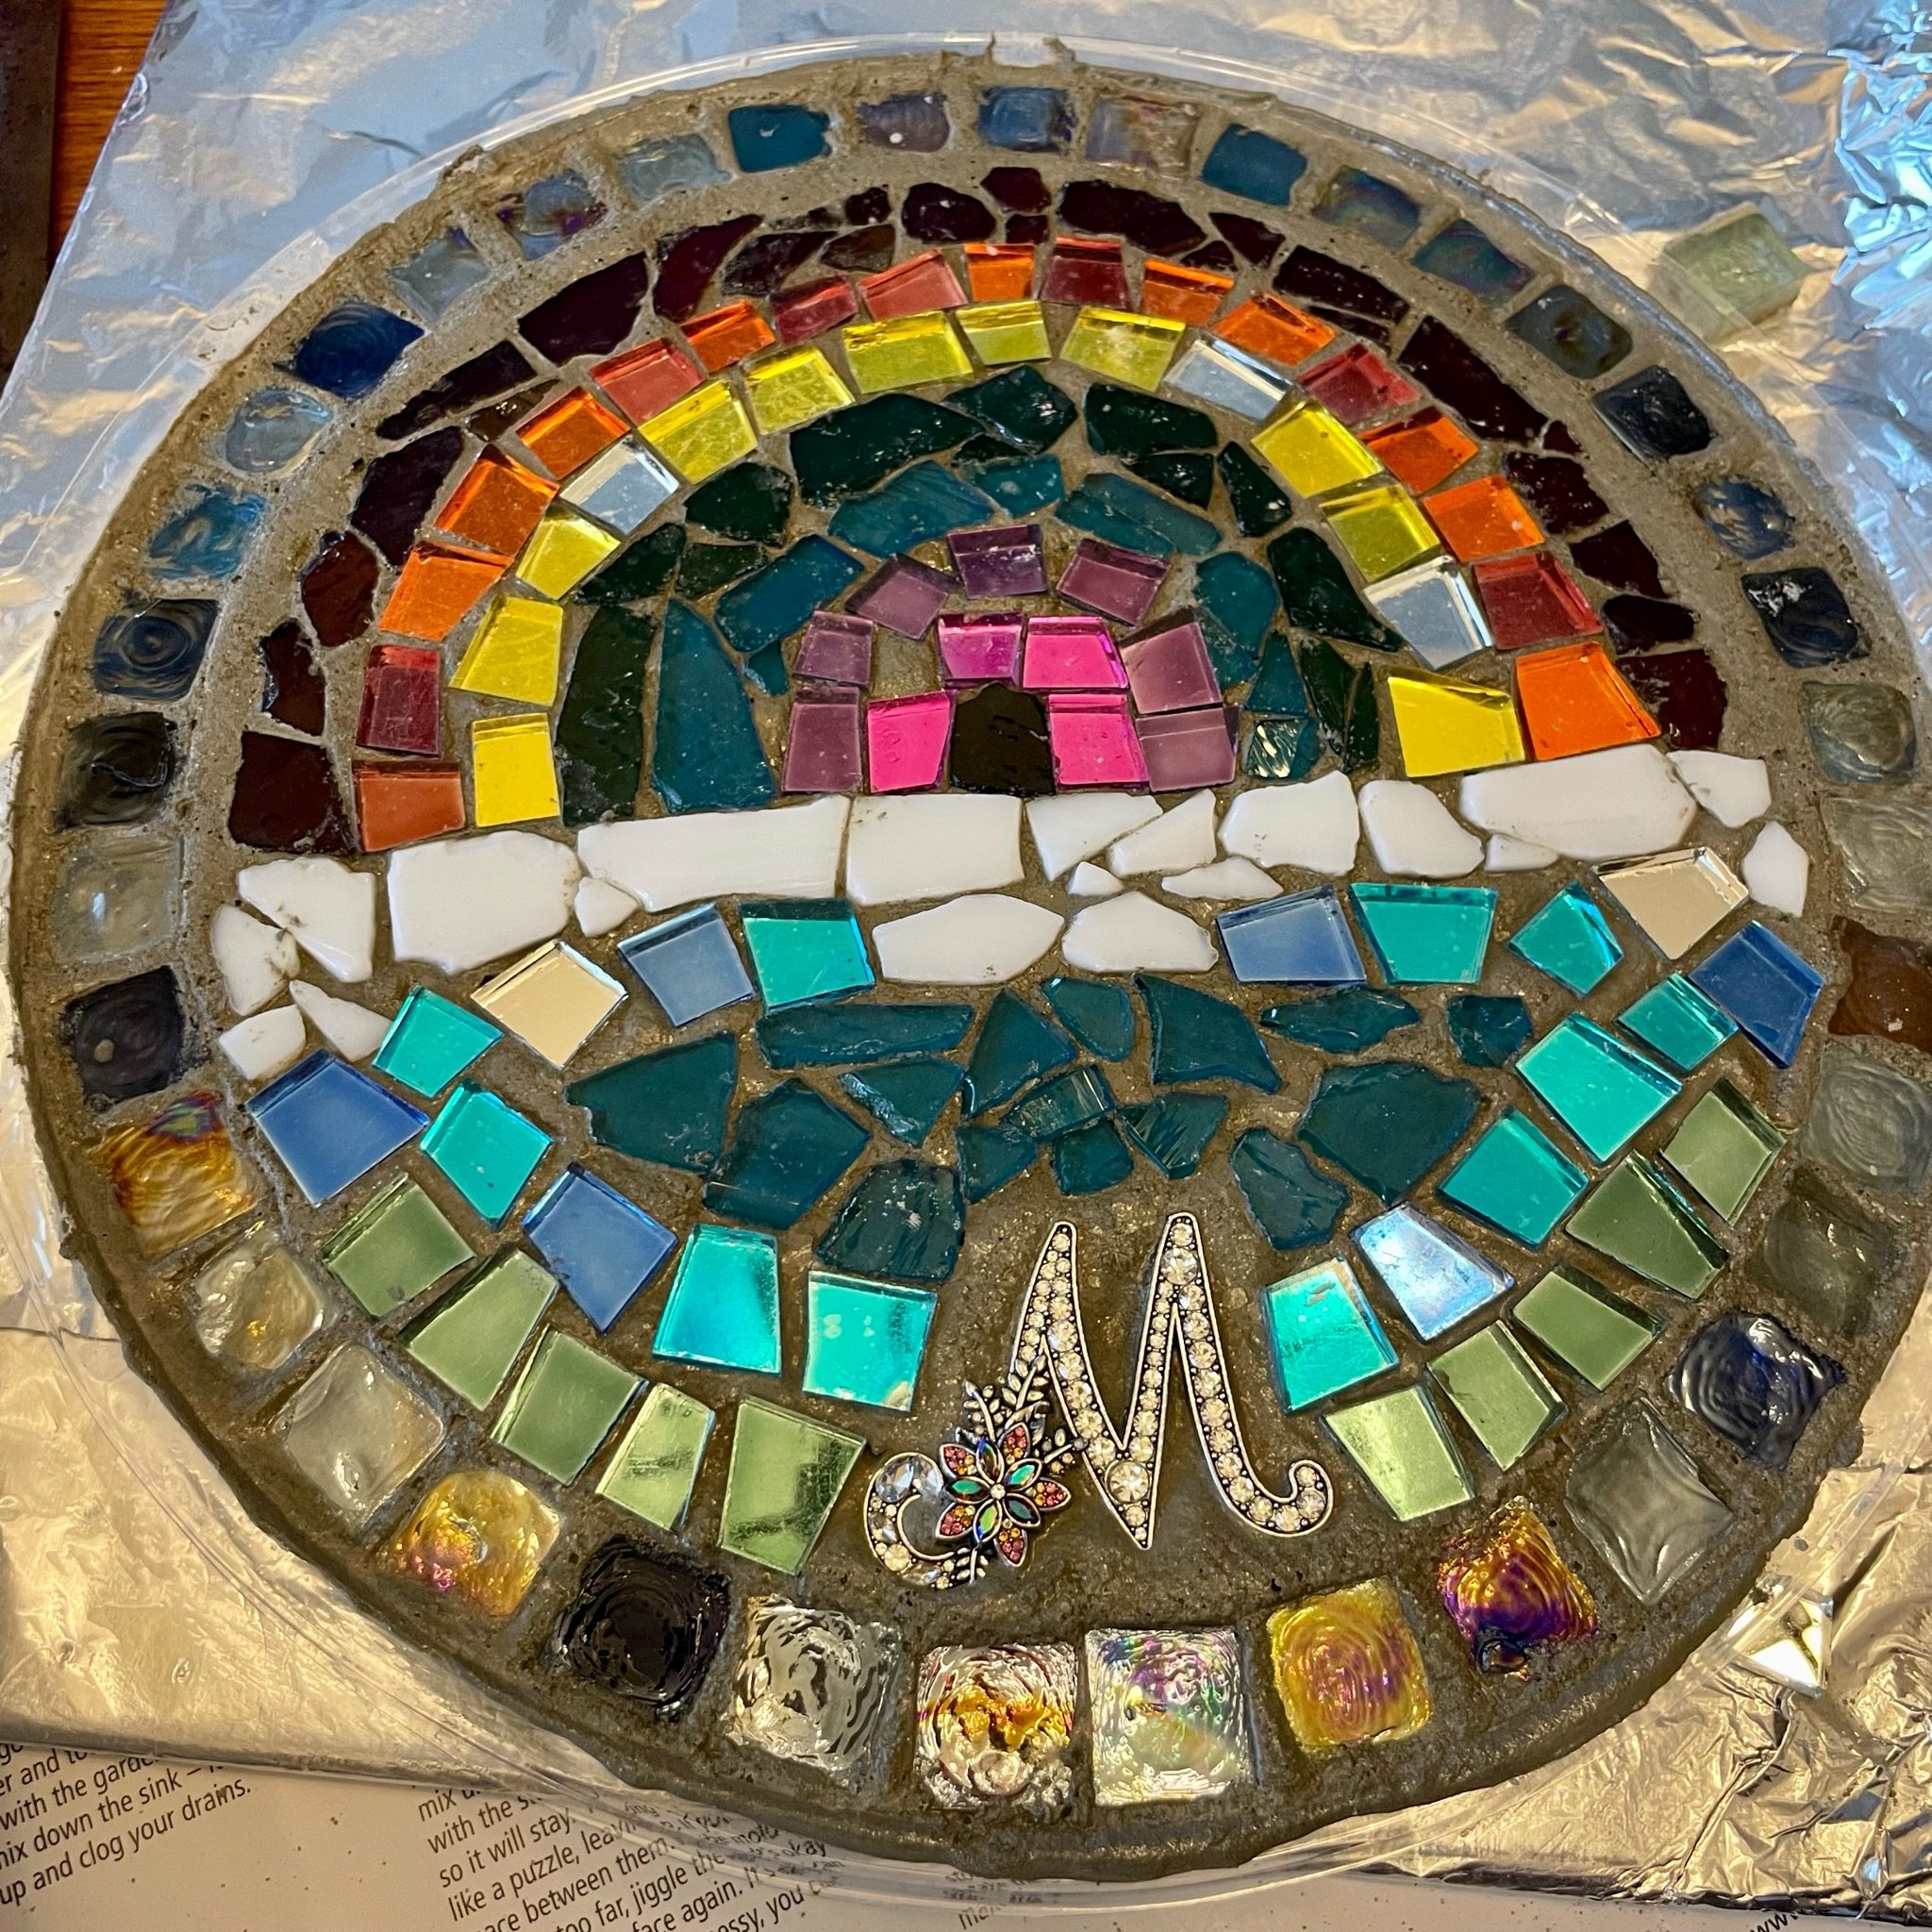
I made Mary’s first; she said she wanted a rainbow, so we started by separating all the glass into separate color piles.
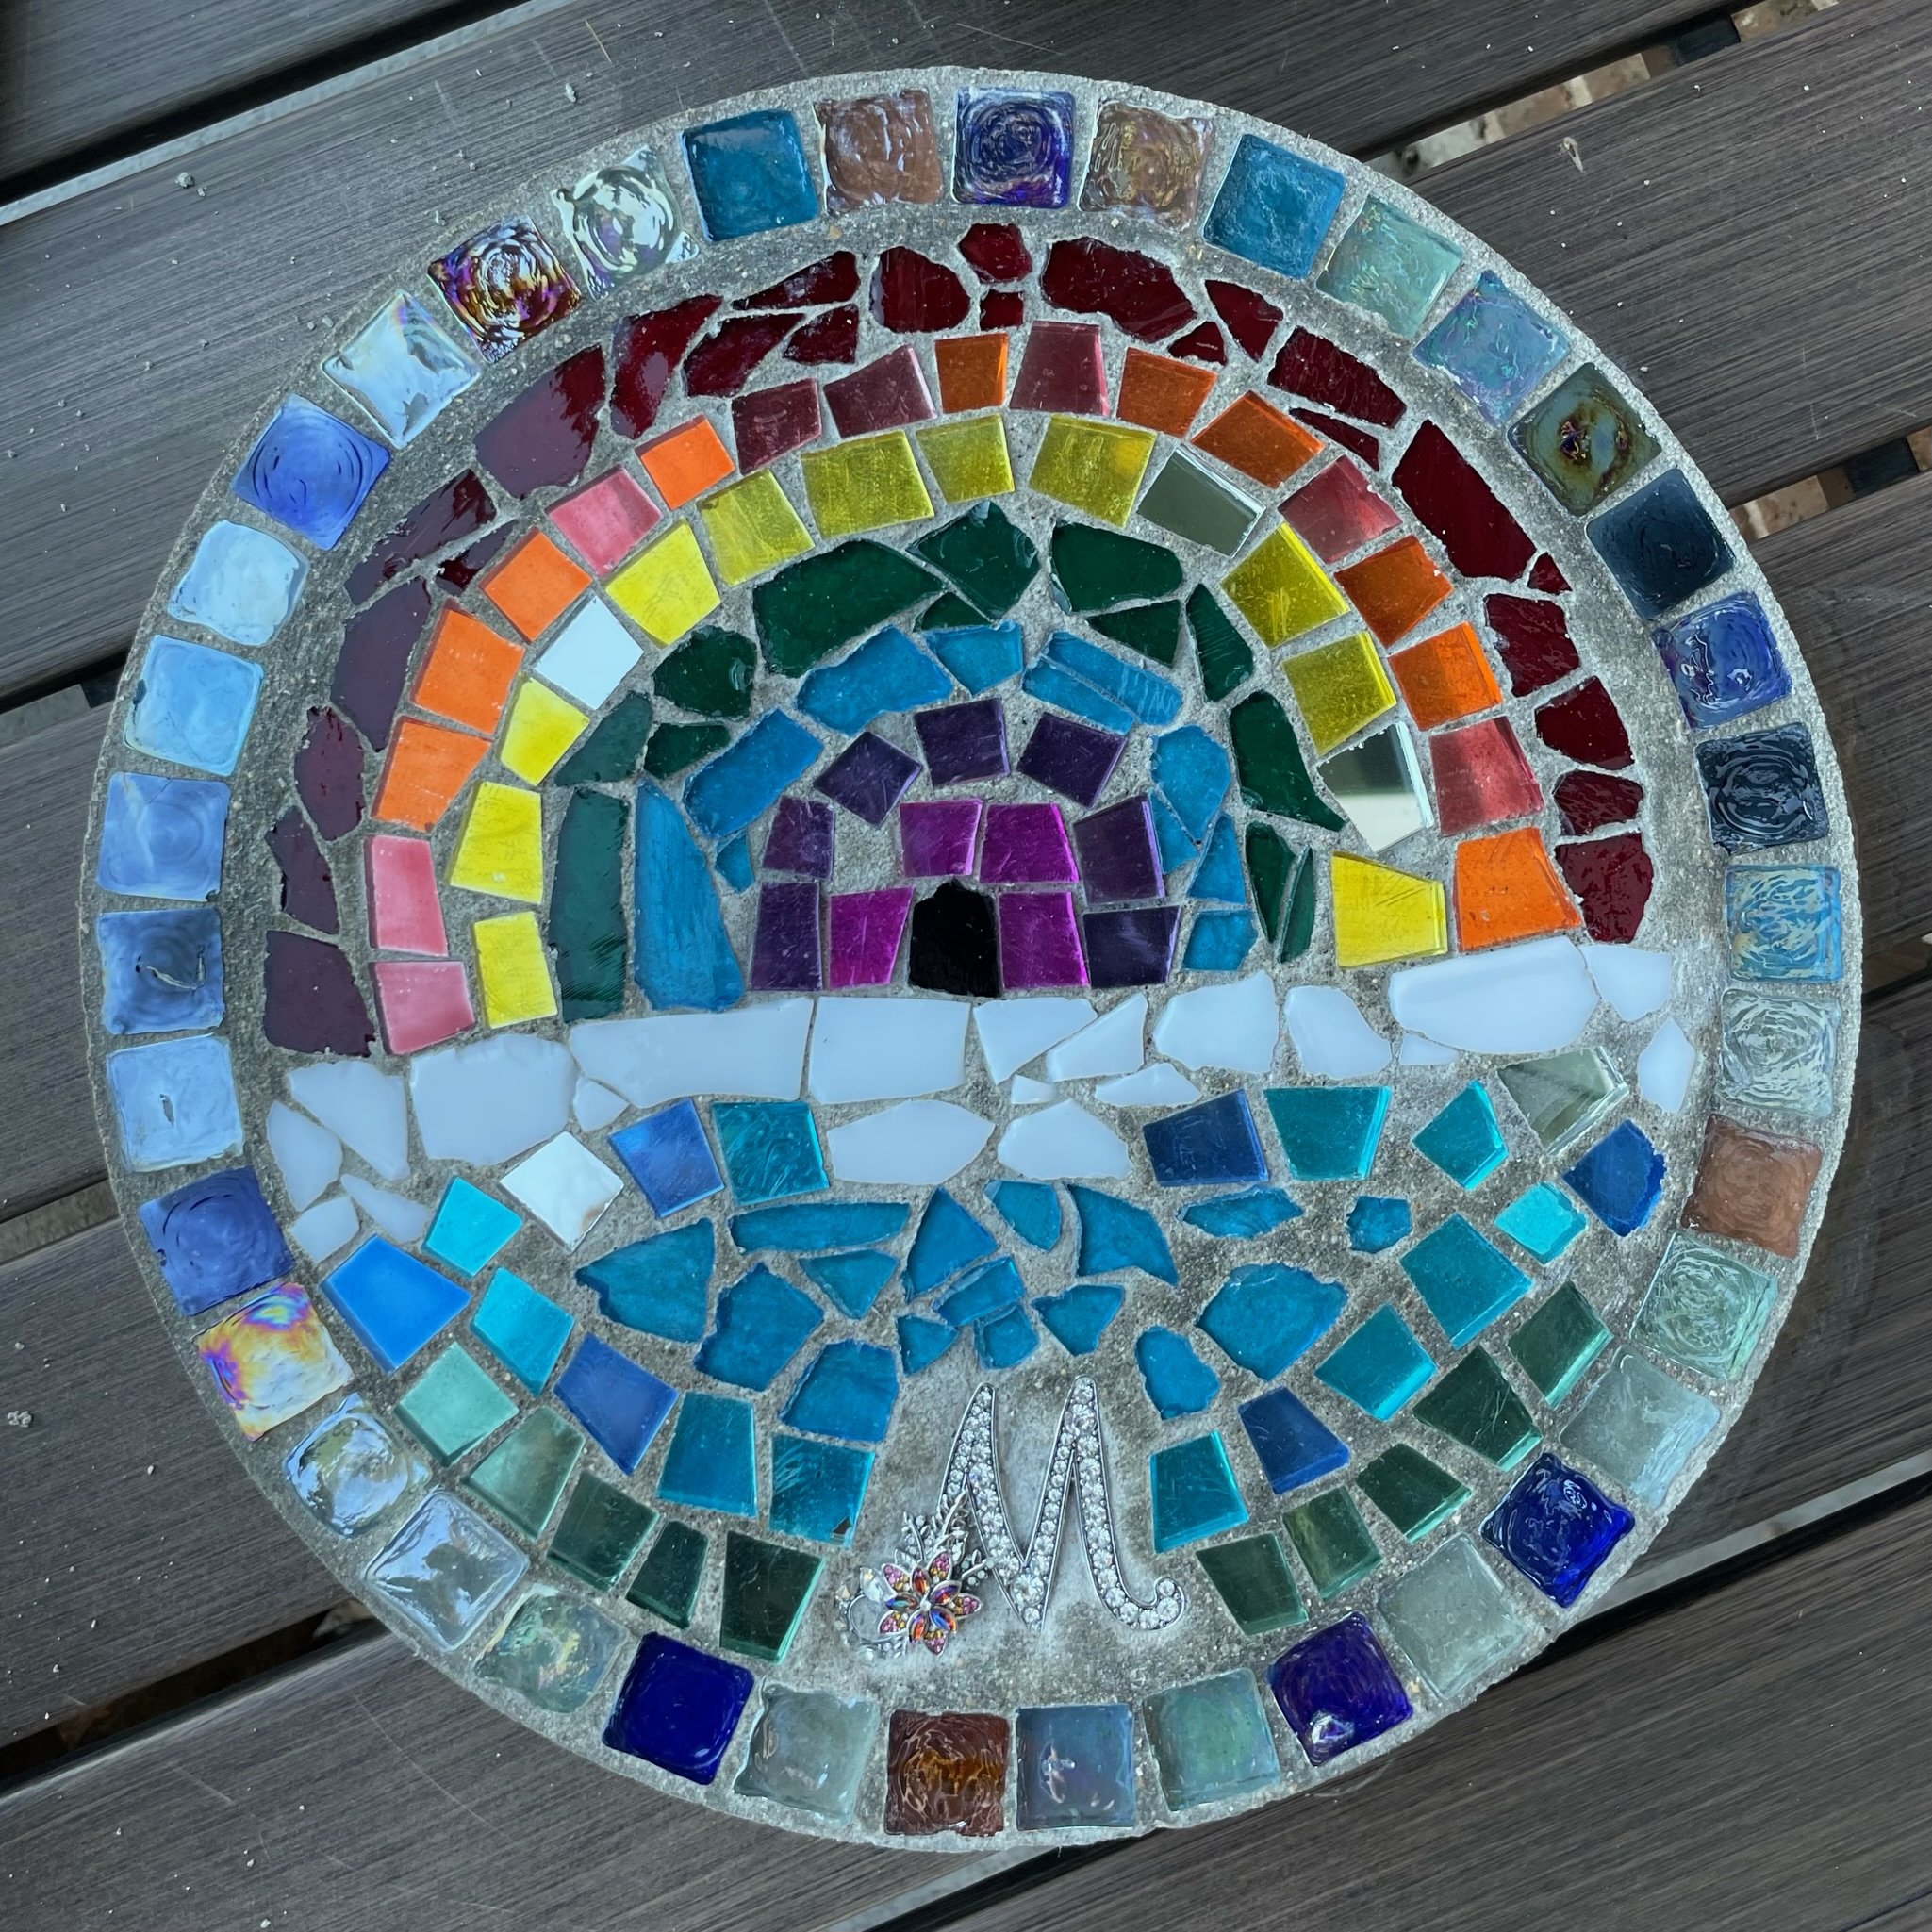
Using the empty mold from one kit, we planned out our design. We decided we wanted a border using the square pieces, and then our rainbow would be inside that. With the extra space below the rainbow, we decided to do white clouds, blue sky (with Mary’s sparkly “M”), and green grass.
We put our mold with the design onto a cookie sheet so we could move it around safely.
Since this is a project with a timer (however long it takes the concrete to dry), I wanted to be as set up as possible before I started. I set up another cookie sheet and covered it in foil, and put the empty mold from the 2nd kit on it. I also put some extra glass and paper towels within reach. The mold with the glass design in it went right next to the empty mold.

Time to mix the concrete. I wore gloves, and followed the directions. I used a big bucket, hoping to contain the dust as much as possible (yes, I did this inside at my dining room table. It was like 40 degrees outside!). The instructions said to make it the consistency of brownie mix, which I took to mean “barely pourable”. I added 2 cups of water at first and mixed, then more water little by little, mixing completely between each addition, just until the mixture was pourable.
Once I had the right consistency, I poured all of the mixture into the empty mold. I had little mini-molds from Nina too, so I scooped a little out into one of those.
The instructions say to shake/wiggle the mold back and forth to level the surface. I found that doing that also brings bubbles to the top, and while it pained me to use some of my ticking clock for bubble popping (reminded me of resin), I can understand how bubbles might compromise the integrity of the concrete, so I wanted to get as many out as possible. Shake shake shake, twist, twist, twist, let bubbles rise & pop. Repeat until the bubbles mostly stop. For me, took about 15 minutes.
The instructions say to work from the outside in, so I started with the outline using the square glass, and pressed each one into the concrete until it was level with the surface, tapping them into place. I needed a couple more than the original design, but they fit perfectly.
At least, they fit perfectly on the first stone. For Emma’s, I had to work with the last few glass squares (basically space them out a little more) to get everything to fit perfectly around the edge.
Then we started on the rainbow. For the most part we just transferred from the design to the concrete, but we had to add pieces of glass from the “bone pile” here and there. I pressed the glass pieces down until they were level, and shook the mold a few times while placing the design to level the whole surface.
There were a couple of times that water kinda started to form a layer on top. I used a paper towel across the top to soak up a little bit of that water - I didn’t want to take it all, thinking it’d shorten my ticking clock if I did (eeeeek!!).

Once all the glass was laid, I pressed and wiggled and leveled until I was happy with it, and then let it dry for a couple hours.
I think this step is the most important for longevity of the piece, so pay attention folks (who’s even reading this ha) - some of the glass edges were sticking up out of the concrete, and I was worried that the glass would just pop off when the concrete cured. Pressing and leveling one piece of glass at a time wasn’t working, so to press all the glass down more broadly/evenly, I got a sheet of parchment paper and laid it down on top of the mosaic. Then I pressed down evenly with both hands (full palm), and gently rubbed all over in sections until the concrete kinda re-liquified and embraced the glass better. When I peeled off the paper, the entire mosaic was covered with a film of concrete. Shit.
Well turns out that film cleans up fine: I let it dry for another 3 hours or so, and then used warm water with a couple drops of dish soap mixed in and a toothbrush to scrub it off. I also rubbed/wiped off any excess concrete on top of individual glass pieces with a slightly damp paper towel. Last step was a dry paper towel to smooth out the whole surface.
I it dry until 24 hours total had passed, and then took it out of the mold. I set it outside to finish curing.


That’s it! For the next stone, I did basically the same steps. The integrity of the used mold was compromised though (had some holes in it after removing the first stone), so I used that one to plan the next design, and the other, unused, mold for the new mosaic. Emma couldn’t help as much as Mary did (she’s 2), but she did a good job separating the glass into color piles, and handing me random pieces to place.