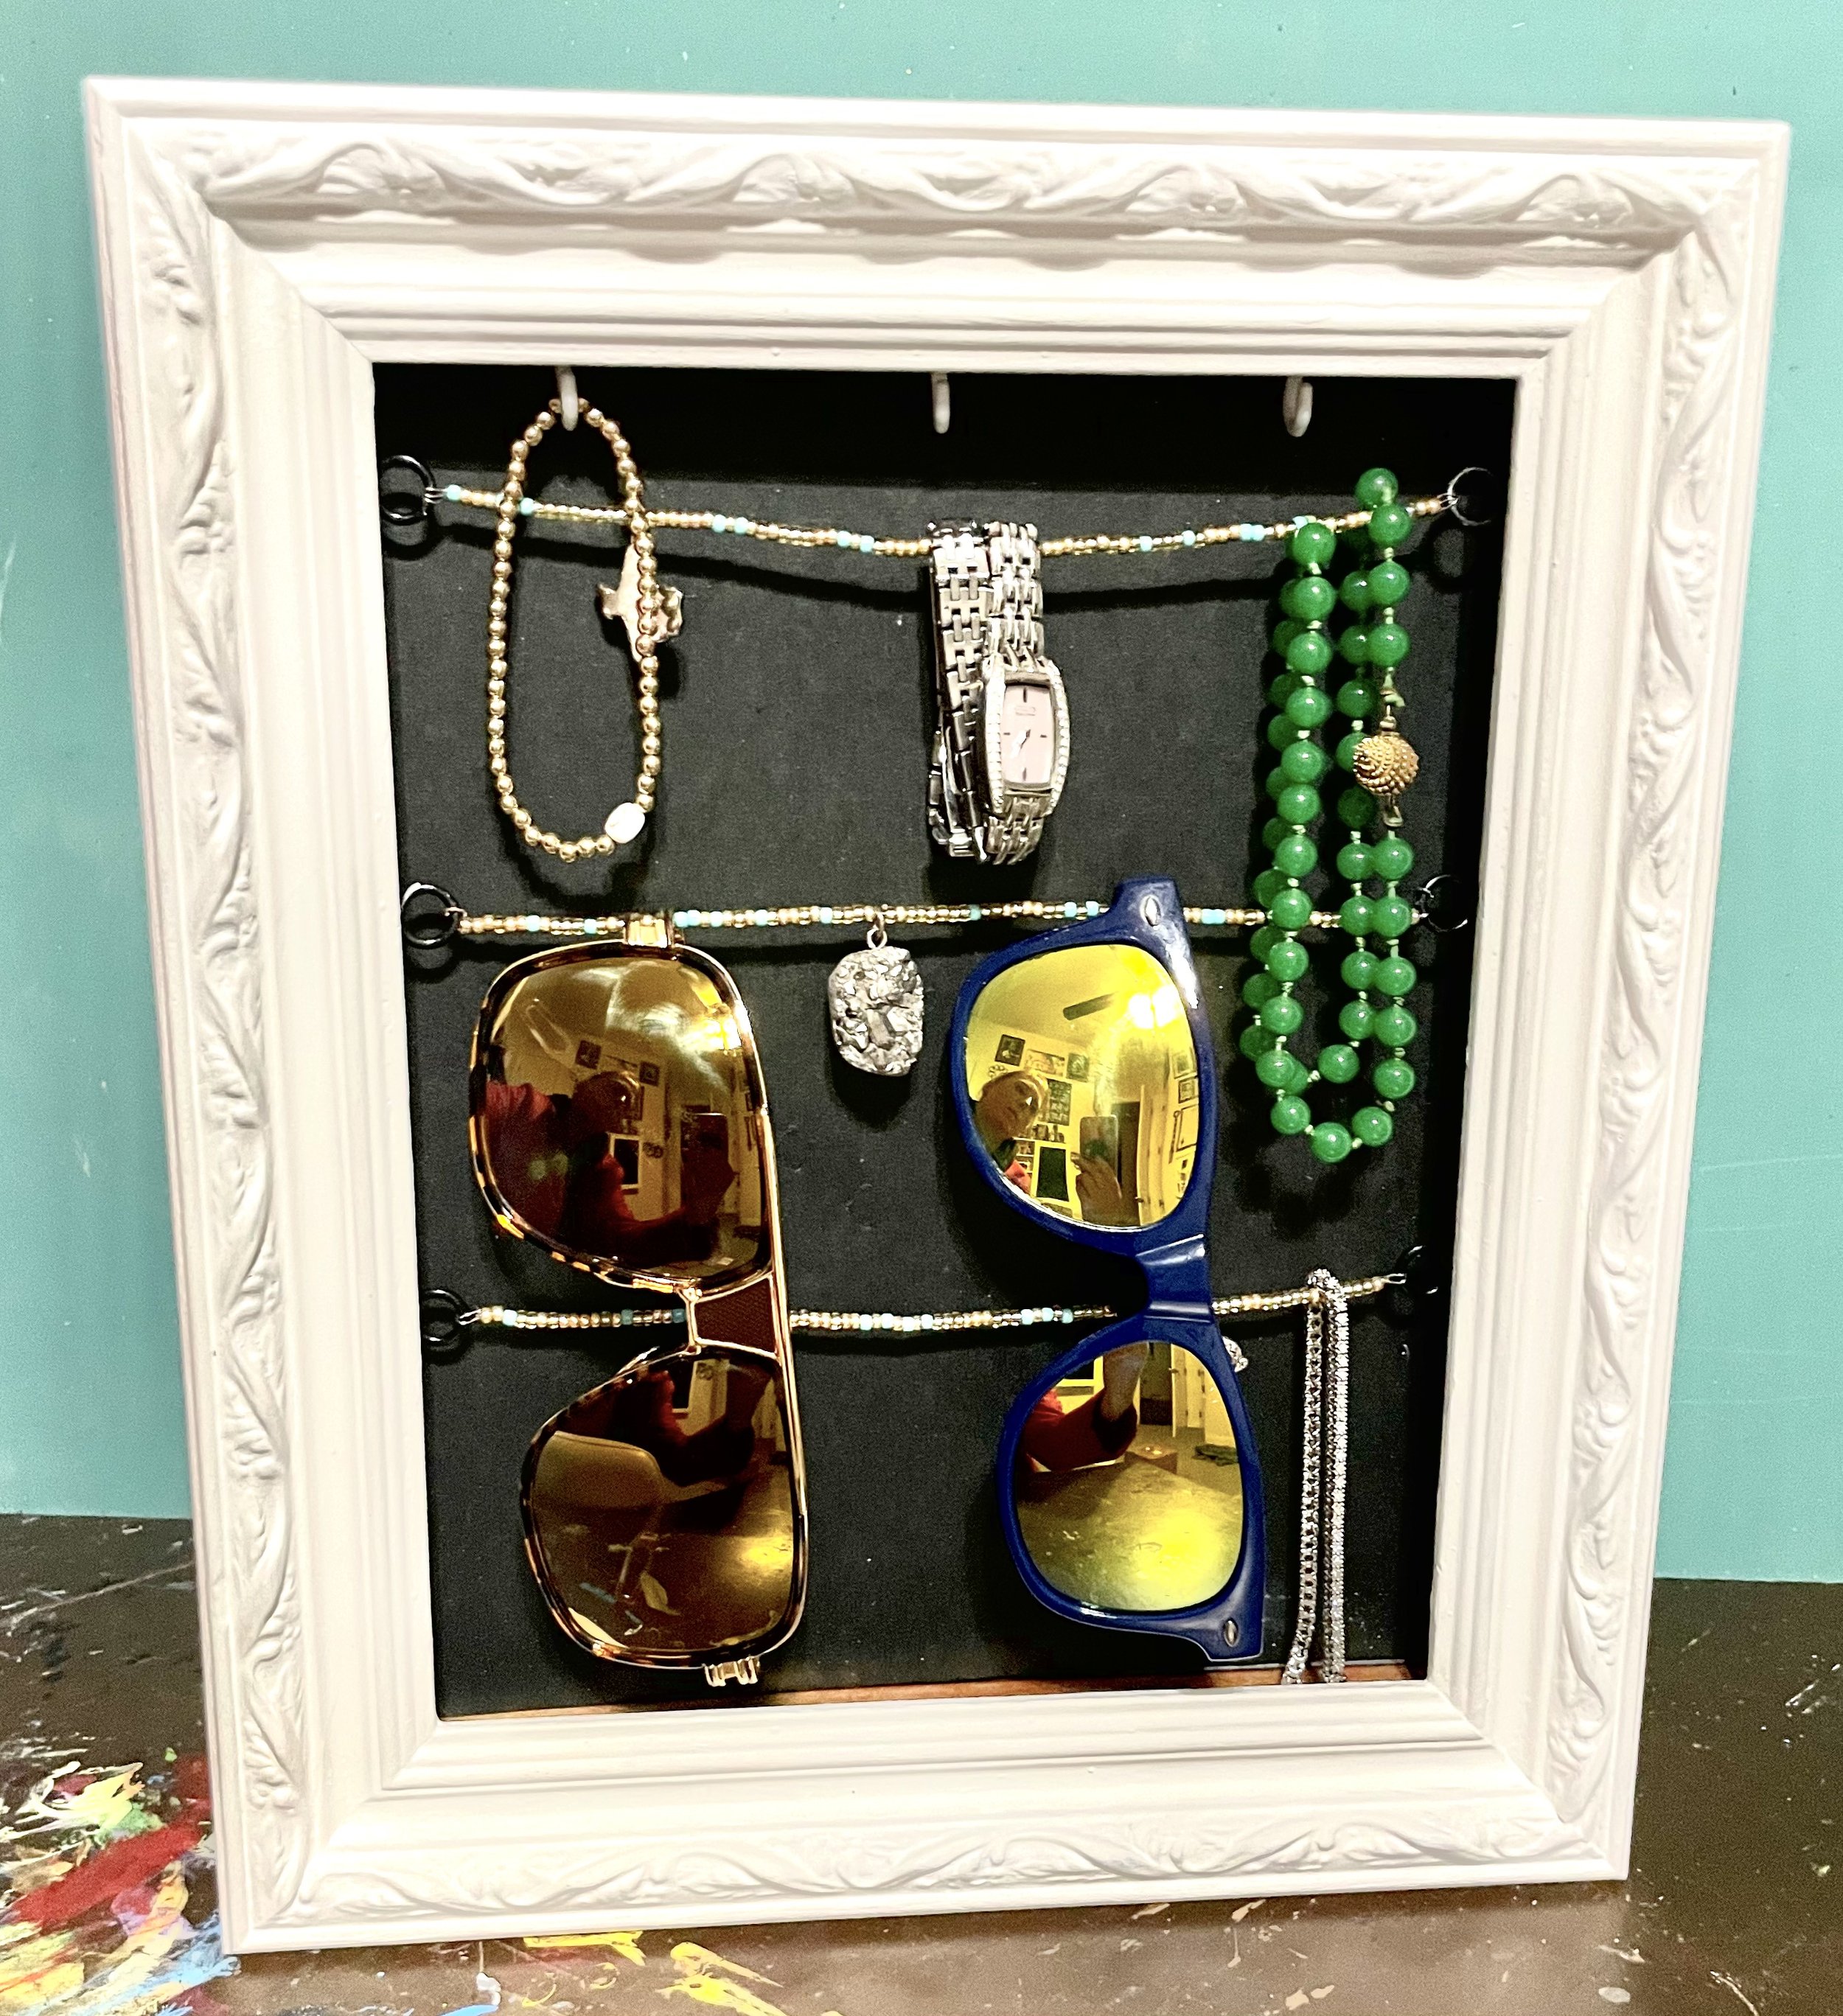
DIY Vintage Frame Accessory Hanger
/I’ve seen examples of these on Pinterest, and have always wanted to make one, so I finally did! I also think it’s a great craft for a workshop, so research was my motivation.
If y’all are anything like us, you have a bowl or some kind of container that has sunglasses, random hairties and bows, maybe some pens, etc. This isn’t necessarily a solution for everything in the bowl, but it will solve for the pretty stuff!

Materials:
Vintage Frame - I have lots of choices to choose from, hand-picked from garage/estate sales all over Texas by my beautiful friend Karla. I chose one that has a backing that opens and is deep, like a shadow box.
Acrylic paint, though for a workshop I’d do chalk paint.
Paintbrush
Memory wire
Seed beads
Small eyelets
Small hooks
Charms
Hammer, needle nose pliers, wire cutters
The Method:
Design. I had a little heartburn about painting this vintage frame, but in the end I’m glad I did. I also thought about distressing it with sandpaper after I painted it, but decided against it. I even tried painting some blue accents, but painted over them. I like the simple white with the vintage design, and letting the color come from the beads and my accessories instead.
I started with paint. In my case, white. I did a pretty thin, but complete, coat because I knew it would need at least one more to get full coverage.
While the first coat of paint dried, I roughly measured how much wire I needed for each wire across, added a couple extra inches, and cut 3 wires to size with the wire cutters. Then, using the needle-nose pliers, I bent & folded the last half inch of each wire so the beads wouldn’t come off.
Paint was still drying, so I chose some seed bead colors, put them on my bead mat, and mixed them up. I let the memory wire stay in a roll, and using the unfolded end, started stringing beads at random. I stopped when it looked like I had enough to go across (again, rough measurement). I bent and folded the last 1/2” end of the open wire to keep the beads on, and set it to the side.
After completing 1 wire, the paint was dry, so I did another coat.
Then I finished the other 2 wires the same way as the first, and set them all to the side.
I needed another coat of paint, so I went ahead and did that, and then had to walk away and let it dry. This is one reason I’d use chalk paint for the workshop; coverage should be better and thus dry time lower.
When everything was dry (again), I used some sunglasses to measure where I wanted the sunglasses wire, and marked the spot on one side. I used a hammer to get my eyelet started, and then screwed it in by hand and with the needle-nose.
After that one was placed, I measured where it was so I could measure and mark where the eyelet should be on the other side. Once marked, I installed that eyelet the same way as the first.
I tied the end of one wire to an eyelet by twisting and wrapping the bare end of the wire around the eyelet until I was sure it would stay. I made sure to wrap as closely to the eyelet as possible, so the beads would still be able to go right up to the eyelet. It also still needed to look good since it’s visible, so I tried to make it look neat.
I stretched the wire over to the other eyelet, and had to adjust the number of beads, so I cut the folded end off with wire cutters, and took 2-3 beads off. Then I wrapped the wire so it was as taut and neat as possible, making sure it’d stay.
I repeated steps 8-11 for the other two wires.
I added some hooks at the top of necklaces and such.
Did a little bit of paint touch ups, I had a couple spots that needed it.